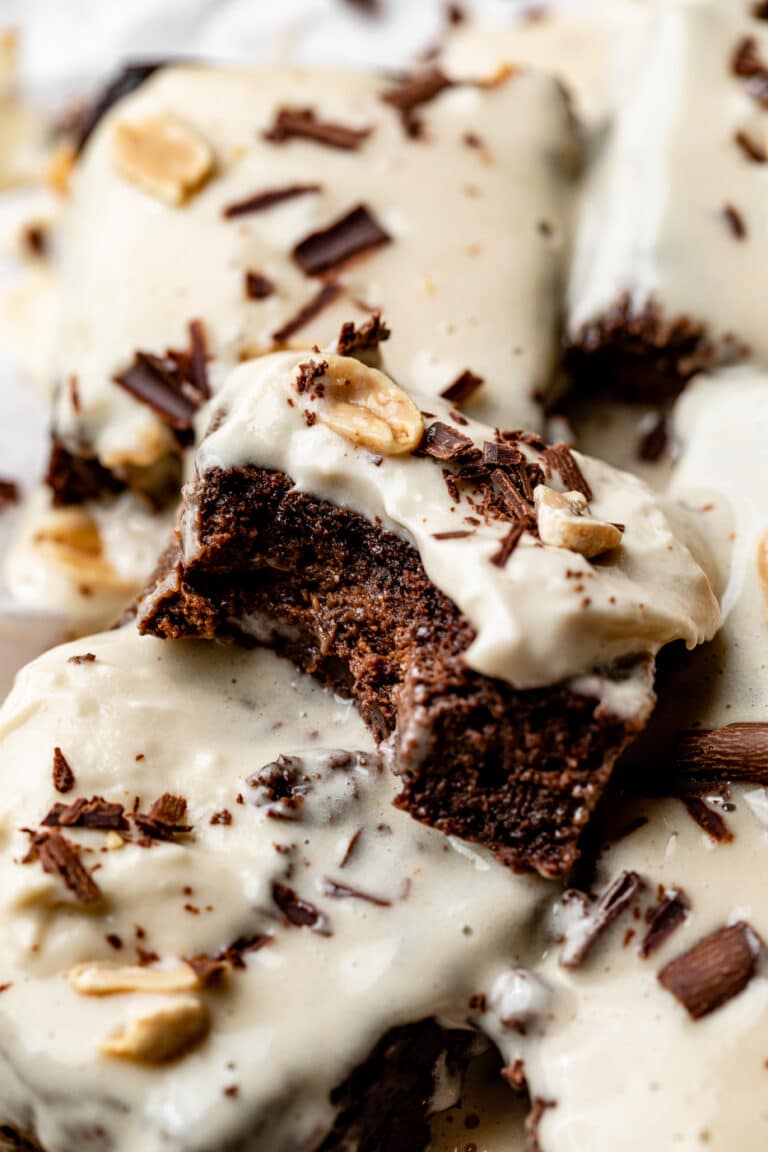
Fudgy flourless quinoa brownies and peanut butter frosting
5 Stars 4 Stars 3 Stars 2 Stars 1 Star
No reviews
These mocha quinoa brownies have a delicious deep flavor and ultra fudgy texture. They’re topped with a rich peanut butter frosting. So indulgent you won’t believe they are gluten free and entirely flourless!
Total Time:1 hour 50 minutes
Yield:9 slices
Ingredients
For the brownie
250 g cooked quinoa *see notes for dry quantities
50 ml almond milk
100 g dairy-free yogurt
1 tbsp (15 ml) espresso coffee
1 tsp vanilla extract
80 g vegetable oil, neutral flavor *see notes for options
100 g coconut sugar (or cane sugar)
50 g cocoa powder, unsweetened
2 tbsp (10 g) fresh ground coffee (optional)
1 tsp (5 g) baking powder
1 pinch of salt
For the peanut butter frosting
1 14-oz (400 ml) full-fat coconut milk, chilled in the fridge overnight
120 g smooth peanut butter
2 tbsp (50 g) maple syrup or agave
1 pinch of salt
Toppings
Roasted peanuts
Shaved dark chocolate or chocolate chips *see notes
A pinch of sea salt flakes
Instructions
Peanut butter frosting
Open the can of coconut milk without shaking it and scoop out only the layer of solid cream that has formed on top. Leave the liquid for another use.
In a large mixing bowl using a hand or stand mixer with the paddle attachment, mix the coconut cream for 1 minute until smooth and fluffy.
Scrape down the bowl and add in the peanut butter, maple and salt. Beat on high speed for 1-2 minutes to incorporate and until you get a firm, light and fluffy mousse.
Transfer to a container and place in the fridge to chill and firm up, for at least 1 hour, ideally more.
Brownies
Preheat the oven to 350F (175°C) and grease and line an 8×8 (20x20cm) square baking dish with parchment paper.
Cook the quinoa accordingly to the packaging instructions, about 10 minutes in a saucepan with twice its volume of water until its tender and fluffy. Remove the pan from heat. Take off the excess water then cover with a lid and leave for 10 minutes more.
Measure precisely 250g of cooked quinoa and place in a blender with the almond milk, yogurt, coffee and vanilla. Blend until smooth and creamy. Then add the oil and blend to combine.
In a large bowl, whisk together the sugar, cocoa powder, ground coffee, baking powder and salt.
Pour the wet preparation to the dry ingredients and mix well to combine, until you get a smooth and pretty thick batter.
Pour the batter into the prepared pan and use a spatula to spread it evenly and smooth the surface.
Bake for 30 minutes, or until the center of the brownies is dry to touch but may seem slightly underdone. Check with a toothpick if the brownie is baked in the middle. It must come out nearly clean. If the brownie is still too wet, cook for another 5 minutes and check again.
Remove from the oven and let cool for at least 30 minutes to firm up.
Once the brownies has completely cooled, put the peanut butter frosting on top and spread it with a spatula. Sprinkle with roasted peanuts, chocolate shaves and a pinch of sea salt flakes. Cut in slices and enjoy!
Notes
250g cooked quinoa equals to about 80g dry quinoa. In any case, make sure to precisely weight the quinoa you’ve cooked before to add.
I recommend grapeseed oil because it’s made with a natural processing method and has a very light flavor, but you can use peanut, canola or any light flavored vegetable oil.
Use a vegetable peeler to shave a dark chocolate bar.
For a thick and creamy frosting, it’s important that you use coconut cream and not milk. For that, place a can of full-fat coconut milk in the fridge overnight. Then open the can without shaking and scoop out only the thick layer of cream that has formed on top.
Store the brownies in an airtight container in the fridge for up to 2 days. Enjoy the brownie straight from the fridge. You can prepare the brownies and the frosting ahead and store them separately in the fridge.