

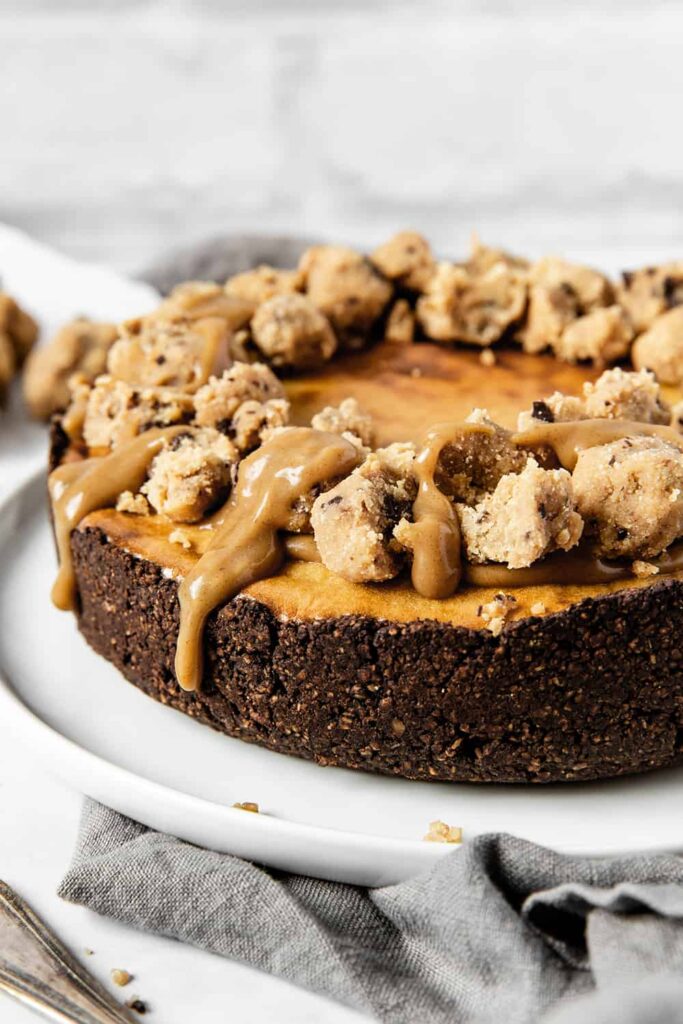
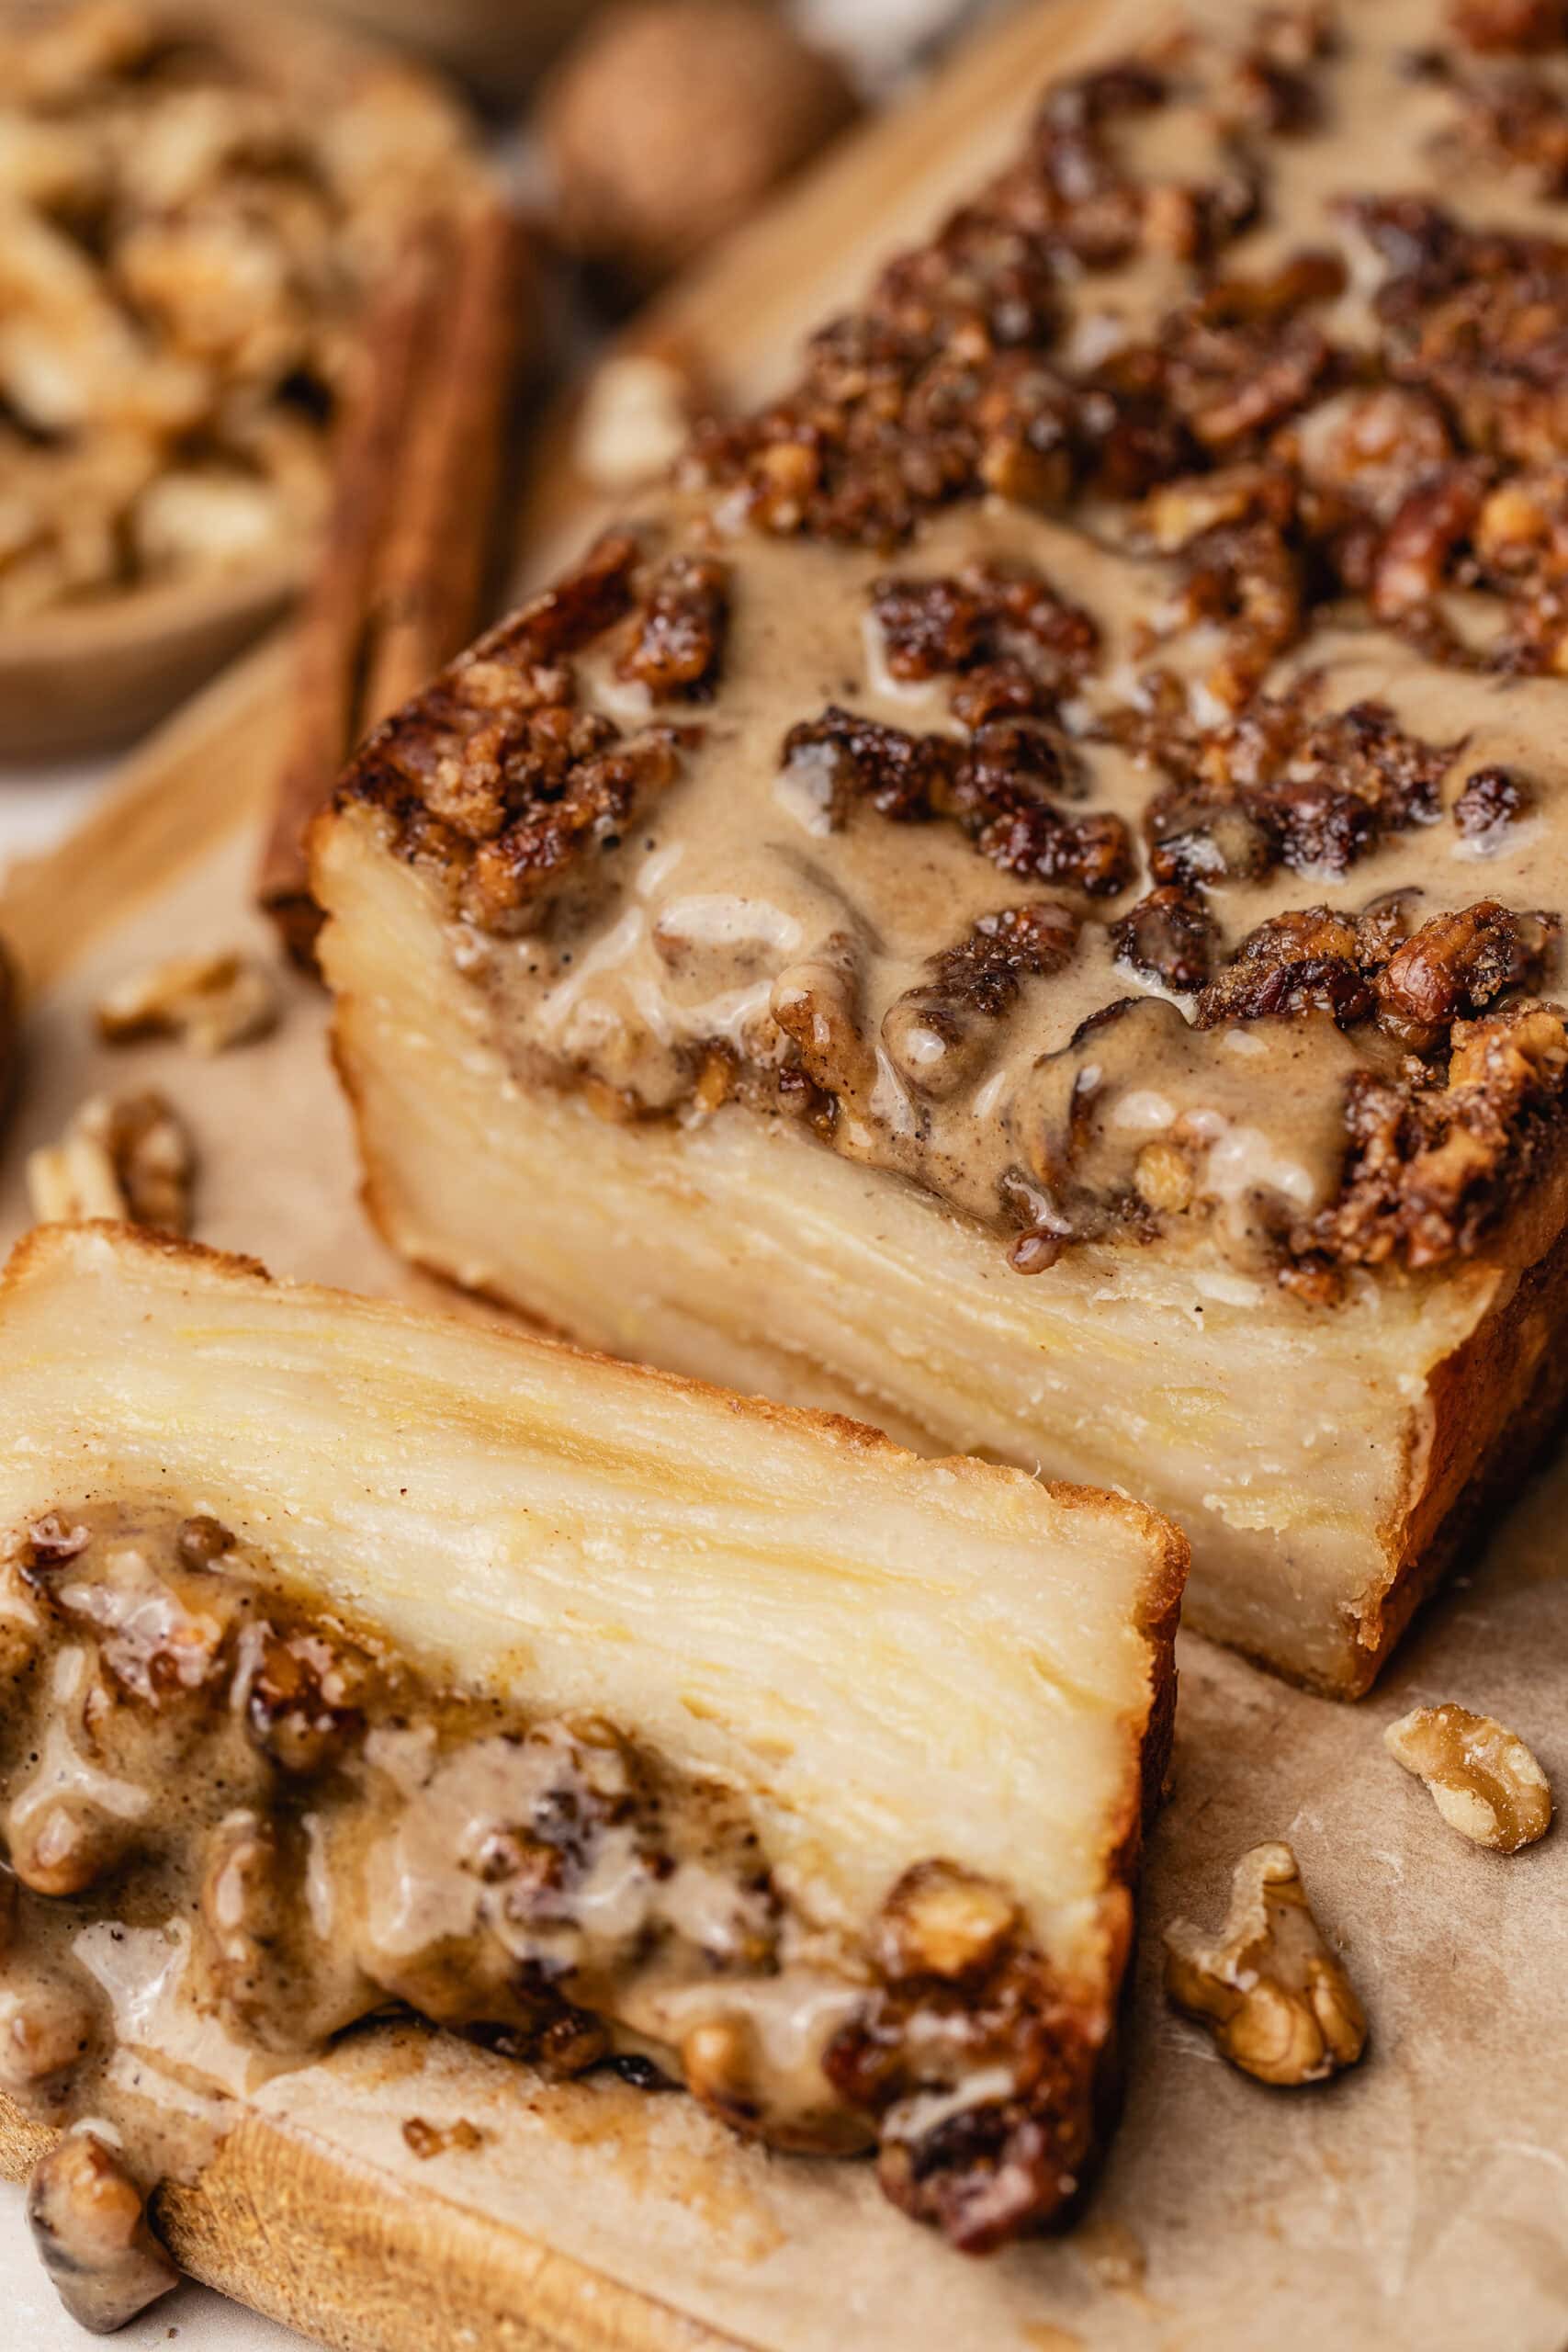
This cookie dough baked cheesecake is everything you could ask for : a decadent ultra creamy cheesecake packed with delicious and rich flavors. It is stuffed with real cookie dough pieces and comes with the best sweet caramel sauce ever. All that naturally gluten free, dairy free and reduced in sugar for a guilt-free pleasure.
How to prepare cookie dough
In this recipe, the cookie dough will be directly baked into the cheesecake. For the best results and to avoid the cookie dough to melt and mix with the batter, you have to make sure the cookie dough is cold and firm. It’s the reason why it is the first step of this cookie dough baked cheesecake recipe.
There are many ways to prepare cookie dough but this one is my favorite. It is super simple and quick to make and the peanut butter & chocolate chips combo is always a winner. However, you can be creative here and try different versions by adding cacao powder, cinnamon, or maybe fold in some crushed nuts or chocolate candies (OK, I definitely need to try this last one).
To prepare the cookie dough, simply mix all the ingredients in a food processor until you get a compact dough. For the dough, I recommend to use a food processor and not a blender to ensure an even mixing. The dough should be wet enough to hold when you roll it in your palms or press between your fingers. If it is too crumbly, add a little more peanut butter and agave.
Then roll the cookie dough into small bite-sized pieces and pop in freezer for one hour while you prepare the other components of the cheesecake. This will allow the cookie dough to firm up and be cold.
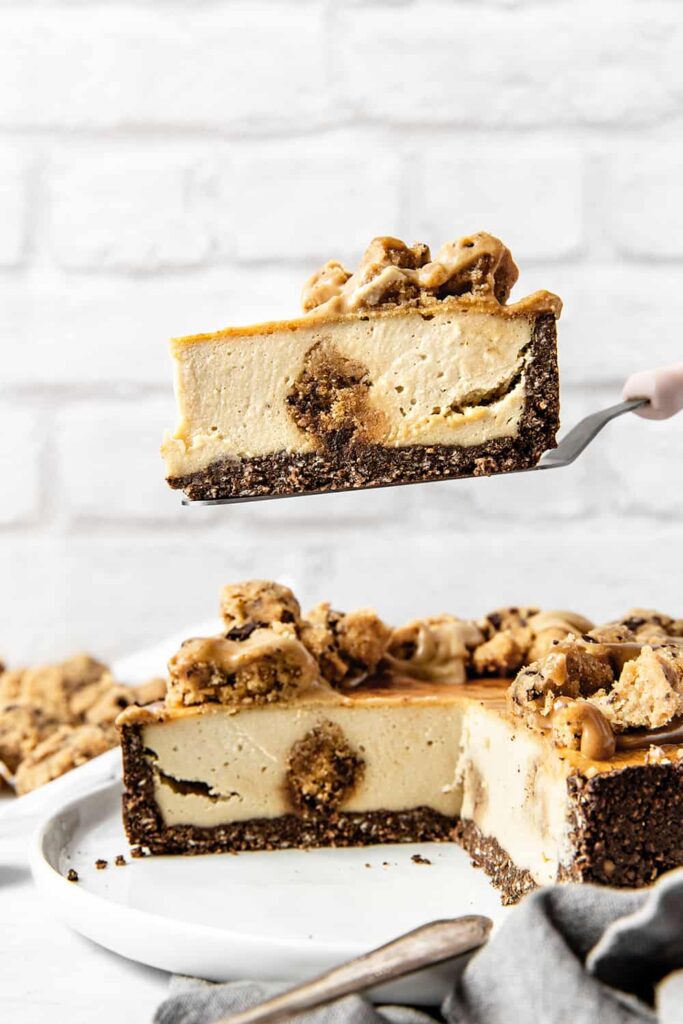
When ready, fold the cookie dough pieces in to the cheesecake batter. Arrange them evenly in the batter to have pieces of cookie dough everywhere in the cheesecake.
How to perfectly bake your cheesecake
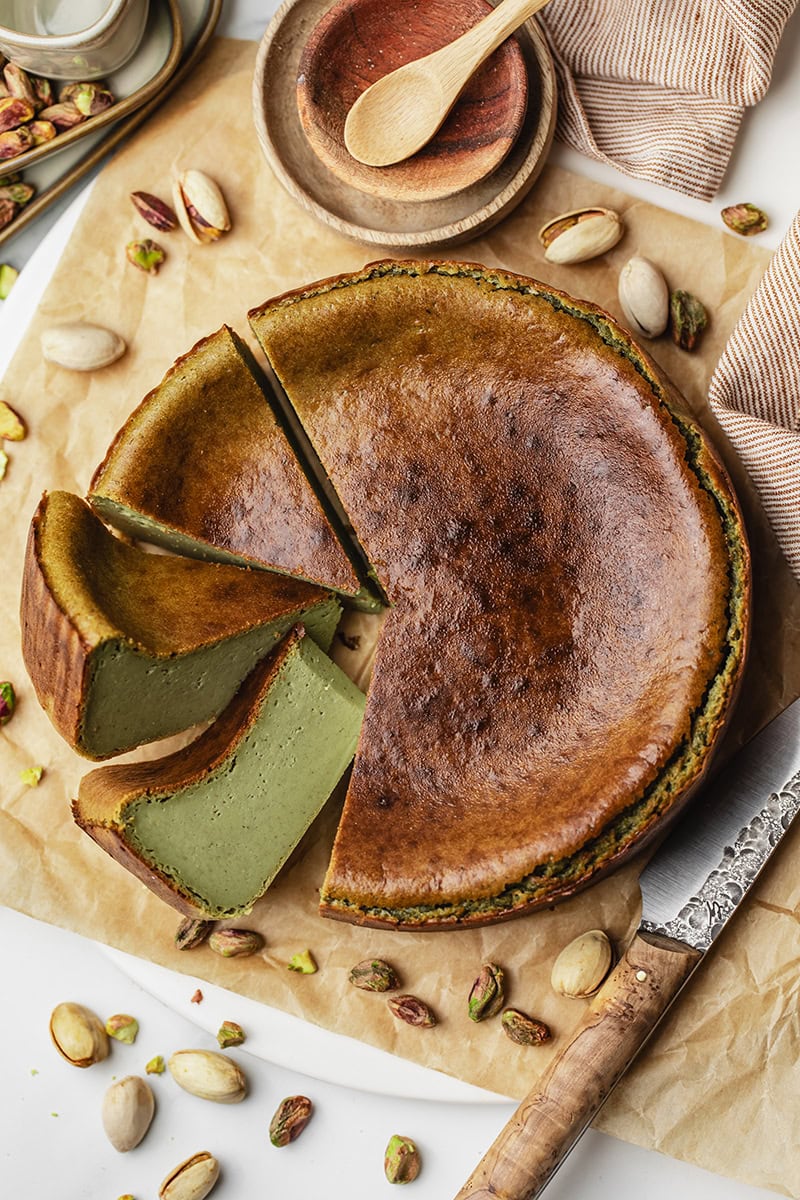
I’m a huge raw cheesecakes lover, but it was the very first time I made a baked cheesecake. To be honest I was totally scared to bake them because it sounded too complicated and risky. Also I had in mind this memory of baked cheesecakes very heavy and rich. But I was completely wrong!
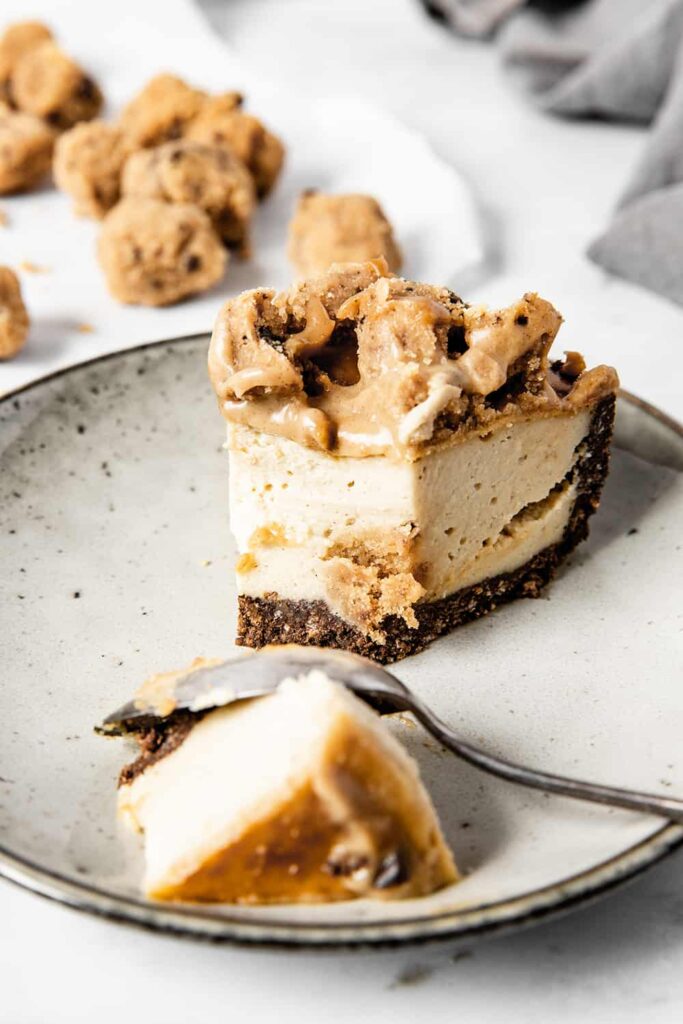
With this cookie dough baked cheesecake I’ve realized how simple it is, and I was amazed of the texture : light and creamy, nothing like the cheesecakes I had tried in some restaurants.
However, there are a couple of tricks and steps to follow to perfectly bake your cheesecake.
- Use an appropriate pan. I can only recommend you to use a springform pan with removable bottom. It will make all the process so much easier and you will be able to remove the cheesecake without any damage. For this recipe, I used a 9-inch springform which is the standard size and leads to around 8 servings. If you change the quantity of preparation you will have to adapt the size of the springform accordingly.
- Make sure your cheesecake filling is perfectly smooth and homogeneous, without any big lump remaining. Use a high speed blender and mix for at least 2 minutes to emulsify the batter.
- Always bake your cheesecakes at low temperature but for a longer time. This ensure an even cooking of the cheesecake, even at the heart of the batter. This is particularly important as cheesecakes are thick and with a runny preparation.
- Bake for 50 to 60 minutes. The cheesecake is ready when puffed up, browned on top and with a slight giggle when you check it. If the surface starts to burn at the end of the baking time, cover with a piece of aluminium foil on top and finish the baking time.
- Once baked, it is very important to allow your cheesecake to cool down. First, allow the cheesecake to completely cool down at room temperature to avoid sudden temperature changes and prevent crackings. Then place in fridge for at least 3 hours or better overnight. This tightens the texture and helps the flavors to infuse.
The best caramel sauce ever
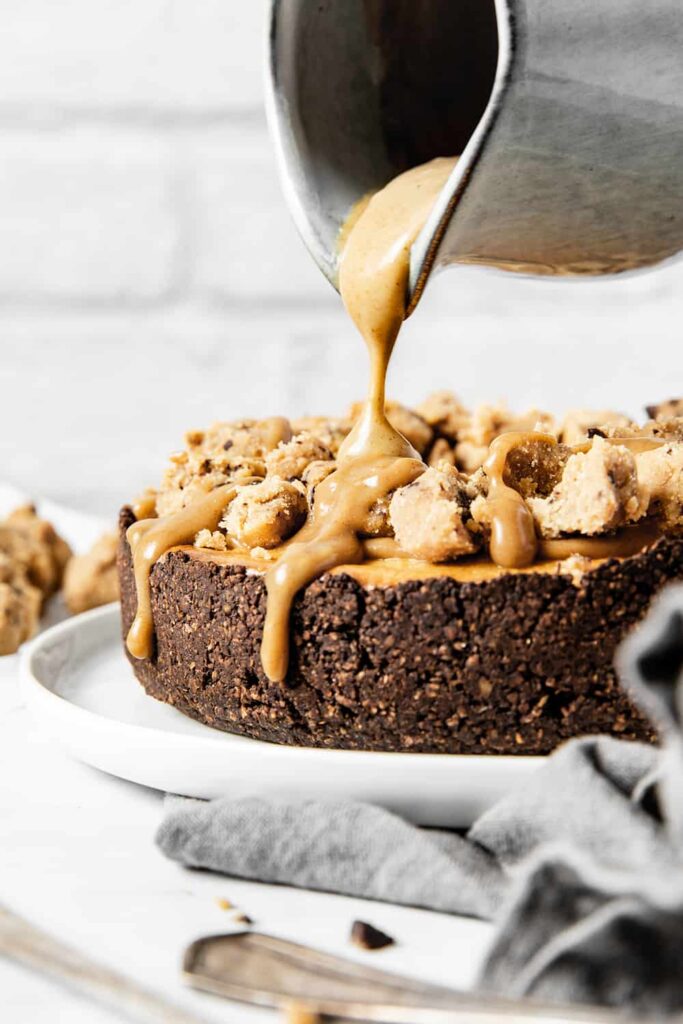
I’ve already tried many caramel sauce recipes, but this one is definitely the best. Really, you’ll be amazed to see how simple it is to prepare. It requires only 5 ingredients you probably already have in your kitchen, and is ready in less than 10 minutes. It’s also a healthier version to regular caramel as it’s naturally sweetened with dattes and coconut sugar.
I bet this caramel sauce will become a staple in your kitchen. I make this one every time I need a caramel sauce in my recipes. The texture is super creamy, glossy and fluid. Perfect to drizzle on any dessert, pancakes, waffles, toasts or cakes.
For the best results and for a thick and creamy caramel sauce, I recommend to use full fat coconut cream. If you can’t find coconut cream in store, place a can of full fat coconut milk in the fridge overnight. Then open the can and scoop the thick white layer that has formed on top : it’s the coconut cream.
Another good thing about this caramel sauce is that it can be kept for up to 2 weeks! You can prepare a full jar and store it in a clean glass container in fridge. Then when you need some caramel, you can simply reheat 1 minutes in microwave or in a double boiler for a pourable sauce. However, you can also enjoy the sauce straight from the fridge with a spoon.
For more cheesecake and cookie deliciousness
- Lemon and poppy seed cheesecake, a raw version of cheesecake
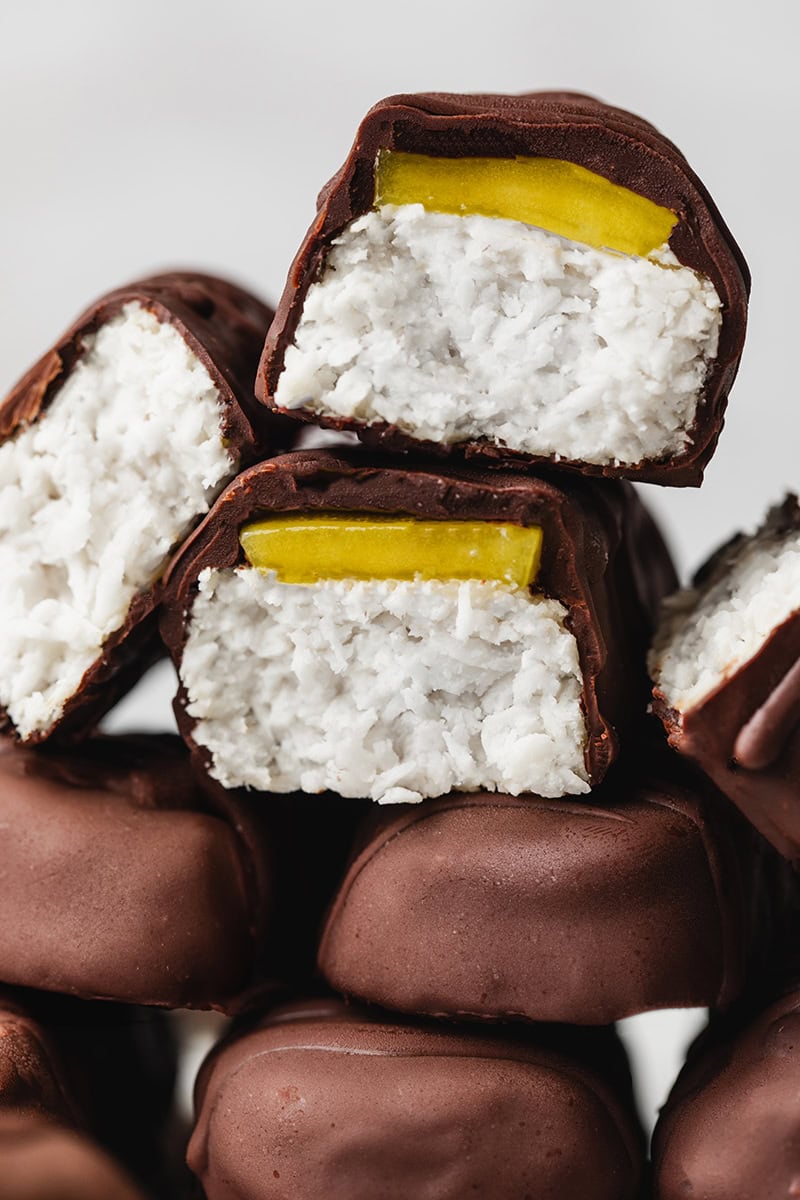
- Coconut and cookie dough slices, a delicious healthy snack
- Hazelnut Cookie skillet, perfect with a spoon of vanilla ice cream
I love to see your creations! Don’t forget to tag me @alicepages on your photos on Instagram and give your feedback in the comments below if you make this recipe at home! Your opinion is my best reward.
PrintCookie dough baked cheesecake with caramel sauce
A decadent and creamy baked cheesecake stuffed with cookie dough pieces and served with a 5-ingredients caramel sauce. Naturally gluten free, dairy free and reduced in sugar.
- Prep Time: 30 minutes
- Cook Time: 50 minutes
- Total Time: 5 hours
- Yield: 8 servings
- Category: dessert, baked goods
Ingredients
Cookie dough
- 1 1/2 cup coconut flour
- 2/3 cup peanut butter
- 1/3 cup agave syrup
- 1/3 cup melted coconut oil
- 1 tsp vanilla extract
- a pinch of salt
- 1/3 cup dark chocolate chips
Cheesecake crust
- 1 1/2 cup rolled oats
- 1/2 cup whole almonds
- 1 ripe banana
- 1/4 cup agave
- 1/4 cup cacao powder
- 1/4 cup coconut oil
- a pinch of salt
Cheesecake filling
- 1 cup of cashew, soaked in water for 8 hours
- 1/4 cup almond milk
- 1 cup silken tofu
- 1 tbsp corn starch
- 1/4 cup maple syrup
- 2 tbsp lemon juice
- 1 tsp vanilla extract
- a pinch of salt
Caramel sauce
- 3/4 cup full fat coconut cream
- 1 tbsp arrow root
- 2 pitted Medjool dates
- 1/4 cup coconut sugar
- 1 tsp vanilla extract
- 1/4 tsp sea salt
Instructions
Cookie dough
- Add all the ingredients except the chocolate chips to a food processor and pulse until a compact dough forms. The dough should hold when pressed between two fingers. If it is too crumbly, add more peanut butter and agave.
- Transfer the dough into a bowl and fold in the chocolate chips.
- Chop the cookie dough into bite-sized pieces. Arrange them on a lined plate and place in freezer to firm up for 1 hour.
Cheesecake crust
- Preheat the oven to 350F and grease a 9″ springform pan.
- Place the oats and whole almonds in a food processor and pulse until you get a flour consistency.
- Add all the remaining ingredients and pulse until a dough forms. The dough should be a little crumbly put hold when pressed.
- Place the dough in the springform pan and press firmly with the hands to create an even layer. The crust should cover the bottom of the form and halfway up the sides.
- Bake for 15 minutes. Remove from oven and allow to cool down.
Cheesecake filling
- Preheat the oven to 330F.
- Rinse under running water, then drain the soaked cashews.
- Mix the cashews with the almond milk in a high speed blender until perfectly smooth and creamy. Add all the remaining ingredients and blend to combine.
- Pour the batter into the springform pan.
- Remove the chilled cookie dough from the freezer, and fold in half into the cheesecake filling. Smooth the surface of the cheesecake with a spatula. Place the extra cookie dough back in fridge.
- Bake for 50 – 60 minutes, until the cheesecake is puffed up, beautifully browned on the top and has a slight giggle when you check it. If the surface starts to burn at the end of the baking time, cover with a piece of aluminium foil on top.
- Remove from the oven and allow to completely cool down at room temperature for 1 hour. Then place in fridge to set for at least 3 hours or overnight. Don’t cover the cheesecake.
- Before serving, garnish the cheesecake with extra cookie dough pieces and drizzle caramel sauce.
Caramel sauce
- Mix the coconut cream, arrow root and pitted dates in a high speed blender until perfectly smooth.
- Place the coconut sugar in a small sauce pan and pour the coconut milk mixture on top. Heat over medium heat and bring to a low simmer, stirring constantly. Continue to heat and whisk for 2-3 minutes, until you get a glossy and golden brown caramel sauce.
- Remove from heat and add vanilla extract and salt. Let cool slightly before serving.
Notes
- Store any caramel sauce leftover in a clean glass jar placed in refrigerator for 1-2 weeks. Before using, simply reheat the sauce in microwave or in a double boiler.
- For even best result, allow the cheesecake to chill in fridge overnight.
Recette version française
PrintCheesecake à la pâte de cookie et sauce caramel
Ce cheesecake décadent renferme des morceaux de vraie pâte à cookie aux pépites de chocolat et est nappé d’une sauce caramel crémeuse. Sans gluten, vegan et allégé en sucre.
- Prep Time: 30 minutes
- Cook Time: 50 minutes
- Total Time: 5 heures
- Yield: 8 parts
- Category: dessert
Ingredients
Pâte à cookie
- 100 g de farine de coco
- 140 g de beurre de cacahuète
- 80 g de sirop d’agave
- 35 g d’huile de coco fondue
- 1 c. à c. d’extrait de vanille
- une pincée de sel
- 50 g de pépites de chocolat noir
Base du cheesecake
- 120 g de flocons d’avoine
- 70 g d’amandes entières
- 1 banane bien mure
- 60 g de sirop d’agave
- 25 g de cacao en poudre
- 25 g d’huile de coco
- une pincée de sel
Appareil à Cheesecake
- 120 g de noix de cajou préalablement trempées pendant 6 heures
- 60 ml de lait d’amande
- 230 g de tofu soyeux
- 15 g de fécule de mais
- 60 g de sirop d’érable
- 2 c. à s. de jus de citron
- 1 c. à c. d’extrait de vanille
- une pincée de sel
Sauce caramel
- 150 g de crème de coco entière
- 10 g d’arrow root (ou fécule de mais)
- 2 dattes medjool dénoyautées
- 35 g de sucre de coco
- 1 c. à c. d’extrait de vanille
- une pincée de sel
Instructions
Pâte à cookie
- Placer tous les ingrédients à l’exception des pépites de chocolat dans le bol d’un robot mixeur et pulser jusqu’à ce qu’une pâte compacte se forme. La pâte doit être malléable et se tenir lorsqu’on la presse entre les doigts. Si la pâte est trop effritable, ajouter un peu de beurre de cacahuète et de sirop d’agave.
- Ajouter les pépites de chocolat et mélanger à la main pour les incorporer.
- Découper la pâte à cookie en petites boules de la taille d’une bouchée. Disposer les boules de pâte sur un plat et placer au congélateur pendant 1 heure pour les raffermir.
Base du cheesecake
- Préchauffer le four à 180°C et huiler un moule à cheesecake de diamètre 23 cm.
- Placer les flocons d’avoine et les amandes entières dans un robot mixeur et mixer jusqu’à obtenir la consistence d’une farine.
- Ajouter le reste des ingrédients et mixer jusqu’à ce qu’une pâte compacte et homogène se forme. La pâte doit être légèrement effritable mais doit se tenir quand on la presse.
- Placer la pâte dans le moule et presser fermement avec les doigts pour former une base uniforme dans le fond du moule, et qui remonte sur les bords jusqu’à mi-hauteur.
- Enfourner pour 15 minutes. Retirer du four et laisser refroidir.
Appareil à cheesecake
- Préchauffer le four à 165°C.
- Rincer abondamment puis égoutter les noix de cajou préalablement trempées.
- Mixer les noix de cajou avec le lait d’amande dans un blender jusqu’à obtenir une consistance parfaitement lisse. Ajouter le reste des ingrédients et mixer pour les incorporer.
- Verser la pâte dans le moule à cheesecake, au dessus de la base.
- Sortir la pâte à cookie du congélateur et placer la moitié à l’intérieur de l’appareil à cheesecake, en les répartissant également. Lisser la surface du cheesecake avec une spatule. Remettre le surplus de pâte à cookie au frais.
- Enfourner pour 50 – 60 minutes jusqu’à ce que le cheesecake soit bien gonflé et joliment doré en surface. Si le cheesecake commence à trop dorer en fin de cuisson, placer une feuille de papier aluminium au dessus.
- Sortir le cheesecake du four et laisser refroidir à température ambiante pendant 1 heure. Puis laisser reposer au réfrigérateur pendant au moins 3 heures. Ne pas couvrir pour éviter de créer de la condensation.
- Avant de servir, décorer le cheesecake du restant de pâte à cookie et garnir de sauce caramel.
Sauce caramel
- Dans le bol d’un blender, placer la crème de coco, l’arrow root et les dattes grossièrement hachées et mixer jusqu’à obtenir un mélange parfaitement lisse et sans morceaux.
- Placer le sucre de coco dans une petite casserole et verser le mélange au lait de coco dessus. Faire chauffer à feu moyen tout en remuant constamment jusqu’à ce que le mélange frémisse. Continuer à chauffer en remuant pendant 2-3 minutes. Le caramel est prêt quand il est lisse et brillant avec une belle couleur brune.
- Retirer du feu et ajouter la vanille et le sel. Laisser refroidir quelques minutes avant de servir.
Notes
- La sauce caramel peut se conserver pendant 1 à 2 semaines dans un bocal en verre au réfrigérateur. Avant de servir, réchauffer simplement au microonde ou au bain marie pour lui redonner sa fluidité.
- Pour un résultat optimal, laisser le cheesecake reposer au réfrigérateur pendant toute une nuit.


0 Comments
Trackbacks/Pingbacks