

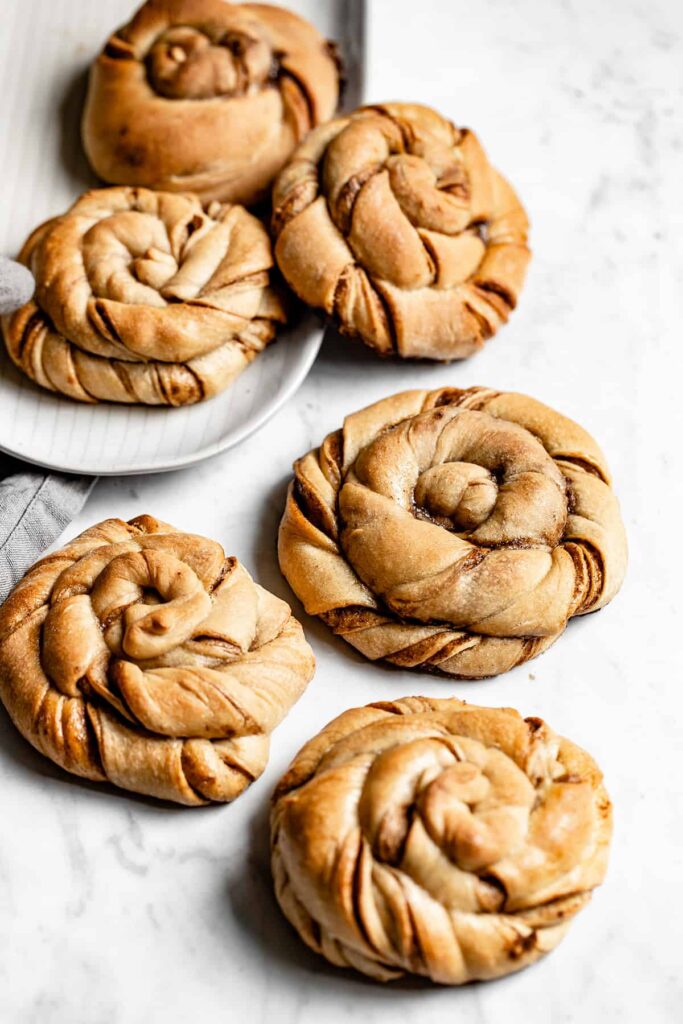
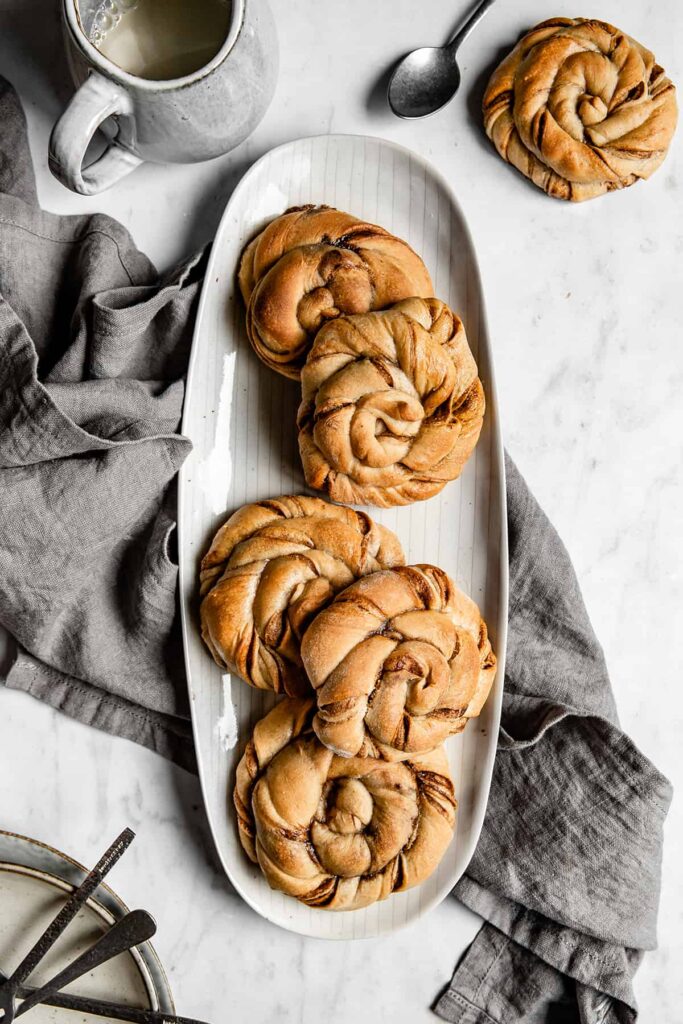
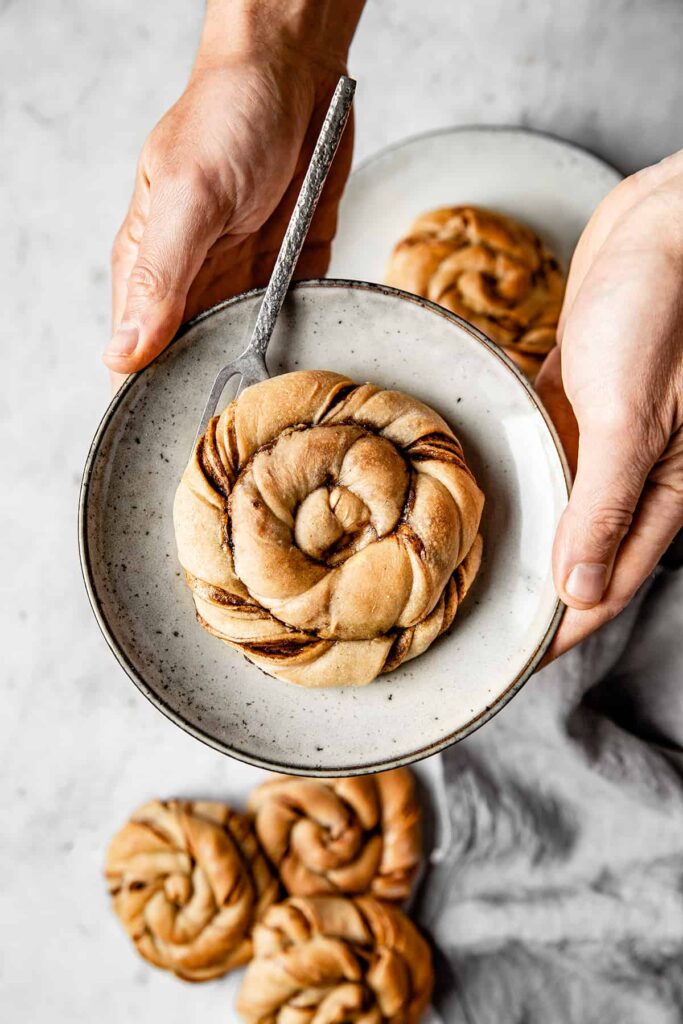
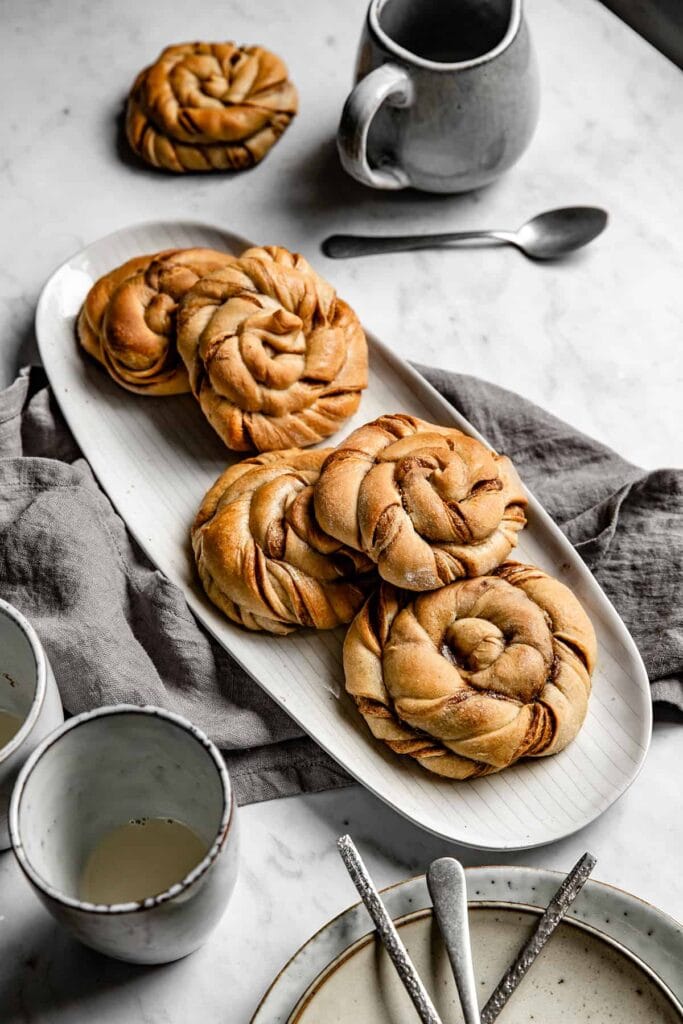
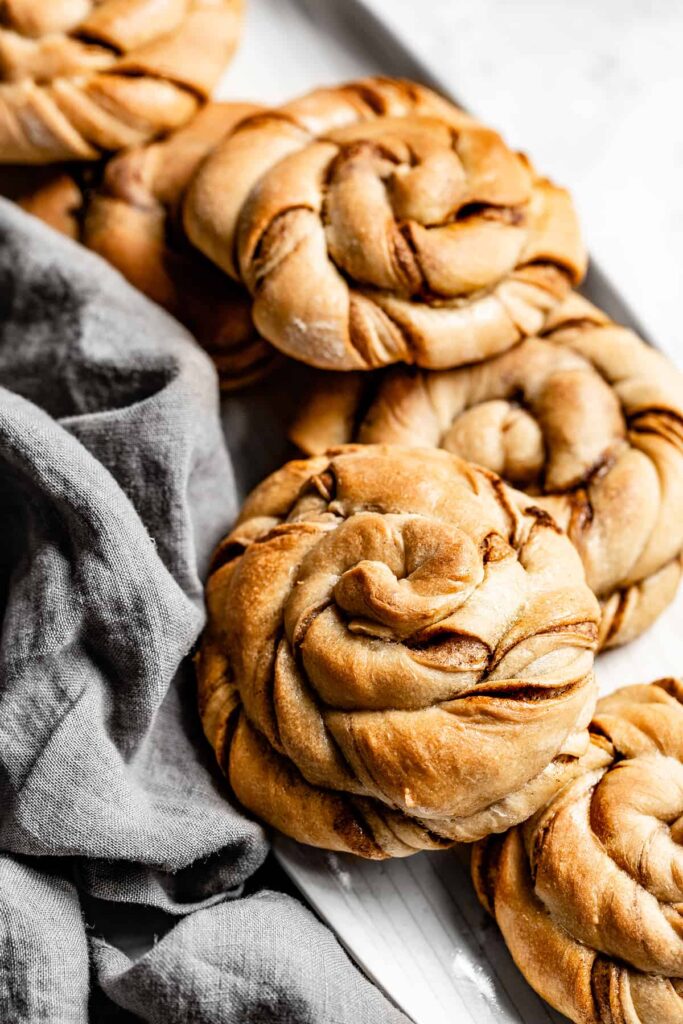
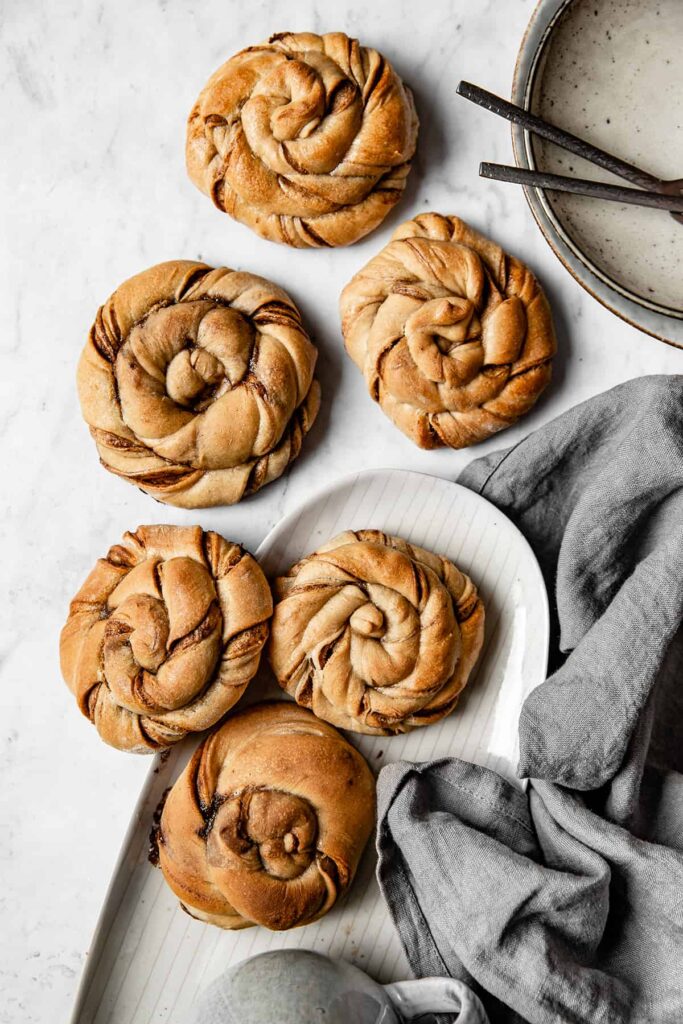
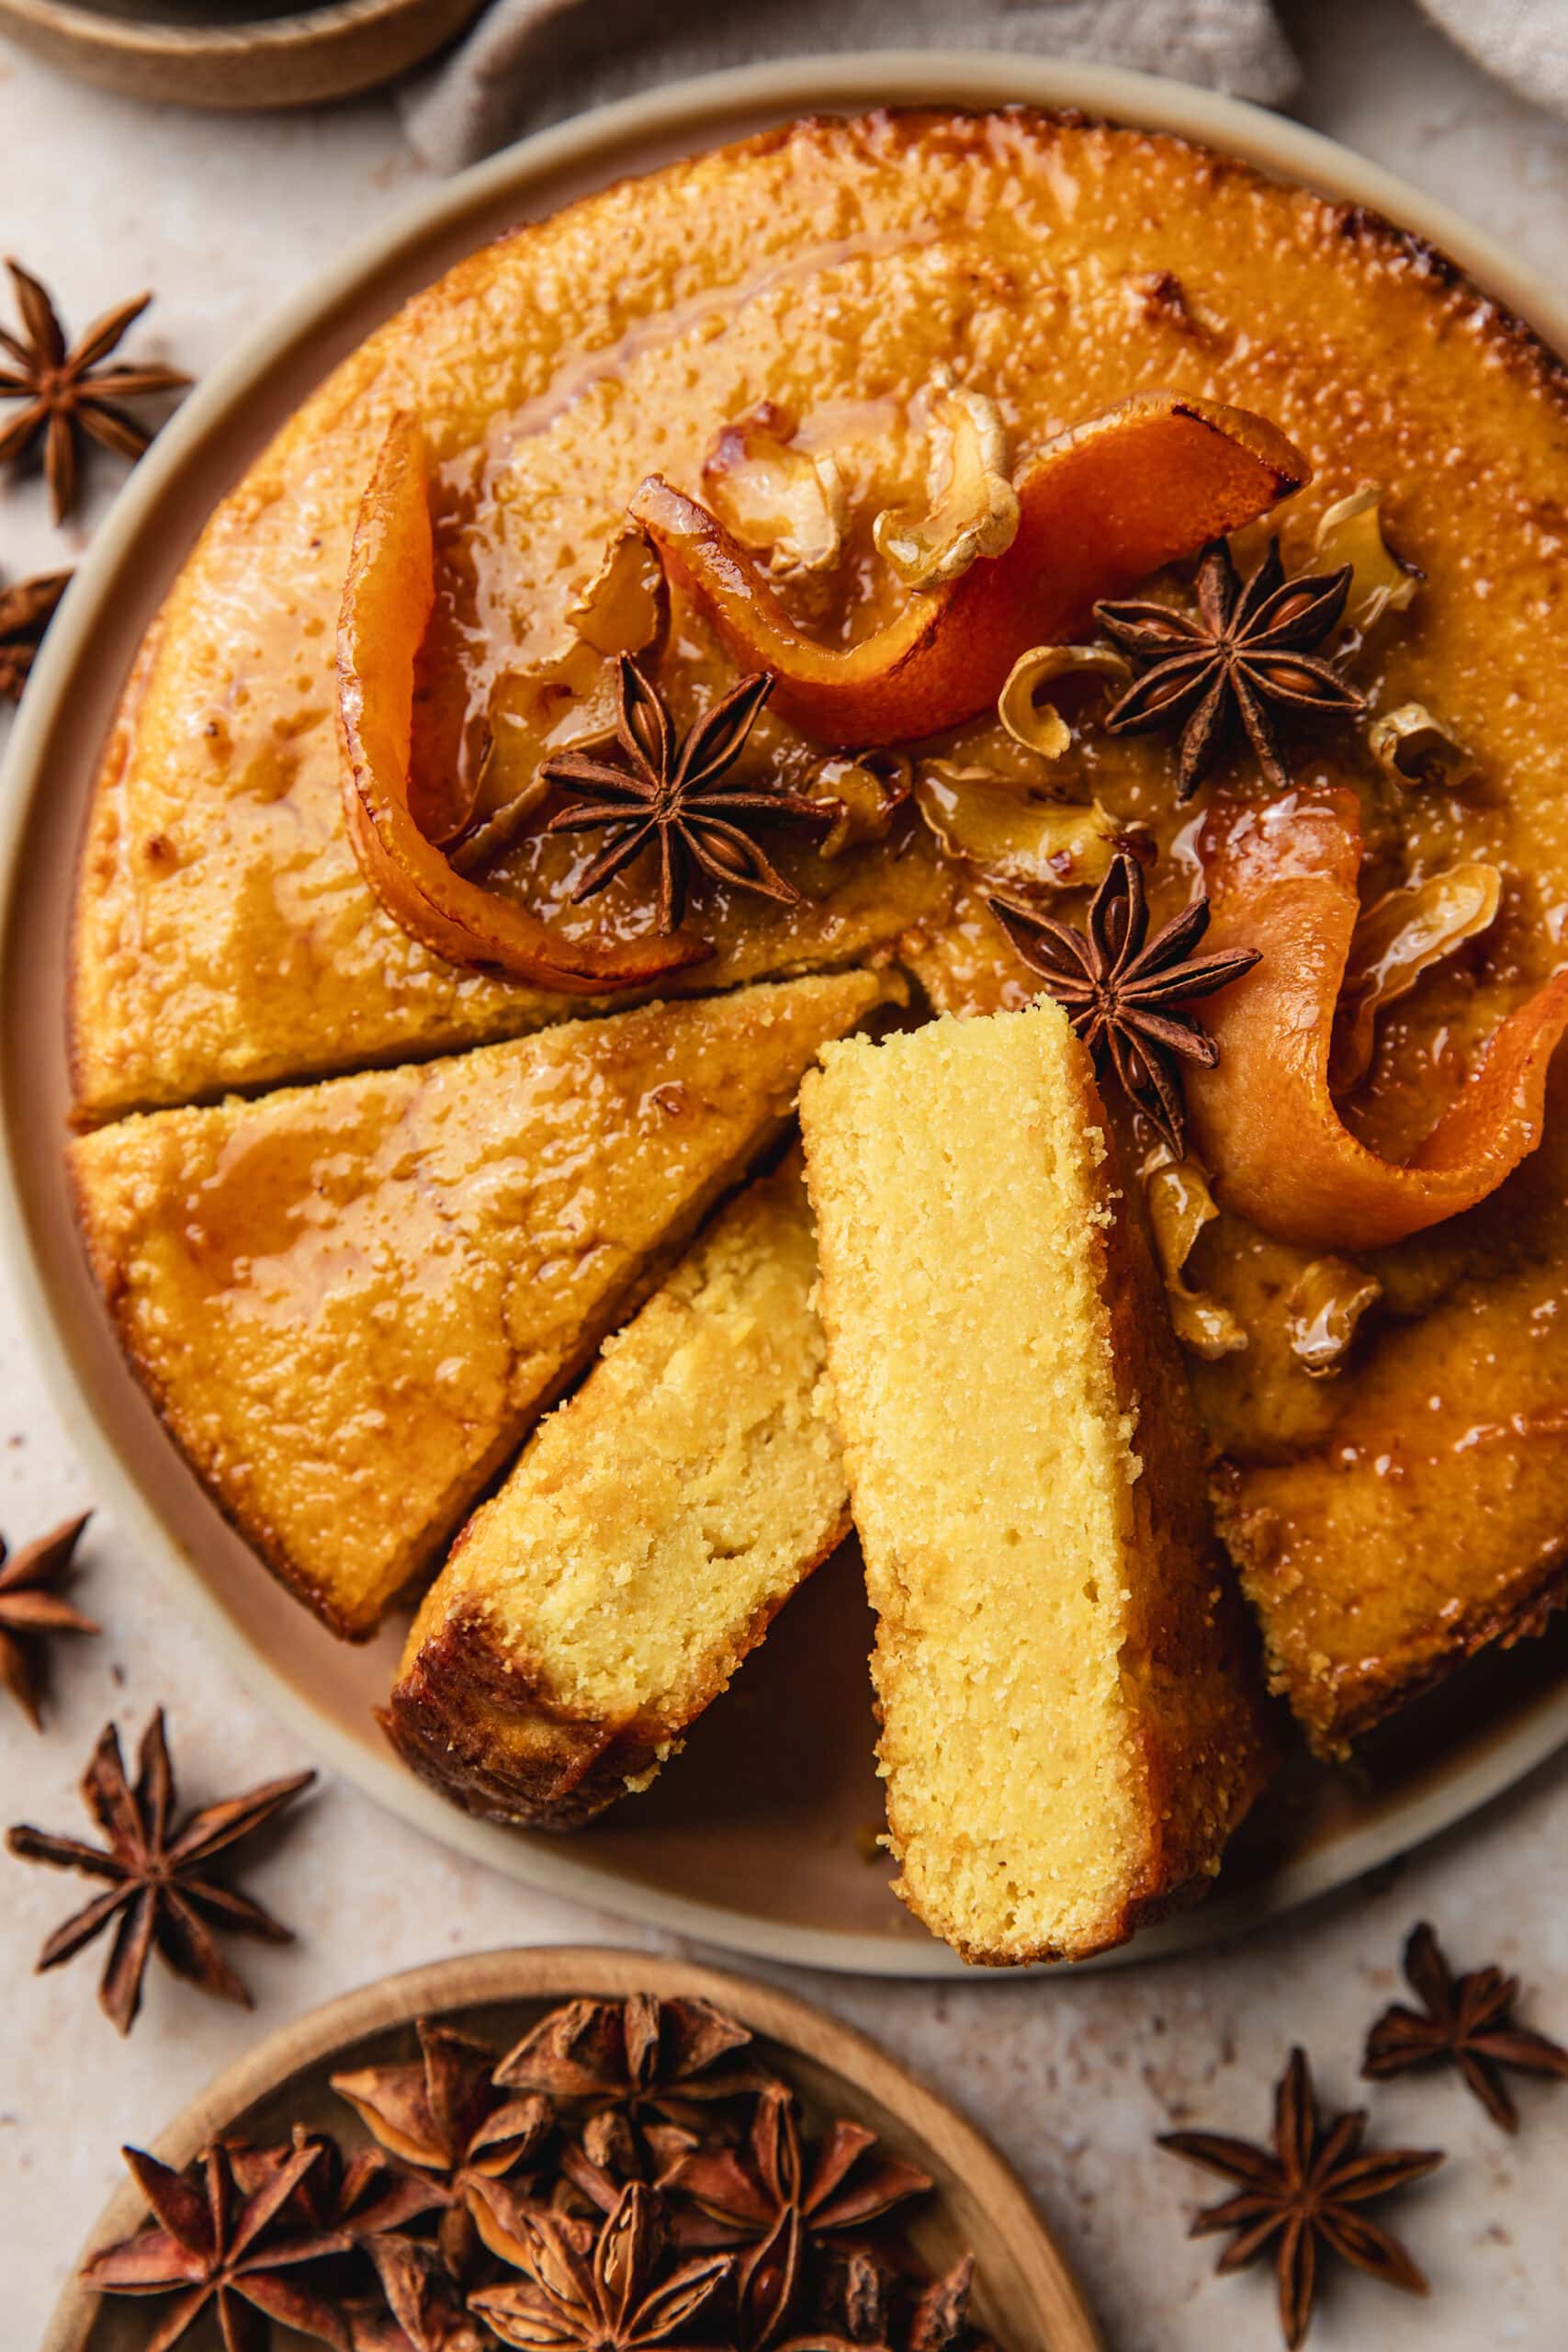
Finally an easy cinnamon buns recipe, with only a few ingredients and simple steps. These cinnamon buns are nothing like you’ve ever seen before: they are vegan, just sweet enough, soft, packed with rich cinnamon flavors and much healthier than any store-bought goods. No fancy equipment, no complex steps, no extended rising time, and the result is just as delicious as bakery fresh cinnamon buns! Enjoy them warm with a cup of coffee for a simple but so satisfying pleasure.
Easy fool proof vegan cinnamon buns
A lot of people are intimidated by making their own cinnamon buns, and to be honest I can totally relate. That’s because traditional cinnamon buns can look very complicated to make and time consuming. But that was before this super simple recipe everybody can make at home!
These cinnamon buns are different from everything you’ve seen before. They only require a few simple ingredients, don’t call for complex preparations and difficult steps, don’t involve specific equipment. Basically everybody can make it at home, you don’t even need a stand mixer to knead the dough. Really, I was the first one to be amazed by how simple this recipe is and how incredible is the result: soft, golden and super tasty cinnamon buns.
When developing this recipe, I’ve started by listing all the ingredients needed to make a good traditional cinnamon bun. Then I’ve simply removed everything that wasn’t strictly necessary, to keep it as simple as possible. What do you expect from a cinnamon bun? A soft, fluffy ans fragrant dough, a rich and buttery cinnamon filling, and a beautiful golden finish on top. Nothing more, nothing less. And that’s all into this recipe.
Oh, and I almost forgot to mention that these cinnamon buns are vegan, refined sugar free and much healthier than any store-bought goods. In this recipe, regular milk is replaced with almond milk, butter with coconut oil and sugar with coconut sugar and maple syrup. And the result is just as delicious as fresh bakery cinnamon buns!
How to make the perfect dough
Don’t be afraid by the yeast
Yeast, this dreaded word! We have all experienced big failures when baking with yeast and I personally can’t count how many times my doughs didn’t rise and I ended up with flat breads and brioches. Until I took the time to understand WHY I’ve failed before, and HOW yeast works. And suddenly, everything became much simpler. And if I can do it, so you guys can! Really, there is nothing complicated with baking with yeast. And if you follow the tips and guidelines below, I promise you will never fail with yeast again!
- Yeast is a living microscopic organism, yes, LIVING! So you should really consider it when working with yeast to understand why the environment parameters, like temperature or humidity are so important.
- The first important factor for a successful baking is the yeast itself. Always check the date on your yeast before to use, just to make sure it hasn’t expired and that the yeast is not … dead.
- There are two main types of bakers yeast: dry yeast and fresh yeast. The first one, dry yeast, is living but inactive. You can easily find it in any grocery store. Dry yeast is sold in little sachets in the form of very fine dry granules. The second type, fresh yeast, is active and living. This yeast is sold in a block and has a limited shelf life (about 1 week). I personally prefer to use dry yeast because it is easy to find and much more convenient as it can be stored for a long time.
- In this recipe, I’m using active dry yeast. Dry yeast needs to be sprinkled and dissolved in a liquid to be used. To do so, sprinkle the dry yeast over lukewarm water and wait. Don’t stir! Your yeast will start to activate and get frothy.
- The temperature of your liquid is a critical factor, so really pay attention to it! The mixture should be warm enough to activate the yeast, but not too hot or it can kill the yeast. The perfect temperature is between 100°F and 110°F (37°C-43°C).
Kneading the dough
Once you’ve activated your yeast, the next step to make these Cinnamon Buns is to mix and knead the dough.
First, mix all your ingredients following the recipe and form them into a dough. You need to knead the dough thoroughly until it is perfectly silky smooth and not sticky at all. Kneading the dough helps the gluten to develop, which is important to get light and fluffy cinnamon buns and to ensure an efficient rising.
You can either knead the dough with a stand mixer with the dough hook attachment, or by hand. Either way works well, the major difference will be the kneading time. With a stand mixer it usually takes about 5-8 minutes to get a smooth dough, while by hands it is around 10-12 minutes -and a good arm workout.
Rising the dough
This cinnamon bun dough has to rise twice, for a total one and a half hour. Once after you’ve mixed the dough, and once after you’ve formed the buns. These rising periods are essential steps to allow the yeast to do its job, develop the dough and for fluffy and easy to digest buns.
To ensure a good rising, cover the dough with a clean towel to protect it from draughts, and place in warm place. Ideal rise temperatures are between 80°F and 90°F (26°C-32°C). Higher temperatures may kill the yeast and keep the dough from rising, while lower temperatures will slow the yeast activity. The oven is an ideal place for rising: heat the oven at the lowest setting for one or two minutes, then turn it off. The sunlight through a window or the heat from a lamp can also help the dough to rise. In any case, make sure that the environment is not too dry.
However, keep in mind that many other factors can strongly affect the rising. Check all these factors and try to create the best conditions as possible. The cinnamon bun dough is considered “ripe” when it has risen enough, usually doubling in size. This takes about 1 hour.
How to form your cinnamon buns
The final step before baking these Cinnamon Buns is to roll them. This step might be the most technical of the whole recipe, but once again, I assure you, there is nothing complicated! Shaping beautiful and even cinnamon buns can take time and requests manual dexterity and practice, but really everybody can do this! Don’t give up.
- First, roll out the risen dough into an even 28 cm x 28 cm square. Important: if you have changed the quantities of the recipe, adapt the dimensions accordingly! Brush the dough with the filling mixture to fully cover the surface.
- Fold over the dough into thirds, like a wallet: at this step you have a 9 cm x 28 cm rectangle. Then roll out the dough in the widthwise direction into a 16 cm x 28 cm rectangle.
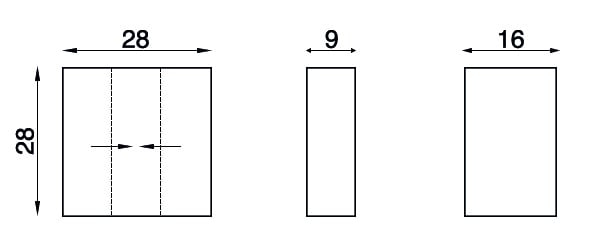
- With a sharpened knife, cut the dough into strips 28 cm long and about 2 cm wide, parallel to the direction of folding.
- Then take one strip of dough and twist it by both ends to form an entire twist. Then roll the twist of dough over itself, into a tight bun and tuck the end underneath to secure.
How to store cinnamon buns
These cinnamon buns are so delicious that I’m sure they won’t last for a long! They are the best enjoyed still warm, right out of the oven, when they are very soft, nearly melting in your mouth. But if you happen to have leftovers or want to keep some for later, these cinnamon buns are easy to keep.
If you plan to eat them within a few days, simply store your cinnamon buns in an airtight container at room temperature. They will keep for up to 2-3 days. Quickly reheat them before eating to restore their softness.
But if you want to keep them for longer, these cinnamon buns also freeze perfectly, for up to 2 months. Once completely cooled, place the baked cinnamon buns in a freezer container or a bag, and freeze. Just leave them out to thaw at room temperature, then warm up in the microwave or oven.

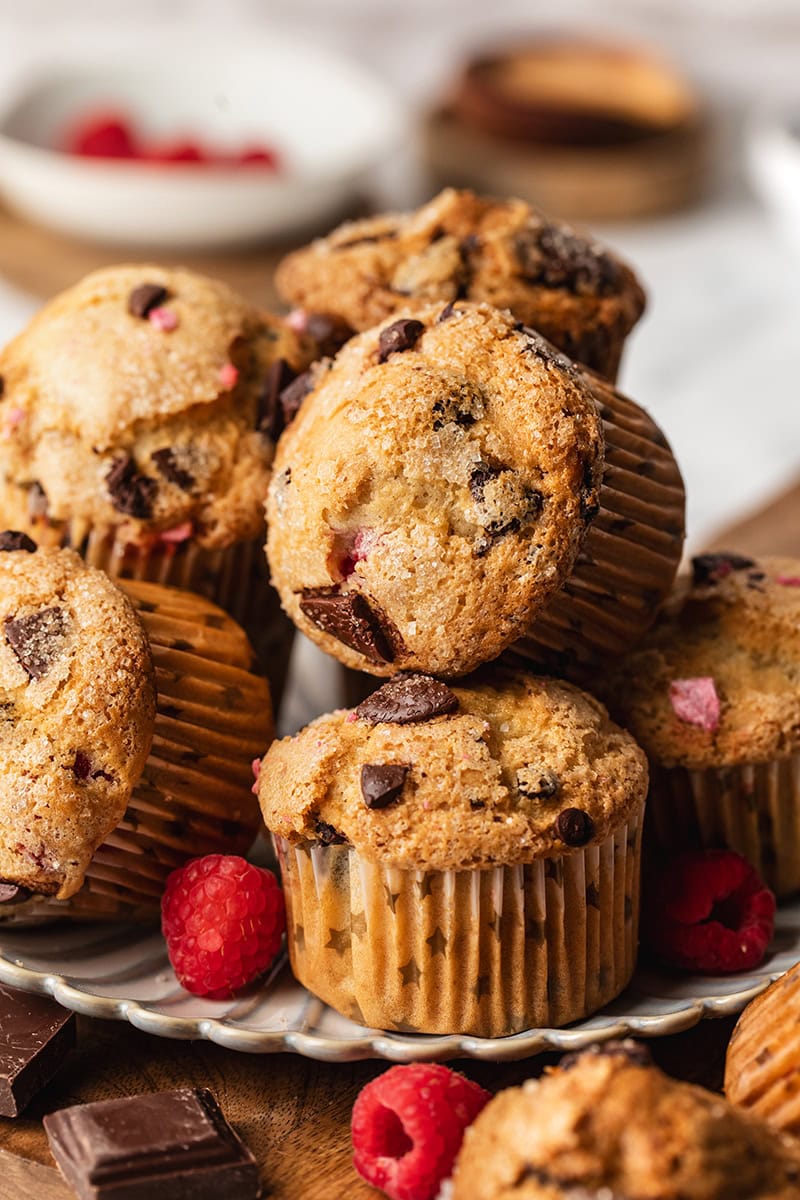
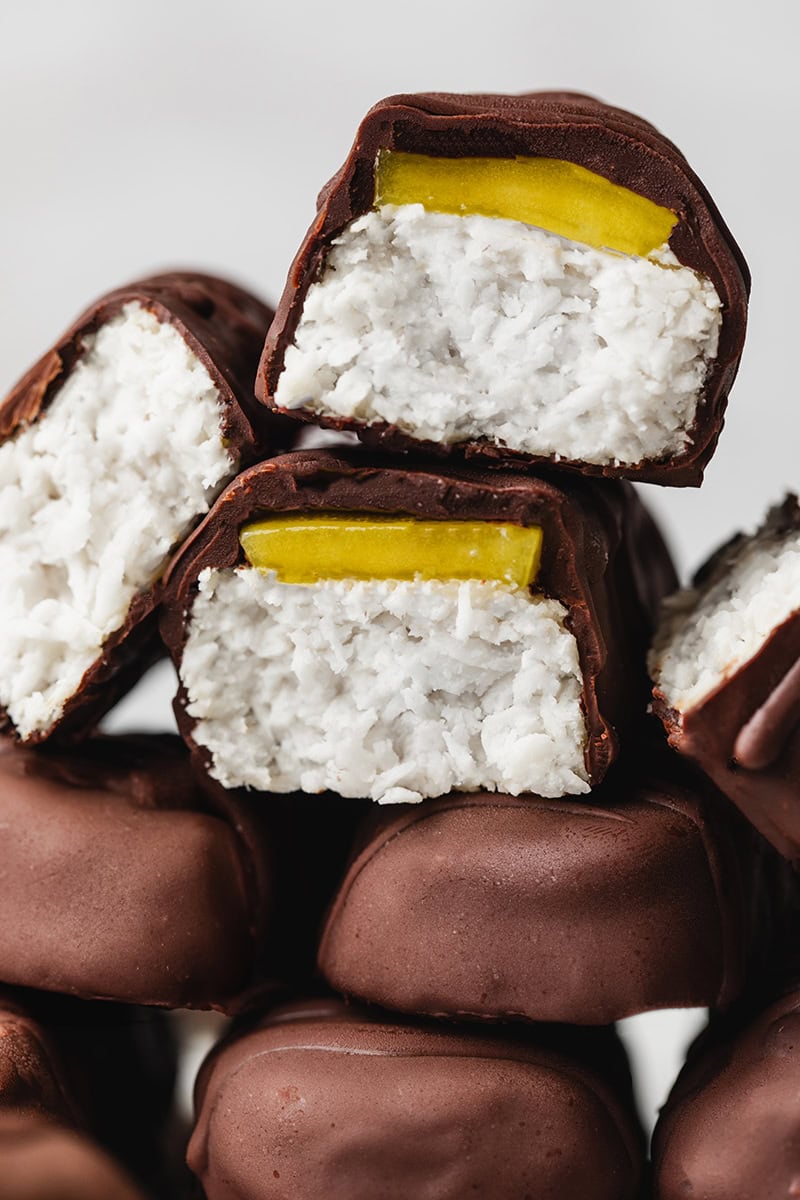
You might also love these delicious comforting snacks and desserts :
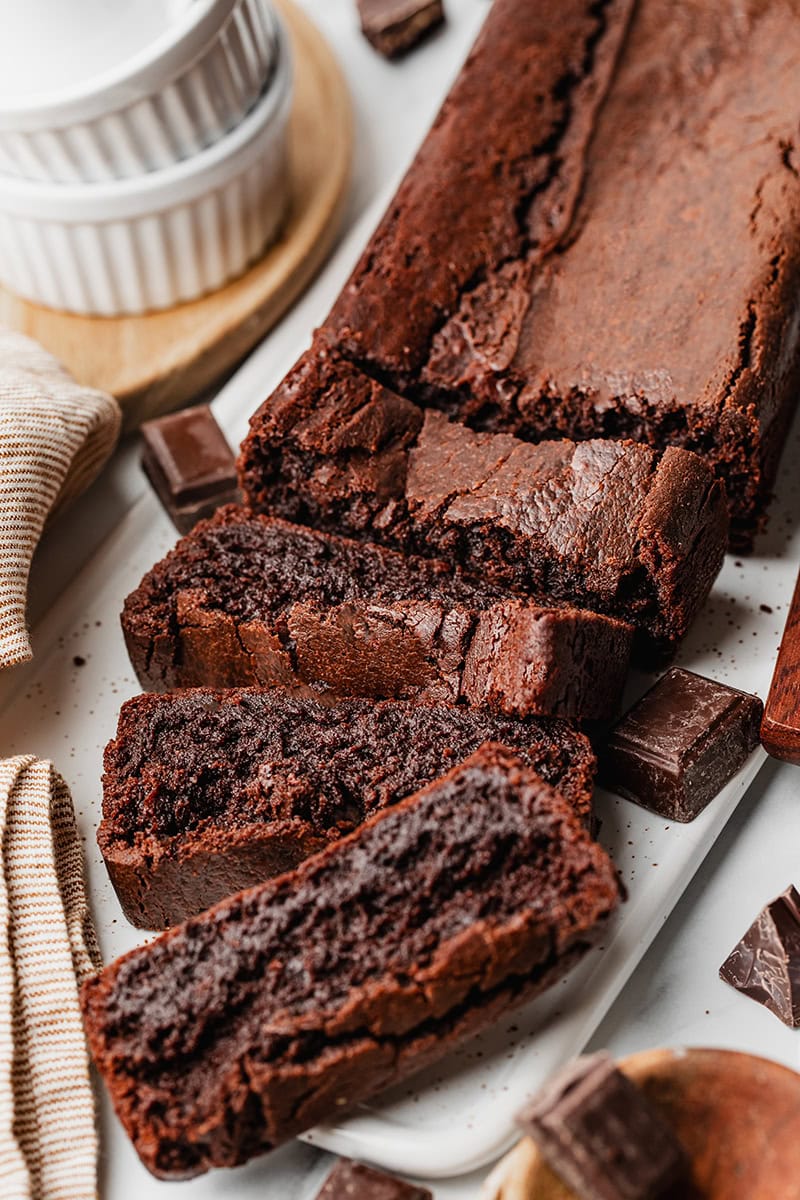
- Mini Chocolate Loaf Cakes with Caramel Sauce, the best chocolate cake recipe
- Healthy Gluten-free Banana Bread, a must in every kitchen
- Chocolate Carob Loaf with Caramel frosting, a readers’ favorite
- Peach & Blueberry Crumble GF, a rich and tasty fruits crumble
- Apple Cinnamon Loaf with Maple tahini sauce, ultra-warming
I love to see your creations! Don’t forget to tag me @alicepages on your photos on Instagram and give your feedback in the comments below if you make this recipe at home! Your opinion is my best reward.
PrintCinnamon Buns
Easy vegan cinnamon buns, with only a few ingredients and simple steps. These are vegan, not too sweet, soft and packed with delicious cinnamon flavors. Enjoy them warm with a cup of coffee.
- Total Time: 1 hour 50 minutes
- Yield: 8 buns
Ingredients
Dough
- 1/2 cup almond milk
- 2 tbsp boiling water
- 1/2 tsp fast-acting dry yeast
- 2 1/3 cups all-purpose flour (270g)
- 2 tbsp coconut sugar (or cane sugar)
- 1/2 tsp ground cardamom
- 1/4 tsp salt
- 2 tbsp melted coconut oil
- 1 tsp liquid vanilla extract
Filling
- 2 tbsp melted coconut oil
- 2 tbsp coconut sugar
- 2 tbsp maple syrup
- 1 tbsp ground cinnamon
- 1 tbsp corn starch
Glaze
- 1 tbsp aquafaba (chickpea brine, optional)
- 1 tbsp almond milk
- 1 tsp maple syrup
Instructions
Dough
- In a small bowl, mix together the almond milk and the hot water. Check the temperature: the mixture should be warm but not too hot, slightly under 100 degrees F (37°C). If it’s too hot, allow to cool.
- Sprinkle the yeast evenly on the warm liquid and let activate for 2 minutes. Then stir until the yeast is completely dissolved in the liquid.
- In the bowl of a stand mixer or a large mixing bowl, add the flour, sugar, cardamom and salt. Mix to combine.
- Pour in the milk and yeast mixture, together with the melted coconut oil and vanilla extract. If using a stand mixer, mix with the hook accessory until the dough is very smooth and elastic, not sticky. This can take up to 5-8 minutes to get the right consistency. If you don’t have a stand mixer, start mixing the dough with a spatula until combined. Then transfer the dough to a lightly floured surface and kneed for about 10 minutes until smooth.
- Form a loose ball with the dough, place it into a greased mixing bowl and cover with a clean towel. Set in a warm place to rise for about 1 hour, or until doubled in size.
Filling
- Meanwhile, prepare the filling. Mix the melted coconut oil, coconut sugar, maple syrup and cinnamon in a bowl and stir until well combined. Then sieve in the corn starch and mix until you get a sticky and viscous preparation.
- Once the dough has risen, turn out onto a floured surface. Roll out the dough into an even 28 cm x 28 cm square (if you have changed the quantities of the recipe, adapt the dimensions accordingly). Brush the dough with the filling mixture to fully cover the surface.
- Fold the dough into thirds : at this step you have a 9 cm x 28 cm rectangle. Then roll out the dough in the widthwise direction into a 16 cm x 28 cm rectangle. See notes.
- With a sharpened knife, cut the dough into strips 28 cm long and about 2 cm wide, parallel to the direction of folding. Twist the strips by both ends to form an entire twist. Then roll the twist of dough into a bun and tuck the end underneath.
- Place the buns on a baking sheet lined with baking paper, cover with a towel and place in a warm place to rise for 30 minutes. Meanwhile, preheat the oven to 350 degrees F and prepare the glaze by mixing all the ingredients together.
- Once the oven is hot and the buns have risen, bake for 15 minutes. Then remove the buns from the oven and brush with the glaze. Return to the oven and bake for 3 minutes more or until golden brown. Transfer to a cooling rack and let cook for a few minutes.
Notes
Dough folding:
1. Roll out the dough into an even 28 cm x 28 cm.
2. Fold the dough into thirds, into a 9 cm x 28 cm rectangle.
3. Roll out the dough in the widthwise direction, into a 16 cm x 28 cm rectangle.

- Prep Time: 1 hour 30 minutes
- Cook Time: 20 minutes
- Category: breakfast, dessert, snack
- Method: oven
- Diet: Vegan
Recette version française
PrintBuns roulés à la cannelle
Enfin une recette de buns à la cannelle facile, saine et rapide à réaliser! Ces buns roulés à la cannelle vegan sont tendres, fondants, juste assez sucrés mais toujours aussi délicieux avec un intense goût de cannelle. A déguster à la sortie du four.
- Total Time: 10 minute
- Yield: 8 buns
Ingredients
Pâte à buns
- 125 ml de lait d’amande à température ambiante
- 30 ml d’eau chaude
- 4 g de levure boulanger instantanée
- 270 g de farine de blé type T55
- 20 g de sucre de coco (ou sucre de canne brun)
- 1 c. à c. de cardamome moulue
- 1/4 c. à c. de sel
- 40 g d’huile de coco fondue
- 1 c. à c. d’extrait de vanille liquide
Garniture
- 40 g d’huile de coco fondue
- 40 g de sucre de coco (ou sucre de canne)
- 30 g de sirop d’érable
- 1 c. à s. de cannelle moulue
- 12 g de fécule de maïs
Dorure
- 1 c. à s. d’aquafaba (eau de cuisson des pois-chiches), optionnel
- 2 c. à s. de lait d’amande
- 1 c. à s. de sirop d’érable
Instructions
Pâte à buns
- Mélanger le lait d’amande et l’eau chaude dans un petit bol. Vérifier la température du mélange: il doit être chaud mais pas brulant, légèrement en dessous de 37°C, pour activer la levure sans la tuer. Si le mélange est trop chaud, laisser refroidir quelques instants.
- Saupoudrer la levure instantanée à la surface du mélange à bonne température et laisser activer pendant 2 minutes. Puis remuer afin de dissoudre complètement la levure dans le liquide.
- Dans le bol d’un robot pâtissier ou dans un grand saladier, mélanger la farine, le sucre, la cardamome et le sel.
- Verser la préparation lait levure dans le mélange sec, ainsi que l’huile de coco fondue et l’extrait de vanille. Si vous avez un robot pâtissier, pétrir avec l’accessoire crochet jusqu’à obtenir une pâte bien lisse et élastique, non-collante. Cela peut prendre jusqu’à 5 à 8 minutes pour obtenir la bonne texture. Si vous n’avez pas de robot pâtissier, commencer par mélanger la pâte avec une spatule pour incorporer grossièrement tous les ingrédients. Puis lorsqu’elle devient trop épaisse, transférer la pâte sur un plan de travail légèrement fariné et pétrir à la main pendant 10 minutes jusqu’à obtenir une pâte bien lisse.
- Former une boule, la déposer dans un saladier huilé et recouvrir d’un torchon propre. Placer le saladier dans un endroit chaud et laisser la pâte gonfler pendant environ 1 heure, ou jusqu’à ce qu’elle ai doublé de volume.
Garniture
- Pendant ce temps, préparer la garniture. Dans un bol, mélanger l’huile de coco fondue, le sucre de coco, le sirop d’érable et la cannelle. Puis ajouter la fécule de maïs tamisée pour éviter la formation de grumeaux, et remuer jusqu’à obtenir un mélange homogène et visqueux.
- Une fois que le pâte a doublé de volume, la déposer sur un plan de travail fariné. A l’aide d’un rouleau à patisserie, abaisser la pâte en un carré de dimension 28 cm x 28 cm (si vous avez modifié les quantités de la recette, adaptez les dimensions en fonction). A l’aide d’un pinceau, étaler la garniture à la cannelle uniformément sur toute la surface de la pâte.
- Replier la pâte en trois: à ce stade elle forme un rectangle de dimensions 9 cm x 28 cm. Puis abaisser la pâte dans le sens de la largeur en un rectangle de dimensions 16 cm x 28 cm. Se référer aux Notes en dessous de la recette pour les détails du pliage.
- A l’aide d’un couteau aiguisé, découper des bandes de longueur 28 cm et de largeur 2 cm dans le rectangle de pâte. Former des torsades avec les bandes de pâte en les vrillant simultanément par les deux extrémités. Puis enrouler les torsades de pâte sur elles-mêmes pour former des buns et coincer l’extrémité de la torsade en dessous.
- Déposer les buns sur une plaque de cuisson chemisée de papier sulfurisé, couvrir avec un torchon propre et laisser gonfler dans un endroit chaud pendant 30 minutes. Pendant ce temps, préchauffer le four à 180°C et préparer la dorure en mélangeant tous les ingrédients.
- Une fois que le four est chaud et que les buns ont gonflé, enfourner et cuire pendant 15 minutes. Puis retirer les buns du four et les badigeonner de dorure avec un pinceau. Enfourner pour 3 minutes supplémentaires, jusqu’à ce que les buns soient bien dorés. Retirer du four et laisser refroidir pendant quelques minutes avant de déguster encore tiède.
Notes
Pliage de la pâte:
1. Abaisser la pâte en un carré de dimension 28 cm x 28 cm.
2. Replier la pâte en trois, en un rectangle de dimensions 9 cm x 28 cm.
3. Abaisser la pâte dans le sens de la largeur en un rectangle de dimensions 16 cm x 28 cm.
- Prep Time: 1 heure 30 minutes
- Cook Time: 20 minutes
- Category: dessert, snack
- Method: Four
- Diet: Vegan


0 Comments