

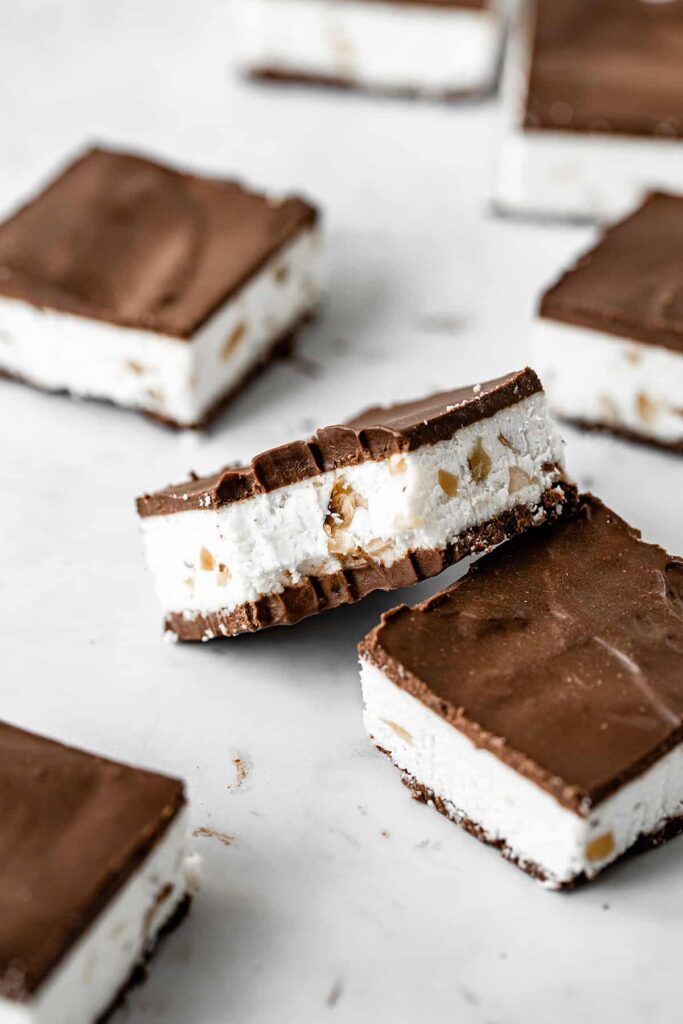
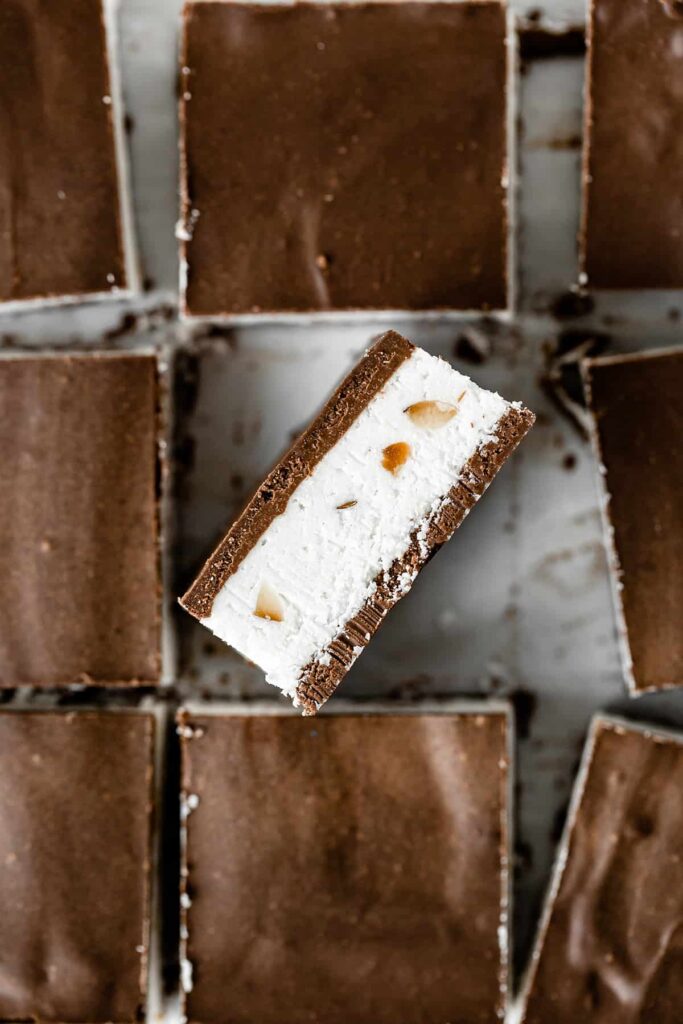
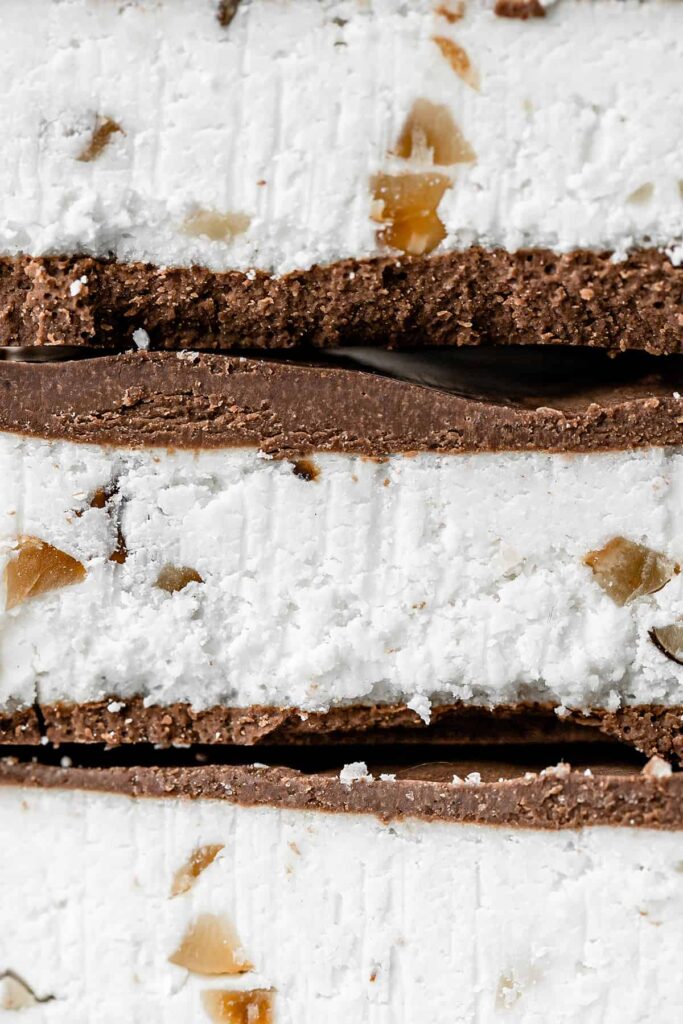
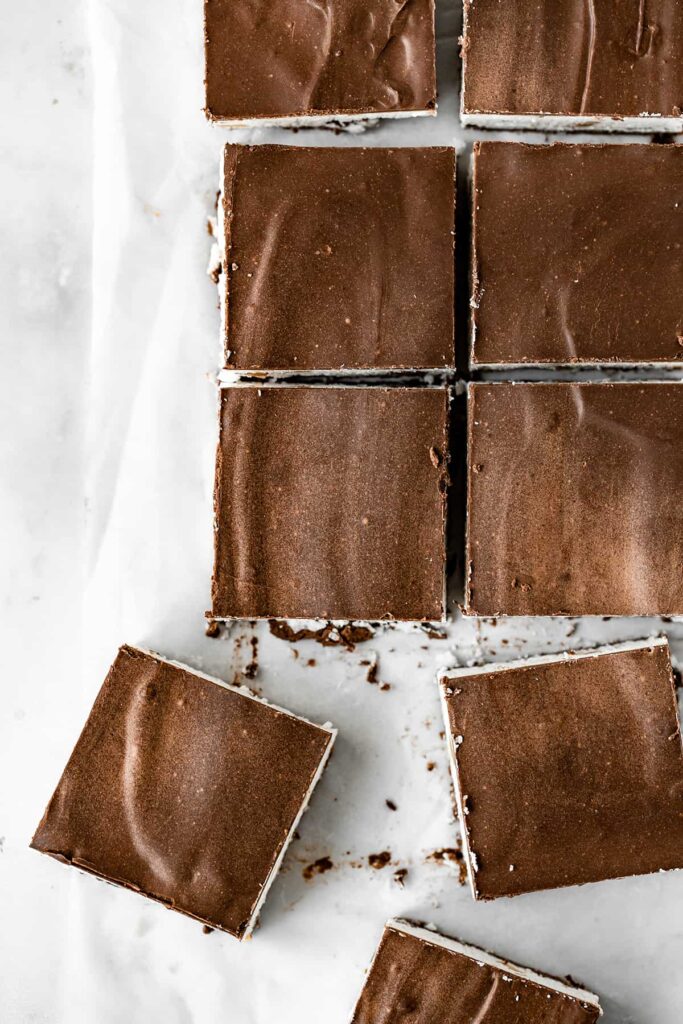
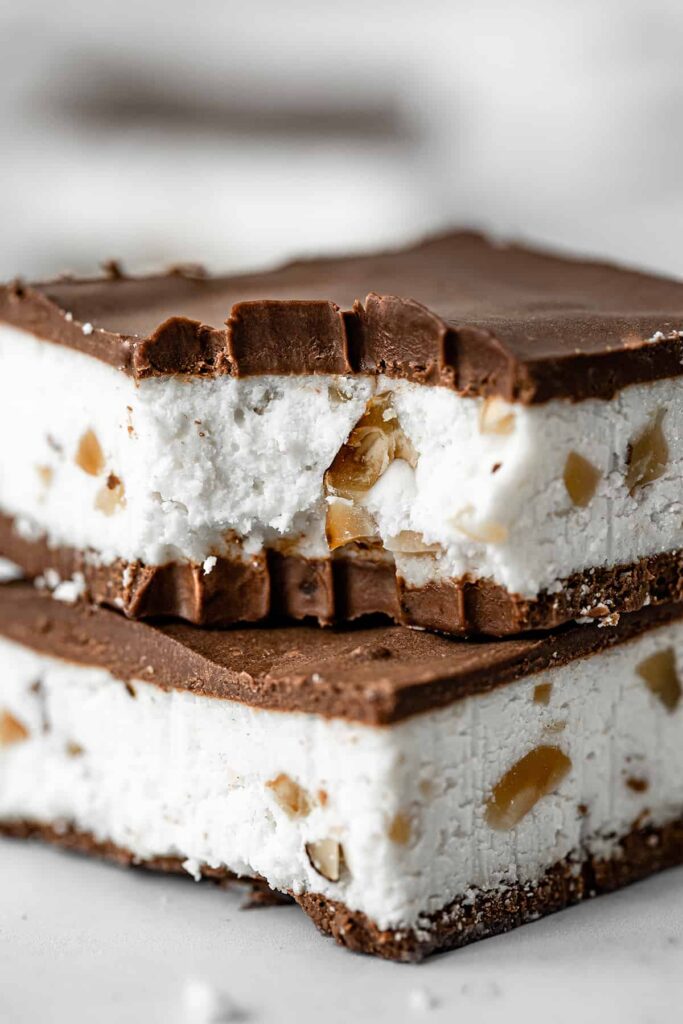
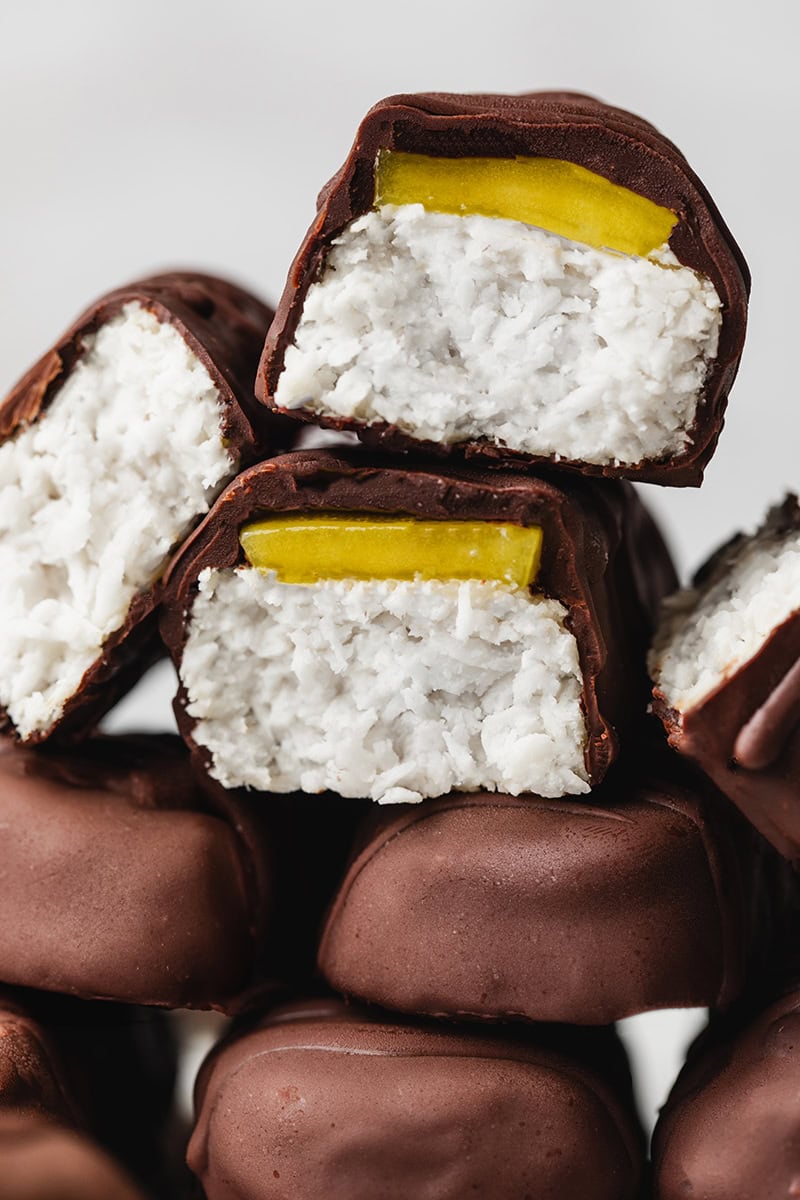
These no-bake vegan Schoko-bons slices taste like your favorite milk chocolate candies, but in a much healthier version! An incredibly rich and satisfying coconut cream stuffed with hazelnut bites is sandwiched between two layers of homemade fudy vegan milk chocolate. The guarantee of a delicious chocolate candy that melt in your mouth!
This post is sponsored by KORO, a European online shop that promotes healthy, high quality and sustainable products. For more information about the brand and its values, visit their website and enjoy 5% OFF everything on the FRENCH store using the code ALICE5.
Cette recette est sponsorisée par KORO, une boutique en ligne qui propose un large choix de produits sains, responsables et de haute qualité à prix juste. Pour découvrir la marque et ses merveilleux produits, rendez-vous sur leur boutique et profitez de 5% DE REDUCTION avec le code ALICE5.
A healthy treat everyone will love
You can’t go wrong with these no-bake vegan Schoko-bons slices! They are easy to prepare with a few simple ingredients you likely have on hand right now.
These chocolate slices are plant-based, gluten and refined sugar free. They make an amazing healthy alternative to regular sugar-loaded chocolate candies.
The coconut and hazelnut cream is simply sweetened by a little maple syrup, but you can absolutely remove it! The chocolate layers already add a light sweet touch to the whole recipe.
The vegan milk chocolate is made from scratch with unsweetened cocoa powder and a little coconut sugar, which is an unrefined sweetener. For even more nutritional benefits, use raw cocoa powder!
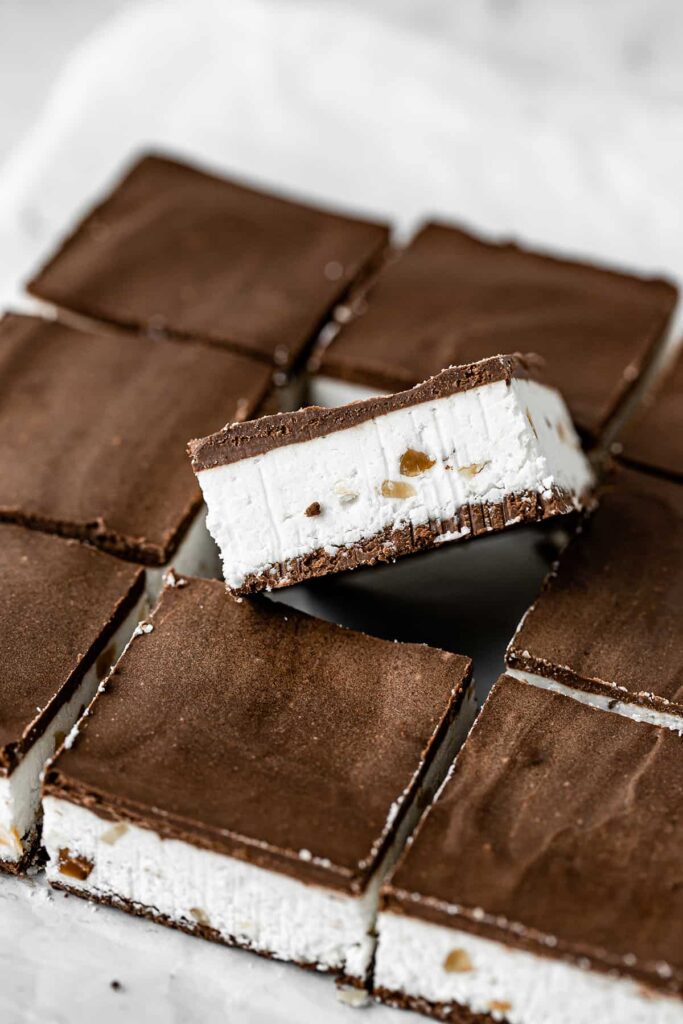
These no-bake vegan Schoko-bons slices make a great treat to have around stored in your fridge. As well as the perfect Easter chocolate candy.
How to make coconut hazelnut cream
The coconut hazelnut cream will be at the center of your slices, for a very smooth texture and delicious coconut and roasted hazelnut flavor. Making the coconut hazelnut cream is very easy, you can either use a food processor or a high-speed blender. However, I recommend to use a blender if you have one, for a smoother texture.
First, blend the shredded coconut alone to reduce into small bites or fine powder. If you’re using a high-speed blender, you can even go further and blend until you get a thick and buttery consistency. This can take up to 2 minutes to achieve the right texture depending on the power of your blender or food processor.
Then, add the coconut cream, melted coconut oil and maple syrup. Blend together until a thick and creamy dough forms.
Finally, transfer the coconut dough in a mixing bowl and fold in the roasted hazelnuts roughly crushed. Mix by hand to incorporate, and your cream is ready to be pressed in a pan and put in freezer.
How to make Vegan milk chocolate
This vegan milk chocolate gonna change your life! While I usually love the taste and intensity of a square of dark chocolate, milk chocolate was the perfect addition to this recipe. It’s sweet, creamy and soft cacao flavor and to make a yummy treat guaranteed to melt in your mouth!
This vegan milk chocolate recipe is very easy and requires only 5 simple ingredients you likely have on hand right now.
- To make it dairy-free, I swapped out regular dairy milk for coconut cream, which is very rich and creamy.
- While chocolate is traditionally made with cacao butter, I choose to replace it for coconut oil as it is much easier to get and work with. Also coconut oil has a lower melting point than cacao butter for a soft and melt-in-your-mouth chocolate.
- Cocoa powder brings a soft chocolate flavor. Make sure to use high-quality unsweetened cocoa powder.
- Finally to add that delicious sweet touch, we went for a little coconut sugar. Coconut sugar, also known as coconut palm sugar or coconut blossom sugar, is a non-refined sugar produced from the sap of the flower bud stem of the coconut palm.
To prepare the chocolate, start by blending the coconut sugar in a high-speed blender on high until a fine powder is achieved. This is very important to avoid lumps in your chocolate and ensure a smooth silky texture.
Then, all the milk chocolate ingredients to the cup of an immersion blender, and blend back and forth to combine, until smooth and creamy. The chocolate is ready! You can use it in all your preparations, or pour in small molds and let set in freezer to make vegan milk chocolate bars!
How to store the vegan Schoko-bons slices
These no-bake vegan Schoko-bons are so delicious and addictive that I can bet they won’t last long in your fridge!
You can either store the slices in fridge or in freezer, depending on how long you want to keep them. Simply place the cut slices in a clean and dry airtight container, cover and place in the fridge or in the freezer.
The slices will keep 1-2 weeks in fridge and up to one month in freezer. Check the color and smell of the coconut cream layer prior to consume. Coconut products are delicate and can go rancid if not stored in the right conditions.
If you freeze the slices, remove them from the freezer 5 minutes before eating to soften at room temperature.
I love to prepare a whole batch and keep them in my freezer to always have a healthy and delicious after-dinner treat ready to eat.
For more delicious and healthy raw treats, check these recipes:
- Raw Carrot Cake Slices, GF & refined-sugar free
- Raw Coconut, Avocado and Lime mini pies, GF & refined-sugar free
- Toasted Buckwheat and Squash Squares, GF & refined-sugar free
- Coconut Chocolate Chips Cookie Dough Squares, GF & refined-sugar free
- Lemon and Poppy seeds Cheesecake, GF & refined-sugar free
I love to see your creations! Don’t forget to tag me @alicepages on your photos on Instagram and give your feedback in the comments below if you make this recipe at home! Your opinion is my best reward.
No-Bake vegan Schoko-bons slices
No-bake vegan slices that taste like your favorite milk chocolate candies! An incredibly rich and satisfying coconut and hazelnut layer sandwiched between two coatings of creamy vegan milk chocolate. A delicious treat for Easter, and not only.
- Total Time: 1 hour 25 minutes
- Yield: 9 slices
Ingredients
Coconut Hazelnut cream
- 3 cups shredded coconut, I used this KoRo organic coconut
- 3/4 cup full fat thick coconut cream
- 1 tbsp melted coconut oil, I used this KoRO organic coconut oil
- 2 tbsp maple syrup, I used this KoRo organic premium maple syrup
- 1/4 cup crushed roasted hazelnuts
Vegan Milk chocolate
- 1/2 cup melted coconut oil, I used this KoRO organic coconut oil
- 1/2 cup full fat coconut cream
- 1/4 cup cocoa powder, unsweetened
- 1/4 cup coconut sugar
- 1 pinch of salt
Instructions
Coconut Hazelnut cream
- Line a 6×6 inch pan with parchment paper, set aside.
- In a food processor or a high speed blender, blend the shredded coconut alone until you get a fine powder. Then add the coconut cream, melted coconut oil and maple syrup. Blend together until a thick and creamy dough forms. This should take about 2-3 minutes depending on the power of your food processor.
- Transfer the coconut dough in a mixing bowl and fold in the crushed roasted hazelnuts. Mix by hand to incorporate.
- Place the dough into the prepared pan and press it in an even and compact layer, using your hands or a spatula. Smooth and flat the surface. Place in the freezer for 20 minutes to firm up. In the meantime, prepare the chocolate.
Vegan Milk Chocolate
- Add the coconut sugar to a high speed blender and blend on high until a fine powder is achieved.
- Add the powdered coconut sugar, melted coconut oil, coconut cream, cocoa powder and salt to the cup of an immersion blender. Blend back and forth to combine, until smooth and creamy. Divide the chocolate preparation in two equal parts.
Assembly
- Remove the pan from the freezer and pour one half of the chocolate on top. Immediately spread it using a spatula to totally cover the coconut layer, and smooth the surface to form an even layer. Return in the freezer to set, about 20 minutes.
- Once the chocolate layer has firmed, carefully remove from the baking dish, flip and place back in the dish. Now, the chocolate layer is at the bottom and the coconut layer is on top.
- Pour the other half of chocolate on top, spread and return to the freezer to set for about 20 minutes.
- Remove from fridge and carefully remove from the dish. Place on a clean cutting board and slice into squares.
- Store in fridge in an airtight container and remove from the fridge 5 minutes before eating to soften.
Notes
- Store the slices in an airtight container in fridge for up to 2 weeks, or in freezer for 1 month or more.
- For a low sugar recipe, you can omit the maple syrup in the coconut cream layer.
- For a very thick and creamy coconut layer, I recommend to use full fat coconut cream, made of at least 85% of coconut. For best results, place the can of coconut cream to chill in fridge the day before, and scoop the thick layer that has formed on top.
- Prep Time: 25 minutes
- Cook Time: 1 hour
- Category: dessert
- Method: Freezer
Recette version française
PrintCarrés Vegan sans cuisson façon Schoko-bons
Ces carrés vegan et sans cuisson vous rappelleront vos bonbons au chocolat préférés! Ils sont composés d’une crème coco noisette riche et fondante, entourée de deux couches de délicieux chocolat au lait ultra onctueux. Un petit plaisir sans faim!
- Total Time: 0 hours
- Yield: 9 carrés
Ingredients
Crème coco noisette
- 220 g de noix de coco râpée, j’ai utilisé la noix de coco râpée bio KoRo
- 180 g de crème de coco entière
- 15 g d’huile de coco fondue, j’ai utilisé l’huile de coco bio KoRo
- 40 g de sirop d’érable, j’ai utilisé le sirop d’érable bio KoRo
- 40 g de noisettes torréfiées concassées
Chocolat au lait vegan
- 75 g d’huile de coco fondue, j’ai utilisé l’huile de coco bio KoRo
- 100 g de crème de coco
- 25 g de cacao en poudre
- 35 g de sucre de coco
- 1 pincée de sel
Instructions
Crème coco noisette
- Chemiser le fond d’un moule carré de dimensions 16×16 cm avec du papier cuisson.
- Placer la noix de coco râpée dans le bol d’un mixeur ou d’un blender, et mixer jusqu’à obtenir une très fine poudre. Puis ajouter la crème de coco, l’huile de coco fondue et le sirop d’érable et mixer jusqu’à obtenir une pâte épaisse et crémeuse. Cela peut prendre entre 2 et 3 minutes en fonction de la puissance de votre mixeur.
- Transférer la crème de coco dans un saladier et incorporer les noisettes torréfiées concassées.
- Verser la préparation dans le plat chemisé et bien étaler avec les mains ou une spatule, de façon à former une couche compacte, uniforme et lisse. Placer au congélateur pour 30 minutes. Pendant ce temps, préparer le chocolat.
Chocolat au lait vegan
- Mixer le sucre de coco dans un blender jusqu’à obtenir une très fine poudre.
- Placer le sucre de coco en poudre, l’huile de coco fondue, la crème de coco, le cacao en poudre et le sel dans le bol d’un mixeur plongeant. Mixer en effectuant un mouvement de va-et-vient jusqu’à obtenir un chocolat parfaitement lisse et onctueux. Diviser la préparation en deux quantités égales.
Assemblage
- Retirer le plat du congélateur et verser la moitié du chocolat par-dessus. Répartir le chocolat de façon à recouvrir complètement la couche coco, et lisser la surface à l’aide d’une spatule. Placer le plat au congélateur pendant 20 minutes, jusqu’à ce que le chocolat ait durci.
- Une fois que la couche de chocolat est bien ferme, retirer le plat du congélateur et démouler avec précaution. Retourner et repositionner dans le même plat: la couche chocolat est maintenant dans le fond du plat, et la couche coco apparente au dessus.
- Verser le restant de chocolat dessus comme précédemment, répartir sur toute la surface et placer de nouveau au congélateur pour 20 minutes supplémentaires.
- Une fois que le chocolat est dur, retirer du congélateur et démouler avec précaution. Placer sur une planche à découper propre et détailler en carrés réguliers.
- Conserver dans une boite hermétique au réfrigérateur, et sortir 5 minutes avant de déguster.
Notes
- Les carrés se conservent dans une boite hermétique pendant 1 semaine au réfrigérateur et jusqu’à 1 mois ou plus au congélateur.
- Pour une recette très faible en sucre, vous pouvez retirer le sirop d’érable dans la crème coco noisette.
- Pour une crème coco noisette très épaisse et onctueuse, je recommande d’utiliser de la crème de coco entière, à teneur minimum 85% de noix de coco. Pour un résultat optimal, placez une conserve de crème de coco au frais la veille pendant toute une nuit, puis récupérer la couche épaisse qui s’est formée au dessus.
- Prep Time: 25 minutes
- Cook Time: 1 heure
- Category: Dessert
- Method: Congélateur


Omg, dying over these! What gorgeous photos as well!
Thank you so much my dear! That really means a lot! These slices made the perfect healthy treat for Easter this weekend. They didn’t stay for a long in the fridge 🙂
Hi, I loved this recipe but do you know how many calories it has??
Hi Iveta! I’m so glad you like this recipe. I don’t know exactly about the macros for this recipe, but I can tell you it’s a pretty healthy alternative to industrial candy bars which are packed with refined sugars and oils. These bars are made with only natural and simple ingredients 🙂 Enjoy!
Bonjour, mon fils n’est pas fan de la noix de coco… Par quoi puis-je remplacer la noix de coco râpée et la crème de noix de coco pour avoir un goût plus neutre ?
Bonjour Virginie,
Malheureusement cette recette est spécifiquement orientée autour du coco, je crains qu’il ne soit très compliqué voir impossible de substituer la noix de coco par un autre ingrédient. J’aurais tendance à dire que des noix de cajou mixées en purée à la place de la noix de coco râpée pourrait fonctionner, mais il faudra à minima garder la crème de coco (ou la remplacer par de l’huile de coco désodorisée, donc qui n’a pas le gout de coco). Mais les quantités risquent de changer et je ne pourrais pas garantir le rendu!