

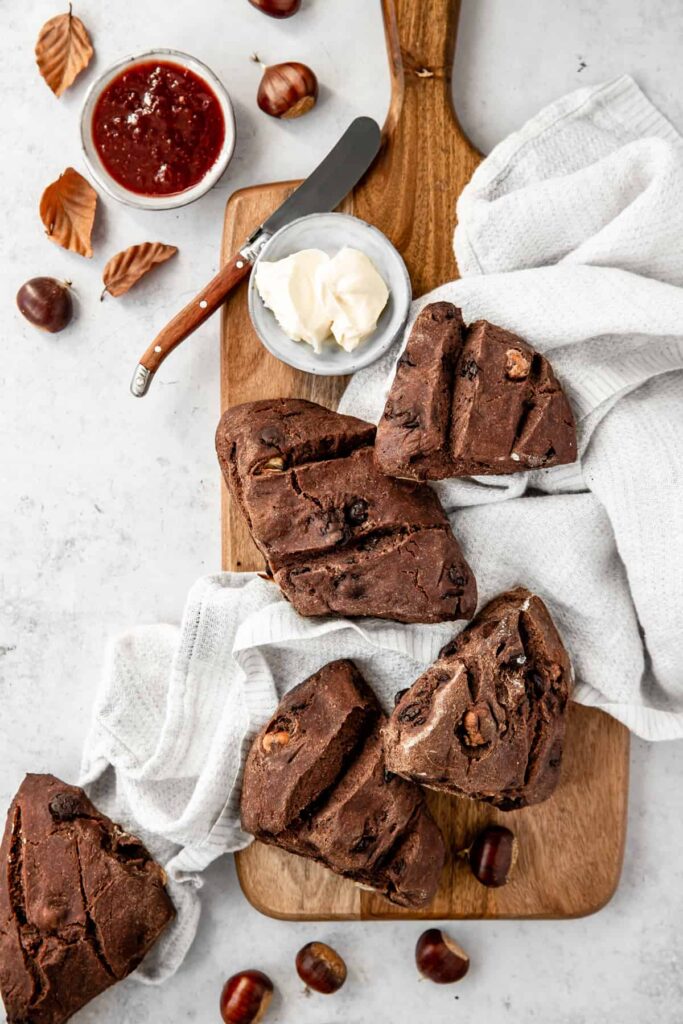
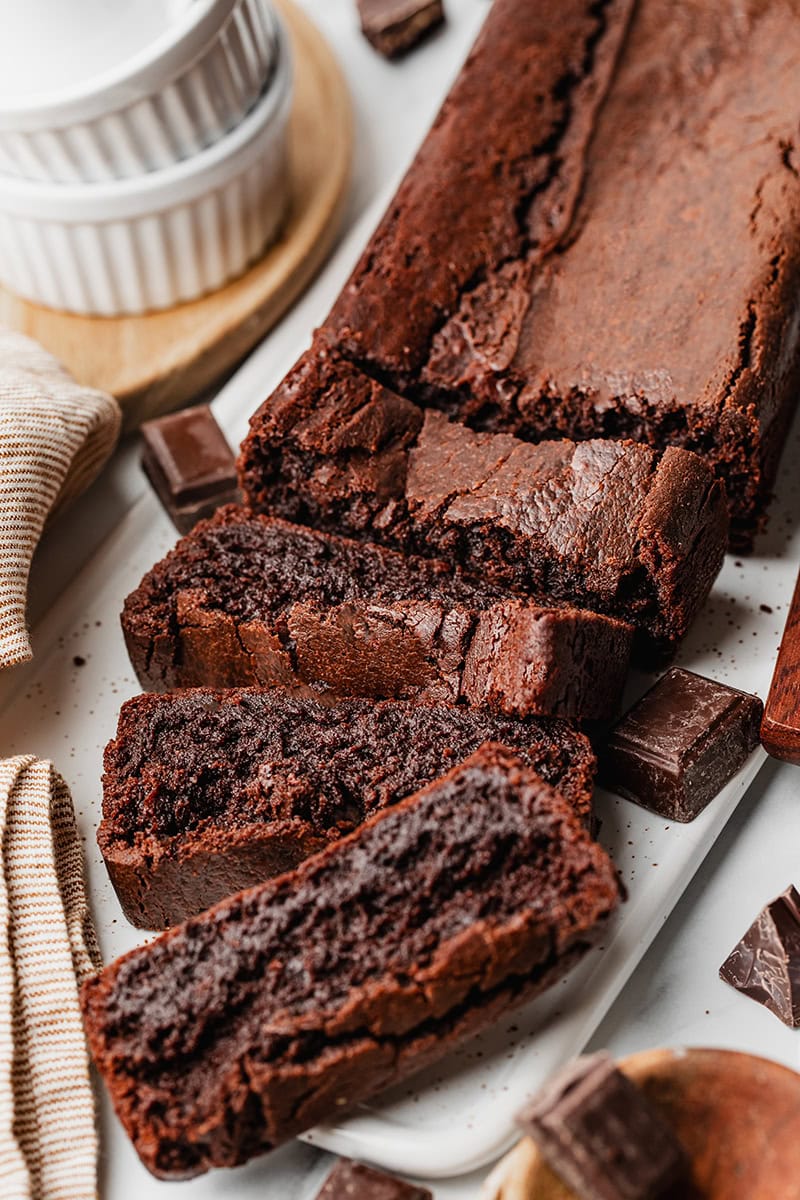
These double chocolate buns will quickly become a staple of your Sunday brunch table! They are soft, just slightly sweetened, loaded with chocolate flavors and crunchy hazelnuts. They are SO easy to make with only 6 simple ingredients and no specific equipment, so that everybody can enjoy freshly baked buns at home.
This post is sponsored by KORO, a European online shop that promotes healthy, high quality and sustainable products. For more information about the brand and its values, visit their website and enjoy 5% OFF everything on the FRENCH store using the code ALICE5.
Cette recette est sponsorisée par KORO, une boutique en ligne qui propose un large choix de produits sains, responsables et de haute qualité à prix juste. Pour découvrir la marque et ses merveilleux produits, rendez-vous sur leur boutique et profitez de 5% DE REDUCTION avec le code ALICE5.

Simple and Easy Chocolate Buns
Forget all your prejudices about bread! These double chocolate buns are SO simple that everybody can make them at home and enjoy a bunch of delicious freshly baked bread for breakfast!
I know how baking can seem impressive when you’re not very familiar with this. And bread baking more specifically is again an other level! Many people, including me for a very long time, are convinced that only bakers can make bread. And that you need super specific equipment and skills to realize a good bread. Big news: that’s wrong. Even if I absolutely love going to the bakery, smelling the fragrant of freshly baked bread and spending minutes in front of the counter to choose THE one, there’s nothing like homemade bread.
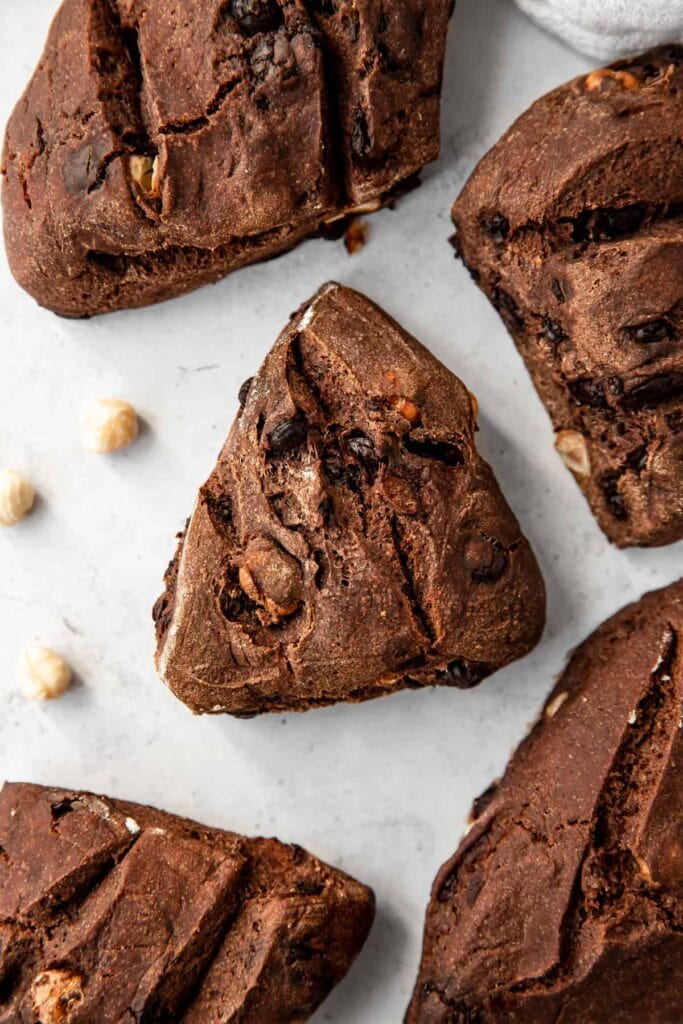
There is nothing very complicated in making a good bread. Just a few steps and rules to follow. For these chocolate buns, I’ve cut all the “extra” steps that would have made the recipe more complicated to keep only the essential. Also I kept the ingredients list as short as possible, with only simple products you can easily found. The base is made with strong flour (also called bread flour) and chestnut flour for a delicious nutty flavor. And because I know how much you LOVE chocolate, I’ve added cocoa powder and chunks of dark chocolate in the dough. So good!
And guys, I can promise that once you’ll have done this recipe once, these cute chocolate buns will be on your brunch table every Sunday morning!
How to make Double Chocolate Buns
You will be amazed to see how easy these double chocolate buns are to make! Just follow the steps detailed in the recipe below, and I can promise you will end up with delicious buns worthy of freshly baked ones!
Prepare the dough
- Start by mixing together water and yeast until combined and no lumps remain. You can use a small whisk. Set aside.
- Place all the dry ingredients (strong flour also called bread flour, chestnut flour, cocoa powder and salt) in the bowl of a standing mixer, and mix to combine. This is important to mix only the dry ingredients before to ensure the baking powder is evenly spread in the dough.
- Pour the yeast and water mixture to the dry ingredients.
- with a stand mixer : Mix using the hook attachment of the stand mixer on low-medium speed for 5-10 minutes or until the dough is soft and pulls away from the sides of the bowl.
- without a stand mixer : If you don’t have a stand mixer you can make the dough by hand. Simply mix the ingredients until roughly combined then transfer to a flat surface and knead by hand for at least 10 minutes. In both case, make sure you knead the dough longer enough so that it is soft, elastic and not sticky.
- Fold in chocolate chips and roasted hazelnuts and keep kneading for a few more seconds until just combined.
- Place the dough in a bowl lightly brushed with oil, cover and let sit in the fridge for 6 hours to allow the dough to ferment and the flavors to develop. If you don’t have time for a long rising, simply lettuce dough rise in a warm place for 1,5-2 hours or until doubled in size.
Bake the dough
- Preheat the oven to the maximal temperature allowed by your oven and line a baking sheet with parchment paper.
- Transfer the dough to a floured surface and divide into 6 equals diamond shaped portions. Don’t overwork the dough at this stage! Place the portions of dough on the prepared baking sheet and using a razor blade or a sharp knife, score the top of each piece of dough.
- Place in the oven and immediately spray the interior walls of the oven and the baking sheet with water. Bake for 12-15 minutes until the dough has risen. To check doneness, flip a bun and tap the bottom: if it sounds hollow, then it’s done! Place the buns on a wire rack to cool completely.
- These chocolate buns are best enjoyed on the same day. But they’ll keep well for up to 3 days wrapped in a clean towel or stored in a dry airtight container at room temperature.

Tips for making this recipe perfectly
This recipe is very simple to make, with no tricky step or specific equipment, so that everybody can make it easily at home! But here are a few little tips of mine for baking your chocolate buns perfectly:
- Use a scale – as far as possible, use a scale to precisely mesure the ingredients rather than relying on the cups and tablespoon measuring system. When making bread, one gram can make all the difference!
- Prepare the dough the day before – while this is not obligated, I highly recommend you to schedule your recipe and prepare the dough the day before if you have time! Letting the dough to rise slowly in the refrigerator overnight allows the fermentation and the deep cocoa and chestnut flavors to develop. This doesn’t had any complexity to the recipe, you just need a little more time.
- Roast the hazelnuts – this can sound like a tiny detail but I promise it makes all the difference! Simply roast the whole hazelnuts in a skillet or in oven until browned and fragrant to boost their flavor and give them a crunchy texture.
- Score the dough – before you put the buns in the oven, don’t forget to score them using a sharp knife or a razor blade. This will help the dough to develop during the baking. For these chocolate buns which contain less gluten than regular bread, score only on the top to avoid the dough to spread.
- Use the right oven mode – always bake the bread in traditional oven mode (not forced or pulsed heat) to keep moisture.
- Add moisture – spray the inside of the oven with water right after adding the bread to bring moisture and avoid the dough to dry too fast, what would limit its expansion.
- Check if the buns are baked – to verify if the buns are well baked, flip one bun and tap the bottom: if it sounds hollow, then it’s done! Else, extend the baking by a few minutes.

More chocolate recipes you’ll love
- Mini Chocolate Loaf Cakes w/ caramel sauce GF & oil-free
- Nutella Chocolate Hazelnut Granola GF
- Salted Caramel Brownie Cookies GF
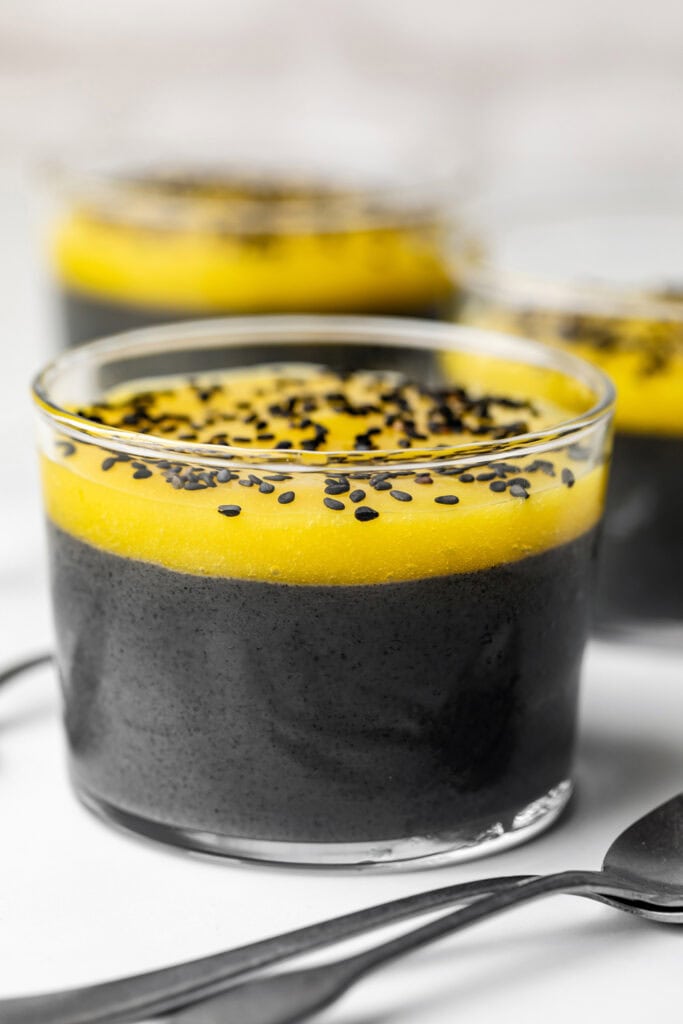
- Chocolate Smoothie Bowl GF
- Flourless Peanut Butter Brownie Mug Cake GF & oil-free
I love to see your creations! Don’t forget to tag me @alicepages on your photos on Instagram and give your feedback in the comments below if you make this recipe at home! Your opinion is my best reward.
PrintDouble Chocolate Buns
These easy double chocolate buns bread with cocoa powder and big chocolate chunks in the dough are perfect for breakfast or for a delicious afternoon snack.
- Prep Time: 7 hours
- Cook Time: 15 minutes
- Total Time: 7 hours 15 minutes
- Yield: 6 buns
- Category: Bread
- Method: Oven
- Cuisine: French
- Diet: Vegan
Ingredients
- 1 1/2 cup strong flour (200 g)
- 1 cup chestnut flour (100 g)
- 3 tbsp unsweetened cocoa powder
- 1 tsp salt
- 1 cup water, lukewarm
- 9 g fresh yeast, or 3 g dry instant yeast
- 1/3 cup dark chocolate chips or chunks
- 1/4 cup roasted hazelnuts
Instructions
- In a bowl, stir together water and yeast until combined and no lumps remain.
- Place the strong flour, chestnut flour, cocoa powder and salt in the bowl of a standing mixer, and mix to combine.
- Pour the yeast and water preparation and mix using the hook attachment on low-medium speed for 5-10 minutes or until the dough is soft and elastic and pulls away from the sides of the bowl. Alternatively, mix the ingredients until roughly combined then transfer to a flat surface and knead by hand for at least 10 minutes.
- Then add chocolate chips and roasted hazelnuts and keep kneading for a few more seconds until combined.
- Place the dough in a bowl lightly brushed with oil, cover and let sit in the fridge for 6 hours to allow the dough to ferment and the flavors to develop. For a quick version, let rise in a warm place for 1,5-2 hours or until doubled in size.
- When the dough has risen (in fridge or in a warm place), preheat the oven to maximal temperature and line a baking sheet with parchment paper.
- Transfer the dough to a floured surface and divide into 6 equals portions and shape each one into a diamond. Place the portions of dough on the prepared baking sheet and using a razor blade or a sharp knife, score the top of each piece of dough.
- Place in the oven and immediately spray with water. Bake for 12-15 minutes until the dough has risen. To check doneness, flip a bun and tap the bottom: if it sounds hollow, then it’s done! Place the buns on a wire rack to cool completely.
- Buns are best on the same day, but they’ll keep for up to 3 days wrapped in a clean towel or stored in a dry airtight container at room temperature.
Recette version française
PrintPetits pains au chocolat
Ces petits pains au chocolat et à la farine de châtaigne sont faciles à réaliser et riches en saveurs cacaotées. Ils sont parfaits pour le petit-déjeuner ou pour un goûter sain et gourmand.
- Prep Time: 7 heures
- Cook Time: 15 minutes
- Total Time: 7 heures 15 minutes
- Yield: 6 petits pains
- Category: Pain
- Method: Four
- Cuisine: Française
- Diet: Vegan
Ingredients
- 200 g de farine de blé T80
- 100 g de farine de châtaigne
- 20 g de cacao en poudre
- 1 c. à c. de sel
- 240 ml d’eau à température ambiante
- 9 g de levure fraiche ou 3 g de levure sèche
- 50 g de pépites ou morceaux de chocolat noir
- 40 g de noisettes torréfiées
Instructions
- Délayer la levure dans l’eau afin d’obtenir un mélange sans grumeaux.
- Dans le bol d’un robot pâtissier ou dans un grand saladier, mélanger la farine de blé, la farine de châtaigne, le cacao en poudre et le sel, et remuer.
- Verser le mélange eau levure dans le bol d’ingrédients secs et pétrir avec l’accessoire crochet du robot pendant 5 à 10 minutes, ou jusqu’à ce que la pâte soit bien lisse et souple. A défaut, mélanger avec une spatule pour incorporer les ingrédients puis finir de pétrir à la main pendant au moins une dizaine de minutes.
- Ajouter les pépites de chocolat et les noisettes torréfiées grossièrement concassées, et mélanger pour incorporer les ingrédients dans la pâte.
- Former une boule, la déposer dans le saladier, couvrir et laisser reposer 6 heures au réfrigérateur afin de permettre à la pâte de fermenter et aux saveurs de se développer. Pour une version express, laisser pousser pendant 1h30 à 2h à dans un endroit chaud jusqu’à ce que la pâte double de volume.
- Quand la pâte a bien poussé (au frais ou au chaud), faire chauffer le four à température maximale et chemiser une plaque de cuisson de papier sulfurisé.
- Transférer la pâte sur un plan de travail fariné sans la retravailler et façonner 6 pâtons de même taille. Déposer les pâtons sur la plaque de cuisson. A l’aide d’une lame ou d’un couteau bien aiguisé, scarifier les pâtons sur le dessus.
- Enfourner, vaporiser les pâtons avec un peu d’eau, et cuire pendant 12 à 15 minutes jusqu’à ce qu’ils aient gonflé. Pour vérifier la cuisson, retourner un petit pain et tapoter le dessous avec le poing: s’il sonne creux alors il est bien cuit. Déposer les pains sur une grille et laisser refroidir quelques minutes.
- Une fois complètement refroidis, conserver les petits pains enveloppés dans un torchon sec et propre, ou dans une boite hermétique bien sèche jusqu’à 3 jours.


0 Comments