

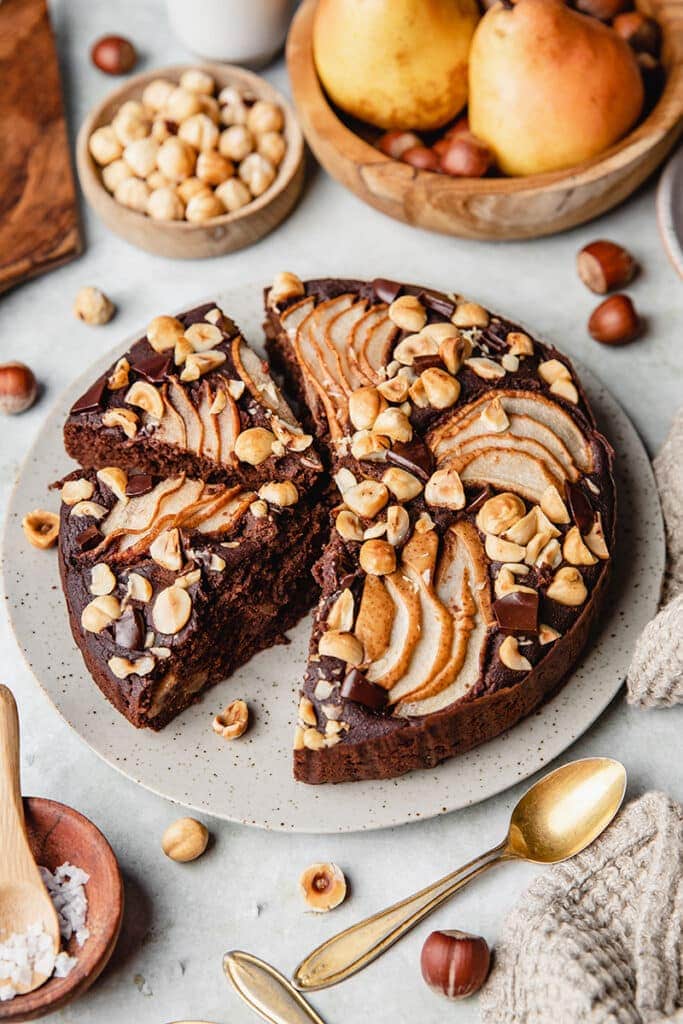
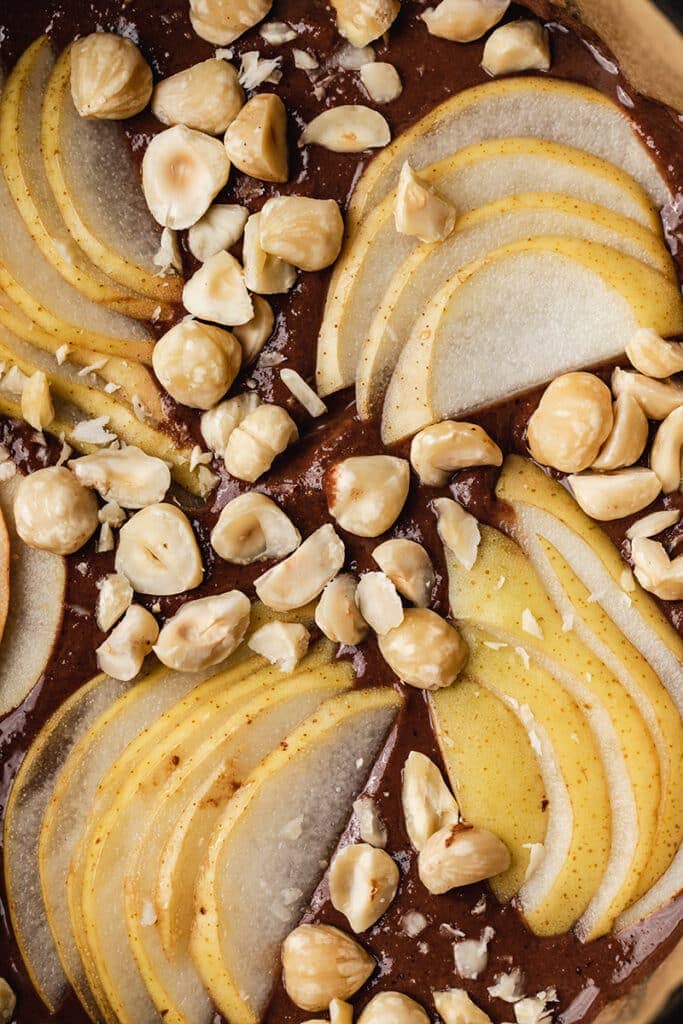
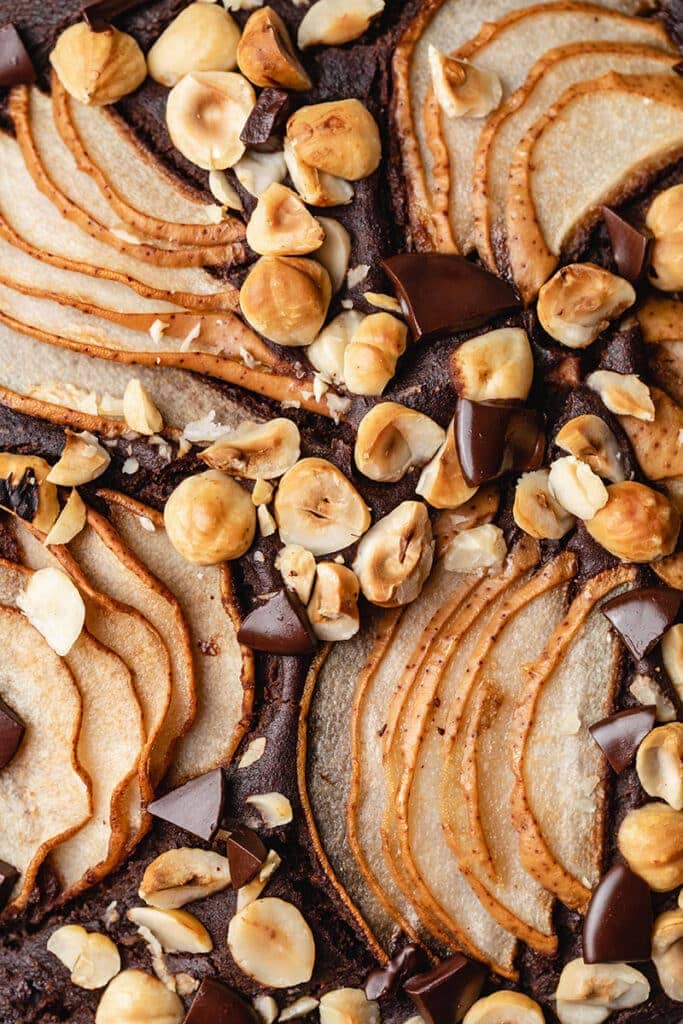
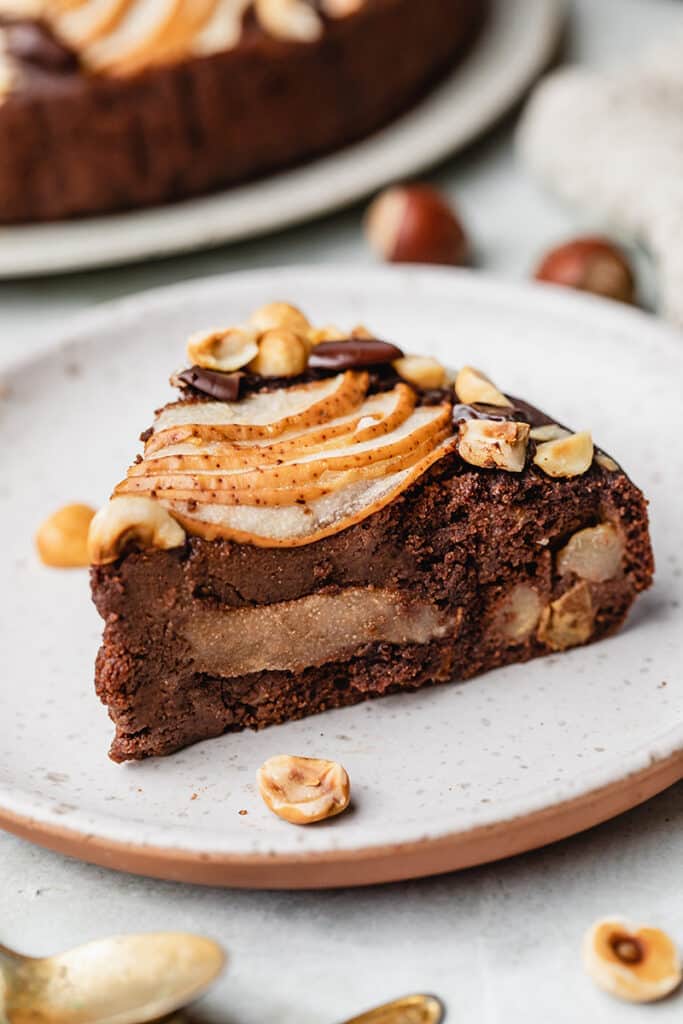
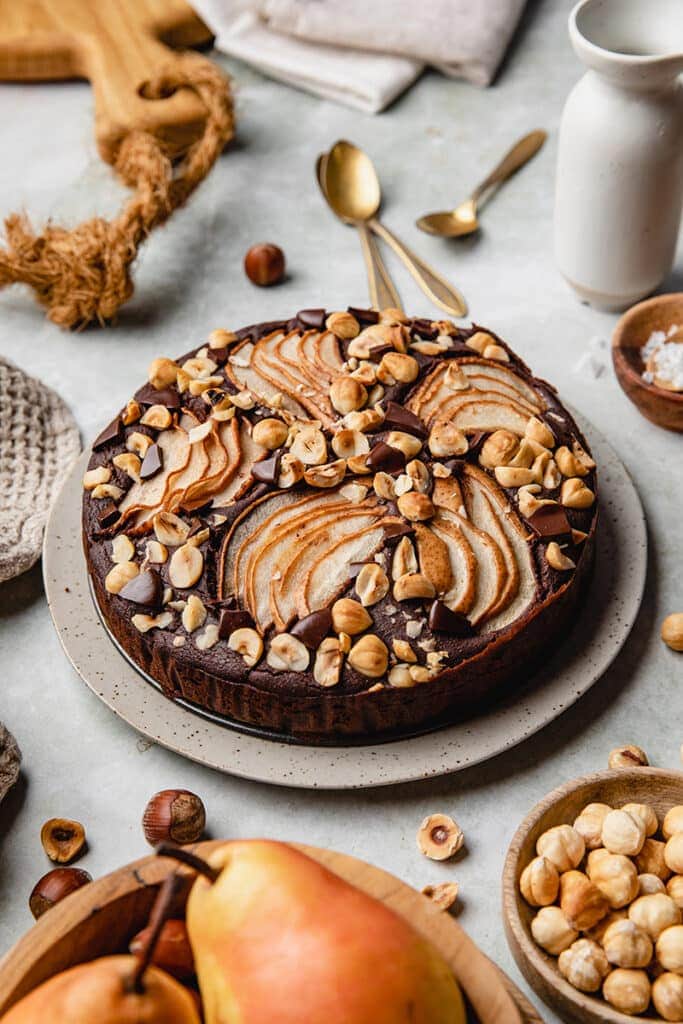
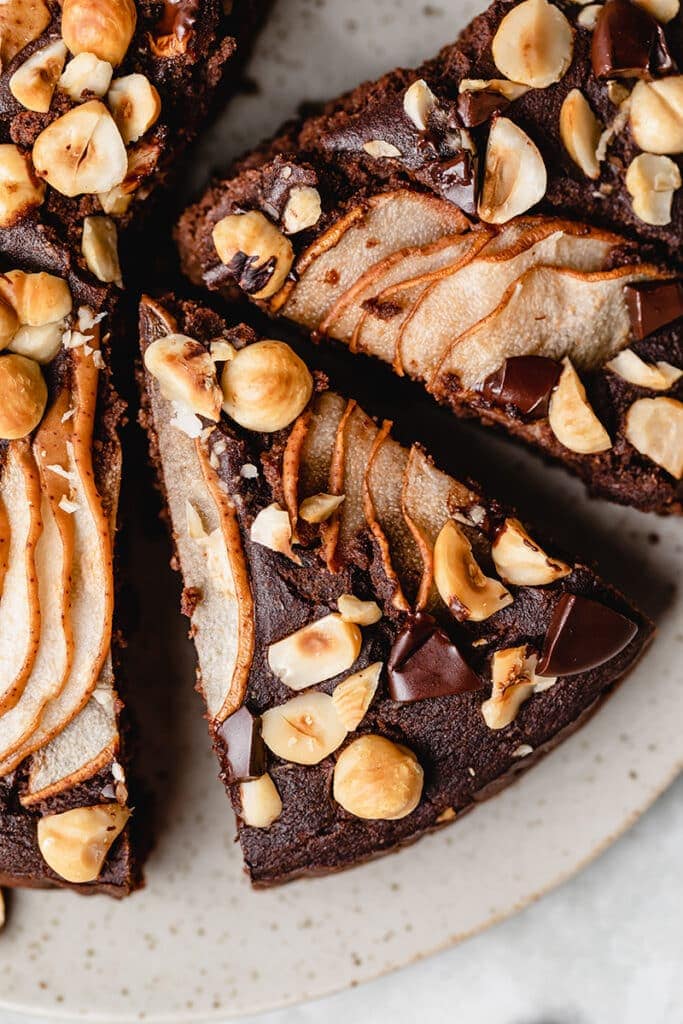
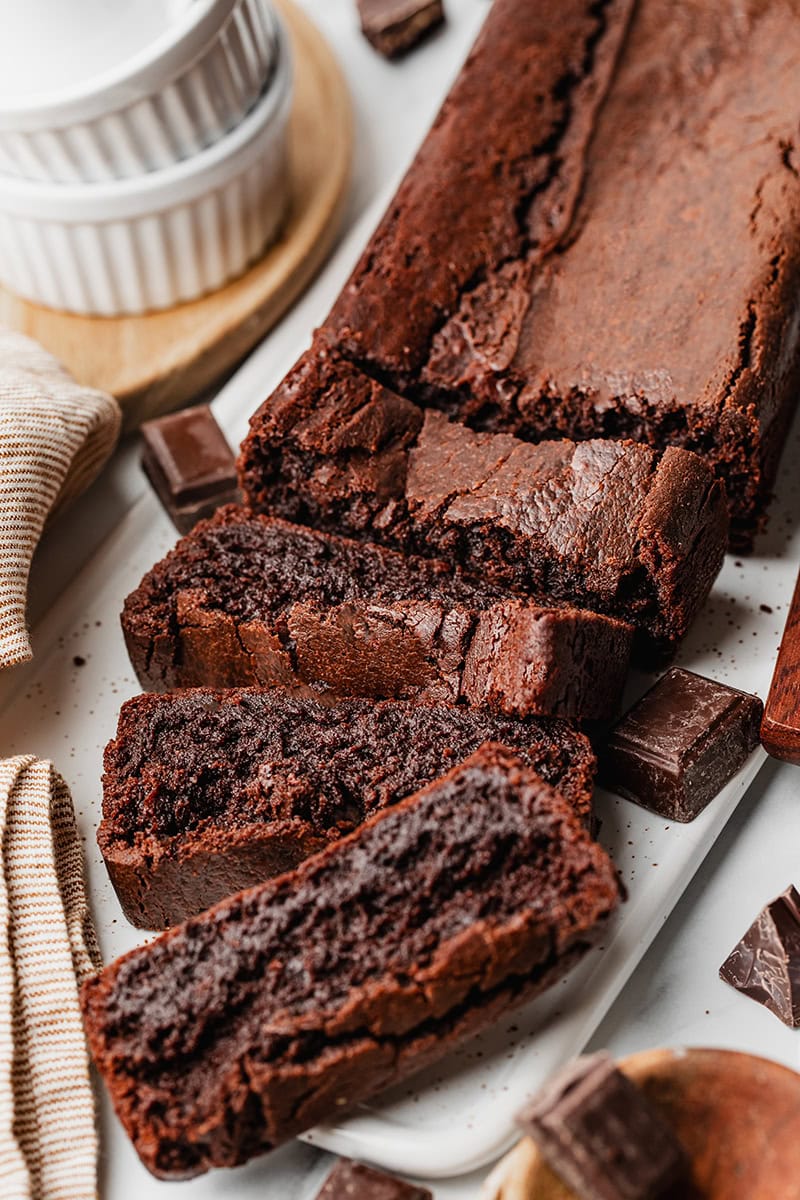
This chocolate pear cake is the quintessence of the best winter flavors in a comforting dessert. It’s moist, fudgy, filled with juicy pear, roasted hazelnuts, and has chocolate in the batter and on the top. It’s baked with olive oil to create a rich flavor, that pairs wonderfully with the bittersweet chocolate. It’s vegan and naturally gluten free and ready to eat in under an hour.
Moist chocolate pear and hazelnut cake
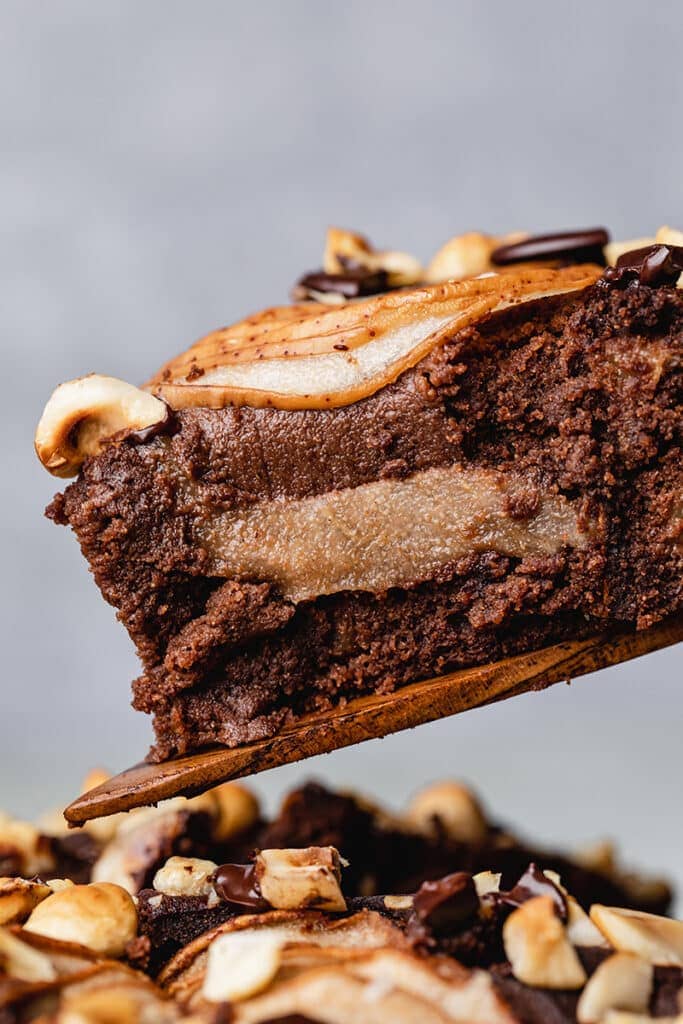
This chocolate pear and hazelnut cake is the quintessence of the best, warming and cozy winter flavors in a regressive and comforting dessert. It’s moist, slightly fudgy, with sweet and juicy fresh pear, crunchy roasted hazelnuts, and chocolate in the batter and on the top. It’s baked with olive oil to create a rich, deep and savory flavor, that pairs wonderfully with the bittersweet chocolate in this cake. Olive oil also makes this chocolate pear cake light and moist.
Since we’re using a combination of rice and corn flours, this chocolate pear cake is completely gluten free, as well as dairy and egg free. It’s lightly sweetened with unrefined sugar, so it’s so light and melty that you’ll keep going back fo more slices.
Not to mention that it’s ridiculously quick and easy to make. The prepping process takes less than 20 minutes, and it’s ready to eat under only an hour!
Ingredients for chocolate pear cake
To make this gluten free chocolate pear cake, you’ll need:
- Brown rice flour – is a light, fine, dry and a little but grainy flour made from rice. It’s naturally gluten free and it’s a great option for baking, often combined with other varieties of flour. I didn’t try to make this recipe with white rice flour, so I can’t ensure the result.
- Corn flour – it’s a yellow powder made from finely ground dried corn. It’s gluten free, has a pleasant fruity flavor, and can be used as other flours. Corn flour and cornstarch are not the same product and can’t be substituted.
- Ground hazelnuts – or hazelnut meal, is a fine grainy powder made up of hazelnuts. It’s not flour. You can also make it by mixing whole hazelnuts. Stop right when you get a dust, before it turns into a purée. Substitute with ground almonds if you can’t find.
- Cocoa powder – I recommend to use a good quality, Dutch processed and unsweetened cocoa powder as it’s a main component of the flavors of this cake.
- Dairy-free milk – I used almond milk, but any unsweetened plant-based milk works.
- Dairy-free yogurt – yogurt brings moisture and makes this chocolate pear cake moist and fudgy. I used natural unsweetened soy yogurt, but you can use any other plant-based yogurt.
- Olive oil – using olive oil created a rich and savory flavor that pairs perfectly with chocolate. Use quality extra virgin olive oil, preferably organic. But if you’re still hesitant or can’t find it, you can also use any other vegetable oil.
- Sugar – I used cane sugar that is light in flavor. You can also use coconut sugar, or any other granulated sugar. You might need to adjust the quantity depending on the sweetening power.
- Pear – if you can, try to use a variety of pear that works best for baking. The varieties vary depending on the country.
- Hazelnuts – use whole raw hazelnuts that you gonna roughly chop. Taste the hazelnuts before to make sure they’re fresh and don’t taste rancid, which could ruin the cake.
- Chocolate – use chopped dark chocolate or chocolate chips to sprinkle on top of the cake after baking.

Tips for making chocolate pear cake
While I think this cake looks very pretty and sophisticated, it takes only about 15 minutes to make it! The process is super simple, it’s only about mixing separately the dry and the wet ingredients, combining the two preparations, folding in the pear, and baking. Here are a few tips that might help you to make the process even easier!
- Weight the ingredients – Well, this is no more a tip since I mention it in all my recipes! But really I can only recommend you to use a kitchen scale to weight the ingredients rather than using measuring cups. I love cups, they’re very helpful for many things, but not accurate enough for baking.
- Quality first – This cake is very focused on the flavors: chocolate, pear and hazelnut. For the best result, it’s important to use good quality ingredients, especially cocoa powder, olive oil, chocolate, hazelnuts and pears. A quality extra virgin olive oil and a good dark chocolate can make all the difference.
- Don’t over mix – When adding the wet preparation to the dry ingredients, use a rubber spatula to gently fold the two together until they’re just combined. Stop when you have an even batter for a moist and fluffy cake. Same thing when you fold in the chopped pear.
- Prepare the pan – Using the right pan is a key factor for a successful result! First, make sure your pan is the right size, between 8 and 9 inches. Regarding the type, I recommend to use a springform pan with removable bottom to make it easier to unmould the cake. Then, carefully grease AND line the bottom and the edges of the pan.
- Cool down – Once baked, allow the cake to cool in the pan for at least 20 minutes, ideally a little more, before to remove it. The cake can be a fragile straight out from the oven so be patient and careful when moving it.
Chocolate pear cake FAQ
Is this cake gluten free?
Yes! This chocolate pear cake is completely gluten free, since rice flour and corn flour are both naturally gluten free flours. It’s also free from dairies, eggs and refined sugar.
Is corn flour the same as cornstarch?
Corn flour and cornstarch are not the same product and can’t be substituted. Corn flour is a yellow powder made from ground dried corn, while cornstarch is a fine white powder made from the starchy part of the corn kernel. The corn flour is used similarly to other flours, whereas the starch is used as a flavorless thickener.
What can I use beside olive oil?
Chocolate and olive oil is a common pairing, and trust me it’s really good! To be honest, you won’t actually taste a strong olive flavor in the cake, it’s very subtle. However, if you’re still hesitant about baking with olive oil (or can’t find it), you can also use any other vegetable oil.
Can I make it ahead?
Yes! This chocolate pear cake keeps pretty well, so you can make and bake it the day before. I would even say that it is better the day after, since time allows the flavors to enhance. It will stay moist for at least 3 days.
How to store chocolate pear cake
Let’s be honest, this cake is so delicious I’m willing to bet that it won’t stick around long! Since it’s light, not too sweet, moist light nearly melting in your mouth, you’ll keep going back for this second serving!
If you plan to eat the cake the same day or the day after, you can simply leave it in a plate, cover and keep it at room temperature. In that case, I recommend not to slice the cake ahead to keep it moist. If you want to keep it longer, place it in an air tight container in the fridge for up to 4 days.
Before to enjoy, you can either warm it up a few seconds in the microwave, or eat it chilled.
For more comforting cakes, check out my:
- Hazelnut and Chestnut Fondant (GF)
- Spice Cake with Walnuts and Plum Caramel
- Gluten free Pumpkin Bread (GF)
- Chocolate Chips Pumpkin Bread
- Healthy Carrot Cake (GF)
- Carob and Tahini Loaf
I love to see your creations! Don’t forget to tag me @alicepages on your photos on Instagram and give your feedback in the comments below if you make this recipe at home! Your opinion is my best reward.
Print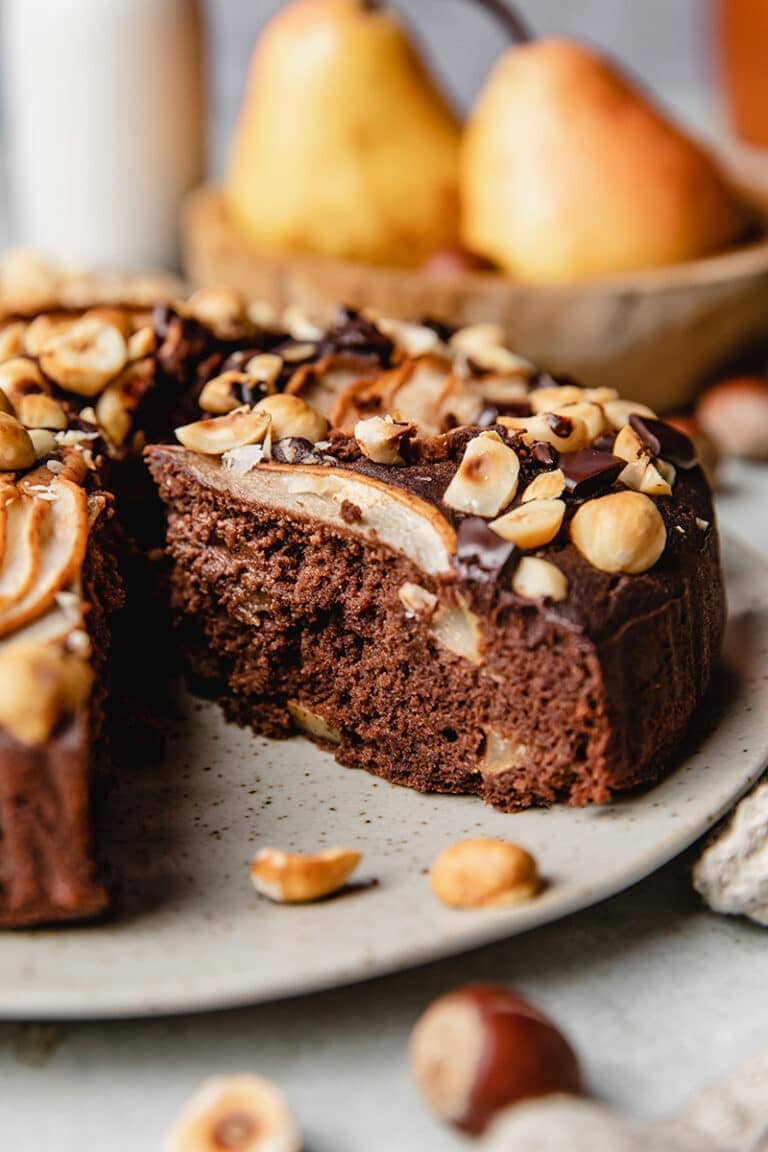
Chocolate Pear Cake
Vegan chocolate pear cake is the quintessence of the best winter flavors in a comforting dessert. It’s moist, filled with pear, hazelnuts, and has chocolate in the batter and on the top. It’s gluten free and ready to eat in under an hour.
- Total Time: 1 hour
- Yield: 8 slices
Ingredients
- 70g brown rice flour
- 60g corn flour *
- 50g ground hazelnuts (meal)
- 30g cocoa powder
- 2 tsp baking powder
- 1/4 tsp ginger powder
- 1/4 tsp ground cardamom
- 1 pinch of salt
- 170ml almond milk
- 90g dairy-free yogurt
- 50g olive oil (or vegetable oil)
- 70g cane sugar
- 1 tsp apple cider vinegar
- 1 tsp vanilla extract
- 2 small pears
- 30g hazelnuts, roughly chopped
- 30g dark chocolate, roughly chopped
Instructions
- Preheat the oven to 350°F / 180°C and grease and line the bottom and the edges of a 8 inch springform cake pan with parchment paper. Set aside.
- In a large mixing bowl, whisk together the brown rice flour, corn flour, ground hazelnuts, cocoa powder, baking powder, ginger, cardamom and salt.
- In another mixing bowl, whisk together the almond milk, yogurt, oil, sugar, vinegar, and vanilla.
- Add the wet preparation to the bowl of dry ingredients and stir until just combined.
- Slice the pears in half and remove the core and seeds. You can keep the skin. Finely chop one of the pear, and thinly slice the other one.
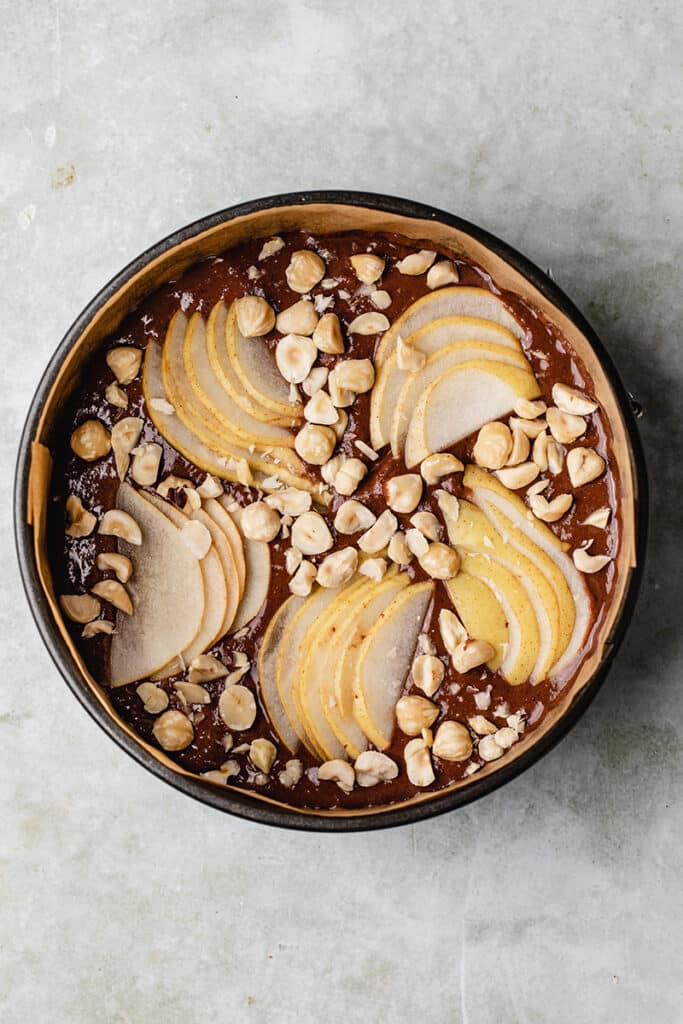
- Gently fold in the chopped pear into the cake batter. Then pour the batter into the prepared pan and spread evenly. Top with the remaining pear slices and chopped hazelnuts.
- Bake for 40 to 45 minutes, until it’s completely set. The top should be dry to touch, and you can check the middle of the cake with the tip of a knife. If the hazelnuts start to brown at the end of the baking time, cover the cake with aluminium foil.
- Remove the cake from the oven and immediately add the chopped chocolate on top. Allow the cake to cool for at least 20 minutes in the pan before to release and place it on a cooling rack to cool completely. Slice and enjoy!
Notes
- Store the cake in an airtight container at room temperature for 1 day or in the fridge for up to 4 days.
- This recipe can be made in a 8 to 9 inches pan. I highly recommend to use a springform pan, so it’s easier to release the cake from the pan once baked. Carefully grease the pan and line the bottom and edges with a round of parchment paper.
- * This recipe calls for corn flour and not cornstarch which is not the same. Check the article for more detailed ingredients substitutions.
- Prep Time: 15 minutes
- Cook Time: 45 minutes
- Category: Dessert
- Method: Baking
- Diet: Vegan
Recette version française
Print Gâteau moelleux poires noisettes chocolat
Ce moelleux au chocolat, poires et noisettes est la quintessence même des saveurs de l’hiver, dans un dessert gourmand et réconfortant. A la fois moelleux et fondant, riche et léger, fruité et intense. Il est vegan, sans gluten et prêt à être dégusté en moins d’une heure!
- Total Time: 1 hour
- Yield: 8 parts
Ingredients
- 70g de farine de riz brun
- 60g de farine de maïs *
- 50g de noisettes en poudre
- 30g de cacao en poudre
- 8g de levure chimique
- 1/2 cuillère à c. de cardamome moulue
- 1/2 cuillère à c. de gingembre en poudre
- 1 pincée de sel
- 170ml de lait d’amande
- 90g de yaourt végétal
- 50g d’huile d’olive (ou huile végétale neutre)
- 70g de sucre de canne (ou de coco)
- 1 cuillère à s. de vinaigre de cidre
- 1 cuillère à c. d’extrait de vanille
- 2 petites poires
- 30g de noisettes concassées
- 30g de chocolat noir en morceaux
Instructions
- Préchauffer le four à 180°C. Huiler et chemiser le fond et les bords d’un moule à manqué de 19 cm de diamètre environ, avec du papier cuisson.
- Dans un grand saladier, mélanger la farine de riz, la farine de maïs, les noisettes en poudre, le cacao, la levure, le gingembre, la cardamome et le sel.
- Dans un saladier à part, mélanger le lait, le yaourt, l’huile, le sucre, le vinaigre et la vanille.
- Verser la préparation dans le saladier d’ingrédients secs et mélanger avec une spatule pour juste obtenir une pâte homogène, sans trop la travailler.
- Couper les poires en deux et retirer le centre. Vous pouvez garder la peau. Couper une des poires en petits cubes, et l’autre en tranches fines.
- Ajouter les cubes de poires dans la pâte, et mélanger délicatement pour les incorporer. Verser ensuite la pâte dans le moule et la répartir également. Décorer avec les tranches de poire et garnir avec les noisettes grossièrement concassées.
- Enfourner pendant 40 à 45 minutes, jusqu’à ce que le gâteau soit cuit. La surface doit être sèche au toucher et le centre cuit mais encore un peu humide. Si les noisettes commencent à trop brunir en fin de cuisson, couvrir avec une feuille d’aluminium.
- Retirer du four et ajouter aussitôt les morceaux de chocolat au dessus, pour qu’ils fondent. Laisser le gâteau refroidir dans le moule pendant au moins 20 minutes. Puis démouler et déposer le gateau sur une grille jusqu’à refroidissement complet. Couper en parts et déguster!
Notes
- Ce gâteau moelleux poires noisettes chocolat se conserve pendant 1 à 2 jours à température ambiante, et jusqu’à 4 jours au réfrigérateur dans un récipient hermétique.
- J’ai utilisé un moule de 19 cm de diamètre pour réaliser cette recette, mais un diamètre entre 18 et 21 cm devrait convenir. Je recommande fortement d’utiliser un moule à manqué, bien chemisé, pour faciliter le démoulage.
- *Attention à ne pas confondre la farine de maïs et la fécule de maïs qui ne sont pas le même produit et non interchangeables. Rendez-vous dans l’article pour plus de précision sur les substitutions d’ingrédients possibles.
- Prep Time: 15 minutes
- Cook Time: 45 minutes
- Category: desserts
- Method: Four
- Diet: Vegan


0 Comments