

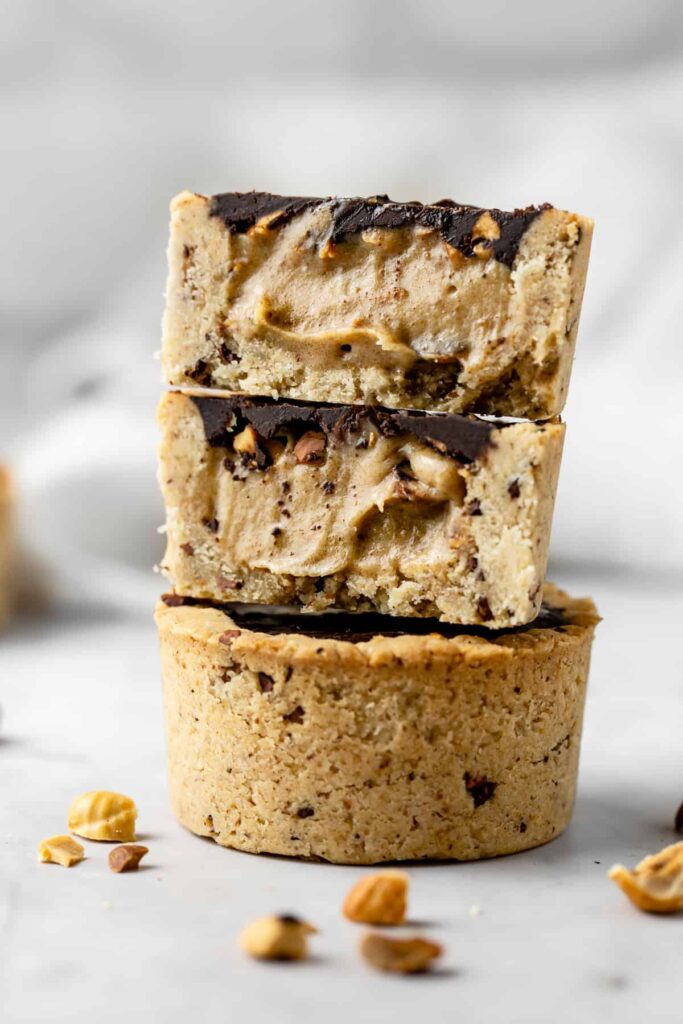
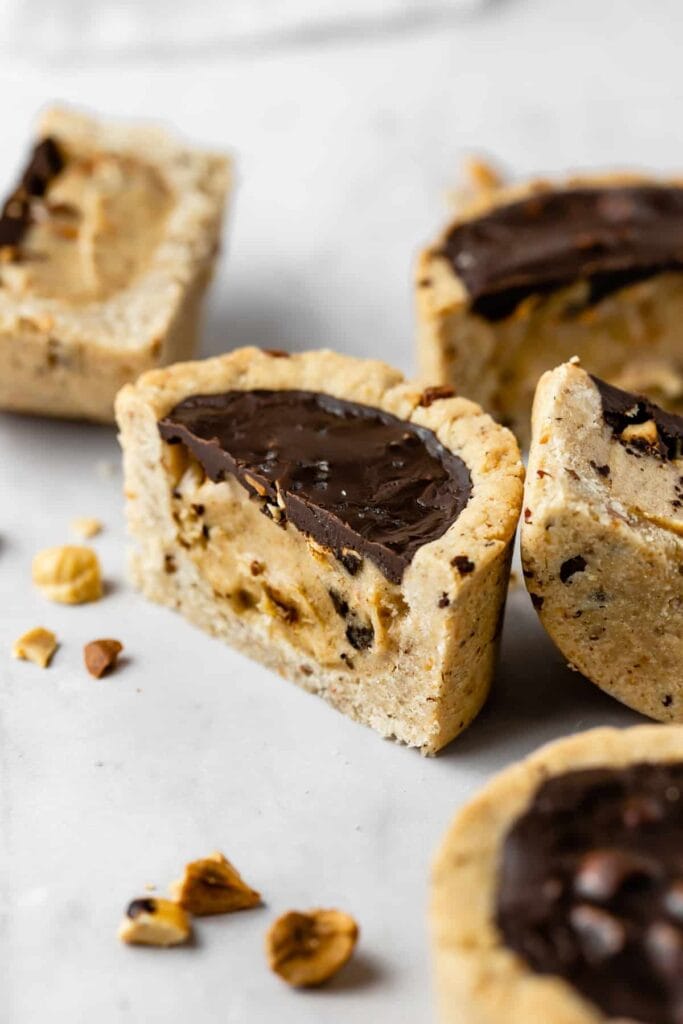
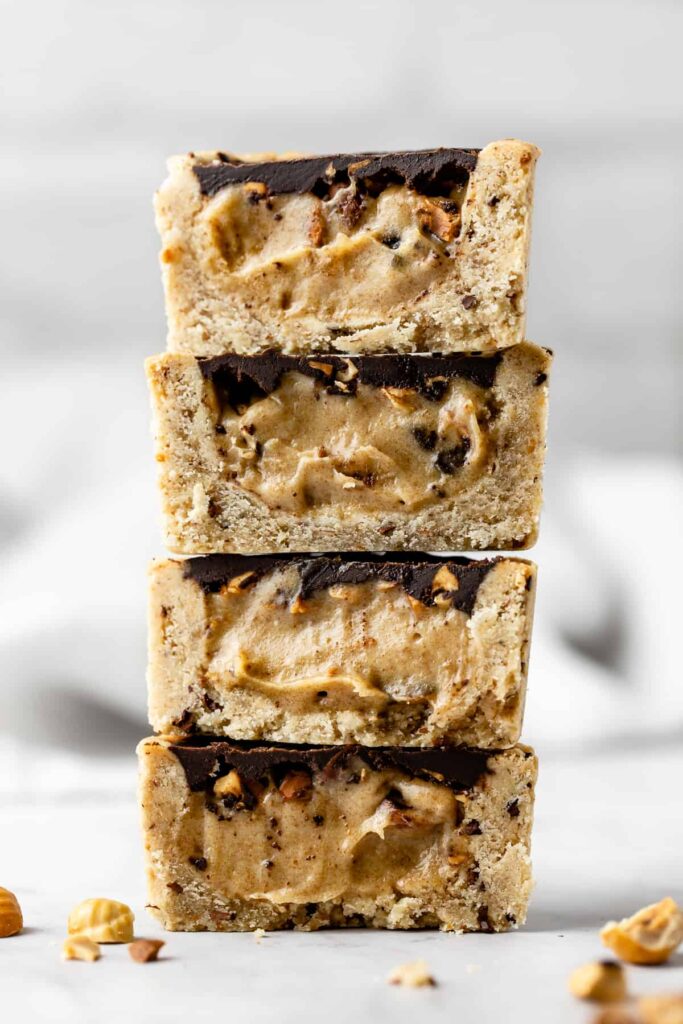
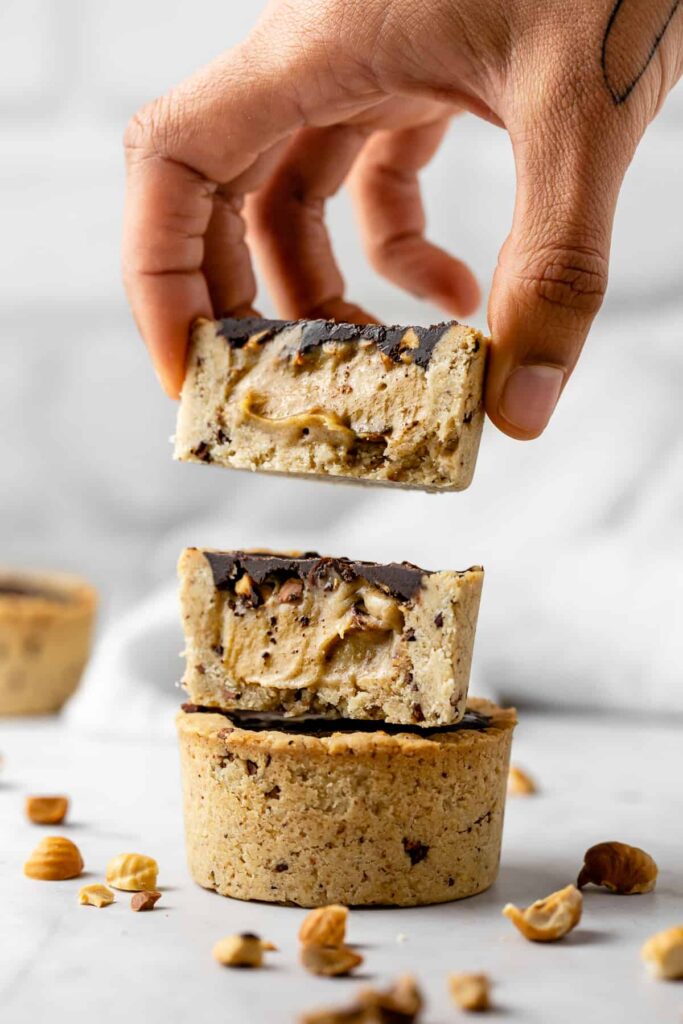
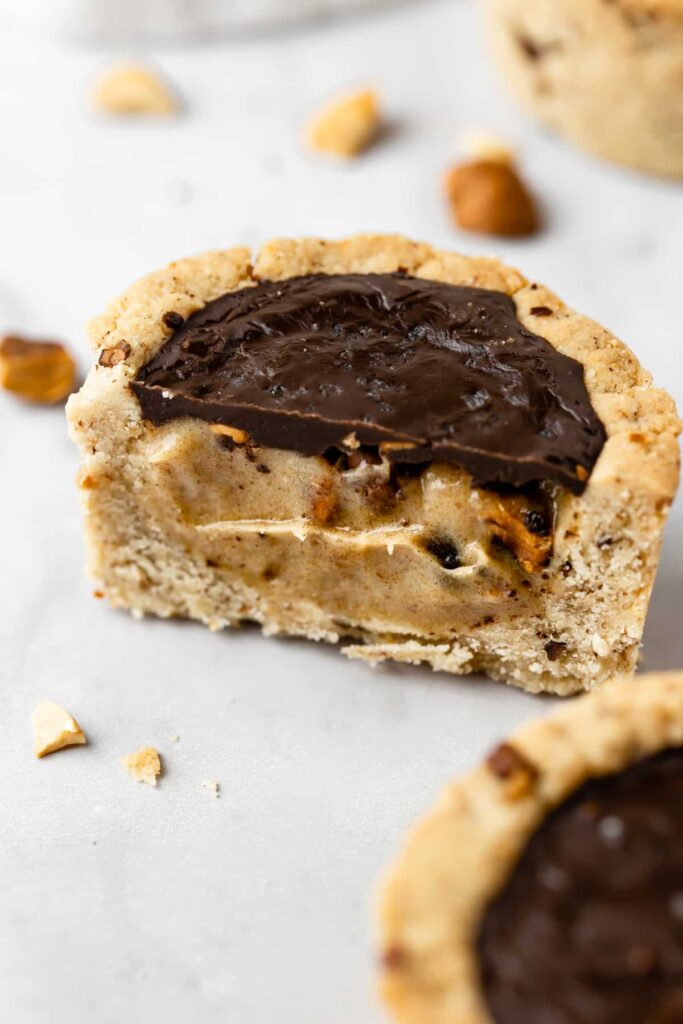
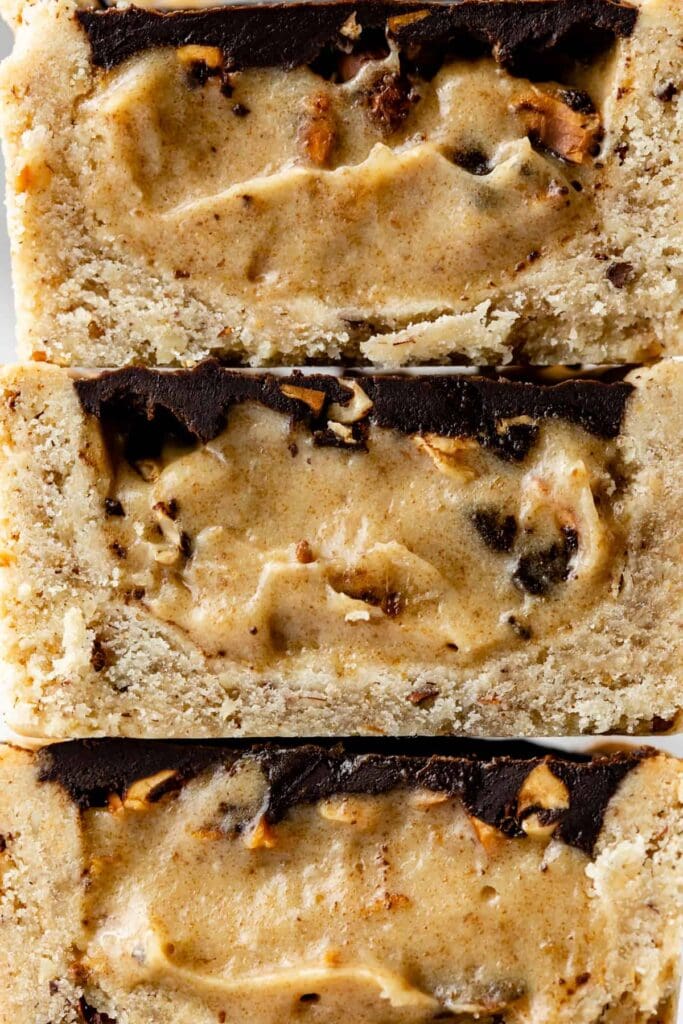
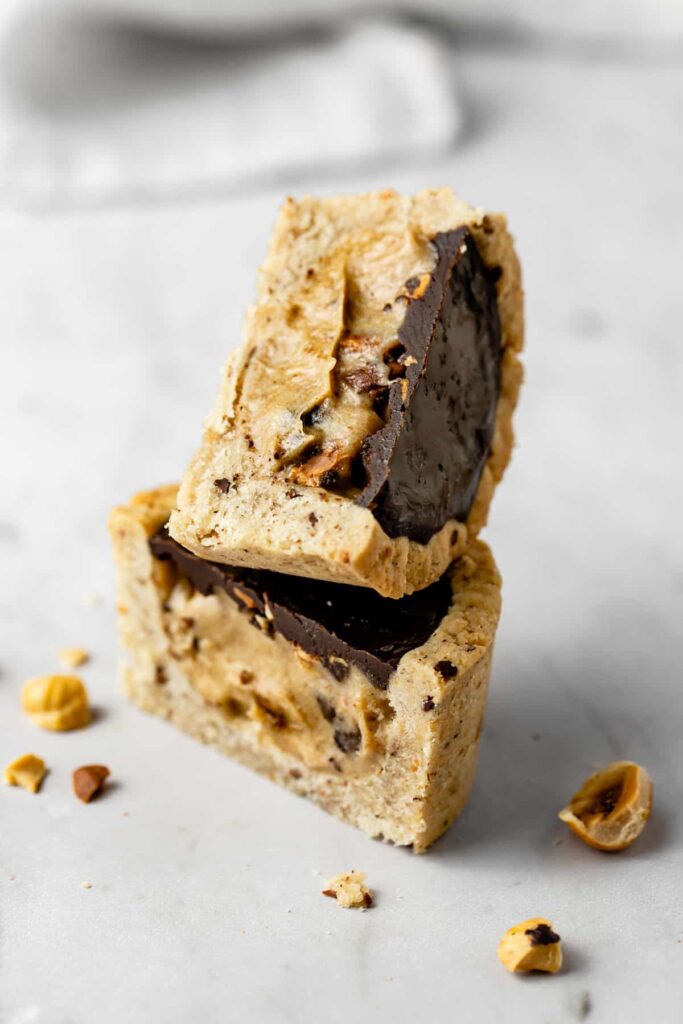
These vegan Caramel Hazelnut and Chocolate Cookie Cups are the perfect combination of flavors and textures. Think about crisp cacao nibs embedded cookie cups that hide a smooth salted caramel cream, crunchy hazelnuts and a cracking chocolate on top. Not only they are pure delight, but these cookie cups also happen to be gluten-free, refined sugar-free and surprisingly easy to make. The kind of healthy and decadent treat you definitely want to have in your freezer to satisfy a sweet tooth!
Easy and Healthy cookie cups made from simple ingredients
OK guys, these cookies are SO delicious that I could speak about these cookie cups for hours! Seriously, this is one of the most decadent and satisfying treat I’ve ever made. You know, sometimes simple things are the best. So you can’t go wrong when you combine three amazing classic flavors, I’ve named Cookies, Caramel and Chocolate. These cookie cups are just a bomb of flavors and texture. Exactly the kind of treat you want to have in your freezer for when you’re craving something sweet and super satisfying for dessert or late-night snack.
Not only these cookie cups are incredibly delicious, but they are very easy to make with a few simple whole ingredients. They are naturally vegan, gluten-free, refined oiled and sugar-free. Healthy enough so that you can have a second one!
Ingredients you will need to make Cookie Cups
To make the cookie dough, you only need 7 simple ingredients:
- Hazelnut meal – similar to almond meal, it’s commonly used in many baking recipes. It is made of finely ground hazelnuts. Hazelnut meal is rich in healthy fats and adds softness to your recipes, along with an irresistible nutty flavor.
- White rice flour – is a very fine and light flour made of ground white rice. White rice flour is naturally gluten-free, rich in carbohydrates and low in fat. It is lighter, milder and easier to digest than wheat flour.
- Baking powder – if you follow a grain-free diet, be careful as most commercial baking powders contain a grain-based starch, like cornstarch. You can make your own or find a grain-free certified version. Else you can use whatever baking powder you have on hand.
- Maple syrup – is a brown syrup usually made from the sap of maple trees. It has a beautiful brown color and delicious flavor. Maple syrup adds sweetness and moisture to recipes, and act like a bidding ingredient. There are numerous varieties of maple syrup, but always make sure to use a good quality, Grade A labeled product.
- Coconut oil – is extracted from the kernel or meat of mature coconuts and is a very versatile product. It can be used in many recipes to replace other oils. Coconut oil can have a strong coconut flavor, so if you don’t like it you can also use deodorized coconut oil.
- Vanilla extract – typically made by infusing vanilla beans in alcohol and water, vanilla extract is a very popular ingredient in countless desserts. It brings a delicious vanilla flavor. Use good quality vanilla extract for best results, or make your own!
- Cacao nibs – are small pieces of crushed cacao beans that have been fermented, then dried, roasted and finally cracked. Cacao nibs have a bitter, chocolatey flavor and are very crunchy.
How to make vegan cookie cups
Make the cookie dough
First thing to make cookie cups is to prepare the cooke dough. And you will be amazed to see how ridiculously easy this is!
For these cookie cups just like for most of my cookie recipes, I simply combine all the dry ingredients together in a large mixing bowl and the wet ingredients in a separate bowl. Then I pour the wet preparation into the dry ingredients and stir to combine. You can’t go wrong with this technique.
Mixing only the dry ingredients together first helps to spread the baking powder evenly in the preparation, and avoids to end up with lumps in your cookie dough.
This is not your regular cookie dough, and it might look a little bit dry and crumbly first. But press a simple between your fingers and you’ll see how it is malleable and easy to work with!
Then divide the dough into 6 balls of equal size – or more or less depending of the quantity you make and the size of your muffin tins. Place each ball into a greased tin, and then comes maybe the trickiest but very important step: shaping the cups! Gently bur firmly press the dough with your thumbs to make a well in the middle and spread the dough in the tin. Take your time to carefully distribute the dough evenly in the tin. You don’t want the layer of cookie dough to be just thick enough to ensure a solid cup.
Bake the cookie cups
Pop the tins in the oven and bake at 350 degrees F for 10 minutes, until slightly golden on the edges and dry to touch. Once baked, remove from the oven and immediately use the back of a teaspoon to push down the bottoms of the cups and reinforce the hole.
Leave the cookie cups to cool for 5 minutes in the tins; don’t remove them immediately as they can be still a little brittle right out of the oven! Then carefully remove the cookie cups from the muffin tin and allow to cool completely on a wire cooling rack before filling. This is very important as cookie cups will dry out and harden as they cool.
What can I use instead of white rice flour and hazelnut meal?
To make cookie cups gluten free, we use a mix of hazelnut meal and white rice flour. These two ingredients are common and easy to find in most grocery stores and healthy stores.
I love hazelnut meal in this recipe because it has a delicious hazelnut flavor that perfectly match with chocolate and caramel. But if you don’t have hazelnut meal, you can replace with almond meal that is lighter in taste.
White rice flour is what I found to work the best to make these cookie cups, for both texture and flavor. You can easily make your own hazelnut meal by mixing hazelnuts in a food processor until you get a fine meal. If you don’t have white rice flour on hand, you can replace with brown rice flour or oat flour. If you use brown rice flour, slightly reduce the quantity of maple syrup to get the right consistency.
Make the caramel filling
While the cups are baking in the oven, it’s time to prepare the caramel that we gonna use to fill the cookie cups. And guys, this caramel recipe is everything! If you follow my recipes, you might have noticed that I’m obsessed with caramel sauce! I’m using it everywhere, as a topping for my Brownie Salted Caramel Cookies, to drizzle on this decadent Cookie Dough Cheesecake, or as a delicious frosting for my Carob Chocolate Cake.
Why I love this recipe? Because it’s super easy to make with only a few simple ingredients. It’s healthy: no added sugar, no processed oil and naturally sweetened with dates. And it’s super thick, creamy and satisfying with an incredibly delicious salted caramel flavor.
Dates are the main ingredient in this caramel recipe. They are the ones that give it this dreamy texture and natural sweetness. For a perfectly smooth caramel, it’s really important that you use soft dates. I recommend to use medjool dates, a naturally smooth, juicy and sweet variety. If you can’t find medjool dates or if your dates are dry, soak them in hot water for 15 minutes before using to soften.
Then drain, pit and roughly chop the dates, and blend with coconut milk in a high speed blender until smooth, without any bites. Add tahini, vanilla and salt, and blend again to combine until perfectly creamy.
Leftovers of caramel will perfectly keep for up to 1-2 weeks in an airtight container or a glass jar stored in the fridge.
The easiest raw chocolate sauce
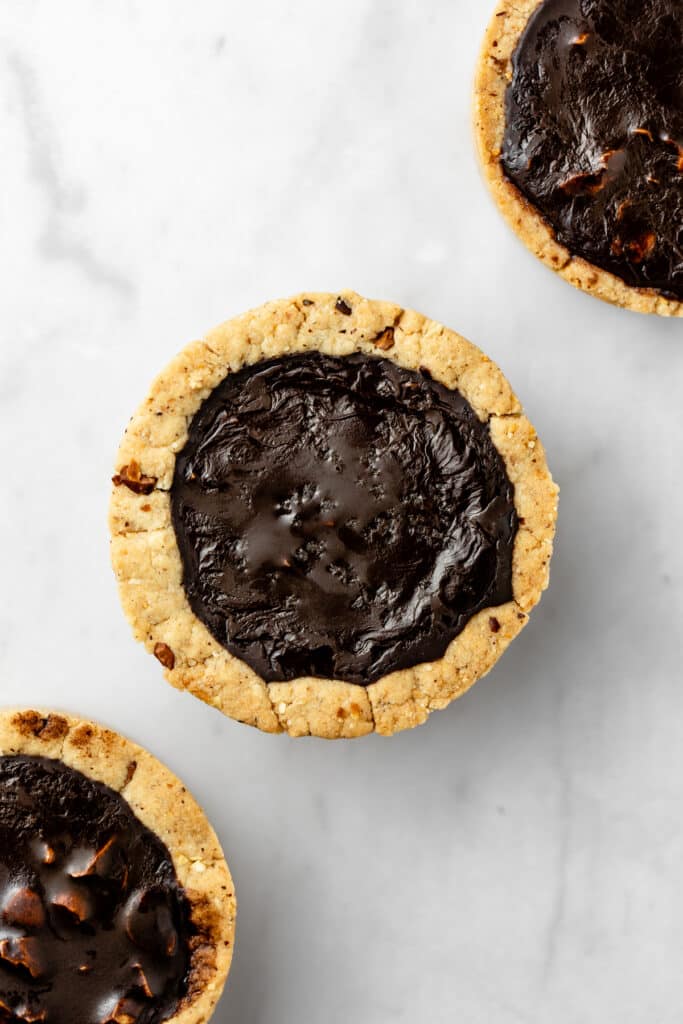
The last step of this recipe is to make a quick chocolate sauce to put on top of the cookie cups. And you will see, this is the easiest recipe ever! All you need to prepare this raw chocolate sauce is melted coconut oil, maple syrup and cocoa powder. Simply combine these three ingredients in a bowl and stir until smooth and runny with no lumps. That’s it!
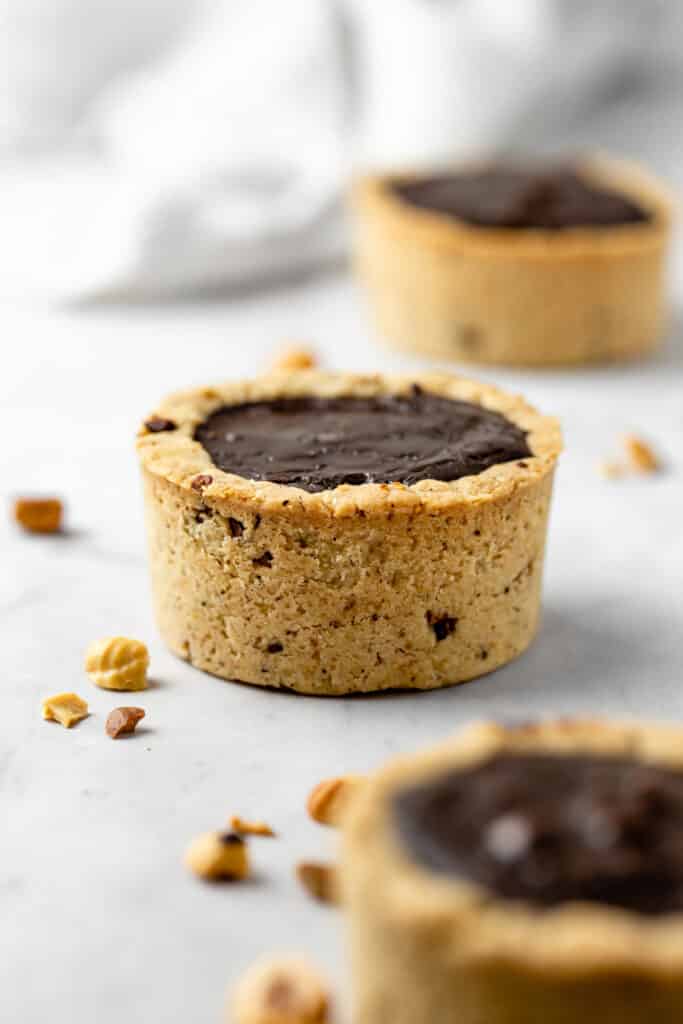
Ready in 1 minute, this chocolate sauce is amazing to use in many recipes, to drizzle on top of cakes, pancakes and especially raw desserts. Because the coconut oil is solid at cold temperatures, this chocolate sauce will harden very quickly when in contact with a frozen element or when it is put in fridge. Pour a tablespoon of chocolate sauce on top of your cookie cups, place in freezer for 3 minutes and you will end up with a super crispy chocolate crust!
How to store cookie cups
These caramel hazelnut chocolate cookie cups are seriously SO delicious that I could eat the whole batch in one evening! But this is also the kind of treat you will love to find into your freezer for when you’re craving something sweet and super satisfying for dessert or late-night snack.
Not only cookie cups are freezer friendly, but I highly recommend to keep them in the freezer for an optimal preservation, in both flavors and texture. Place the cool cookie cups in an airtight container or in freezer bags, and store in the freezer. They will keep for up to one month – maybe more!
When you want to enjoy one, pop one cookie cup out of the freezer and leave to warm up a few minutes at room temperature to allow the caramel to soften a little. The chocolate coating will remain very crispy and they will taste as amazing as if they had been made the same day!
More decadent cookie recipes you won’t resist
- the BEST Walnut Chocolate Chips Cookies GF & oil-free
- Brownie Cookies with Salted Caramel GF
- Easy 5-Ingredient Almond Cookies GF
- Pecan Chocolate Filled Sandwich Cookies GF
- Healthy Chocolate Pecan Cookies bars GF & sugar free
- Cookie Dough and Caramel Cheesecake GF
I love to see your creations! Don’t forget to tag me @alicepages on your photos on Instagram and give your feedback in the comments below if you make this recipe at home! Your opinion is my best reward.
PrintCaramel Hazelnut Chocolate Cookie Cups
Cacao nibs cookie cups that hide a smooth salted caramel cream, crunchy hazelnuts and are topped with a layer of cracking chocolate. Easy to make, naturally gluten-free, refined sugar-free and incredibly delicious. The perfect decadent healthy treat to satisfy your sweet tooth.
- Prep Time: 25 minutes
- Cook Time: 10 minutes
- Total Time: 35 minutes
- Yield: 6 cookie cups
- Category: dessert
- Cuisine: American
- Diet: Vegan
Ingredients
Cookie dough
- 1 cup hazelnut meal (90 g)
- 3/4 cup white rice flour (110 g)
- 1/2 tsp baking powder
- 1/4 cup maple syrup (70 g)
- 3 tbsp melted coconut oil (40 g)
- 1 tsp vanilla extract
- 1 tbsp cacao nibs
- 1 pinch of salt
Caramel filling
- 120 g pitted dates (about 6 large dates)
- 1/3 cup full-fat coconut milk (100 g)
- 2 tbsp tahini
- 1 pinch of sea salt flakes
Chocolate topping
- 2 tbsp melted coconut oil (30 g)
- 1 tbsp maple syrup (15 g)
- 1 tbsp cocoa powder (15 g)
- 1/4 cup roasted hazelnut, roughly chopped
- sea salt flakes
Instructions
Caramel
- Optional (see notes): soak the dates in hot water for 15 minutes to soften. Carefully drain.
- Place the chopped pitted dates and coconut milk in a high speed blender and blend until smooth without any bites.
- The, add tahini, vanilla and salt, and blend again to combine until you get a perfectly creamy caramel. Transfer in a container and store in fridge.
Cookies
- Preheat the oven to 350 degrees F and grease a small muffin tin with oil.
- To a large mixing bowl, add hazelnut meal, rice flour, baking powder and salt. Stir to combine.
- Add maple syrup, melted coconut oil and vanilla, and stir using a wooden spatula or your hands to massage the dough and incorporate all the ingredients. The dough must look a little dry and crumbly, but must hold when pressed between two fingers. Fold in the cacao nibs.
- Divide the dough into 6 balls of equal size. Place each ball into a greased muffin tin. Gently bur firmly press the dough with your fingers, making a well in the middle of each with your thumbs to shape a cup.
- Bake for 10 minutes, until slightly golden on the edges and dry to touch.
- Remove from the oven and immediately use the back of a teaspoon to push down the bottoms of the cups and reinforce the hole. Allow to cool for 5 minutes in the tins. Then carefully remove the cookie cups from the muffin tin and cool completely on a wire cooling rack.
Toppings
- Prepare the chocolate by adding melted coconut oil, maple syrup and cocoa powder in a bowl. Mix until combined and smooth, without any lumps.
- Roughly chop the hazelnuts.
- When the cookie cups are cool, fill them with the caramel up to two-thirds. Add chopped hazelnuts on top, then pour the chocolate to fill right to the top and fully cover the hazelnuts. Sprinkle with a pinch of sea salt flakes.
- Place the cookie cups in freezer for 3 minutes until the chocolate is hard. Enjoy immediately, or store in freezer and remove 10 minutes before serving.
- The cookie cups will keep in an airtight container in the freezer for up to 1 month.
Notes
- I’ve used 2,5 inches diameter muffin tin.
- It’s really important that you use soft dates to get a smooth and creamy caramel. I highly recommend to use medjool dates, a natural smooth, juicy and sweet variety. If you can’t find medjool dates or if your dates are dry, soak them in hot water for 15 minutes before using to soften.
- To make the caramel, I recommend to use thick full-fat coconut milk, with at least 85% of coconut.
Recette version française
PrintCookie Cups Caramel Noisette et Chocolat
Envie d’un dessert ultra gourmand? Ces irrésistibles cookie cups se composent d’un cookie croquant aux fèves de cacao, garnis d’un caramel de dattes onctueux, de noisettes torréfiées et d’une couche de chocolat craquant. Ils sont vegan, sans gluten, sans sucre raffiné et facile à réaliser.
- Prep Time: 25 minutes
- Cook Time: 10 minutes
- Total Time: 35 minutes
- Yield: 6 cookie cups
- Category: dessert
- Cuisine: Américaine
- Diet: Vegan
Ingredients
Pâte à cookie
- 90 g de noisettes en poudre
- 110 g de farine de riz blanche
- 5 g de levure chimique
- 70 g de sirop d’érable
- 40 g d’huile de coco fondue
- 1 c. à c. d’extrait de vanille
- 5 g d’éclats de fève de cacao
- 1 pincée de sel
Caramel
- 120 g de dattes dénoyautées (environ 6 dattes)
- 100 g de lait de coco entier (au moins 85% teneur en coco)
- 30 g de tahini (crème de sésame)
- 1 c. à c. d’extrait de vanille
- 1 pincée de fleur de sel
Garniture
- 30 g d’huile de coco fondue
- 15 g de sirop d’érable
- 15 g de cacao en poudre
- 30 g de noisettes torréfiées
- fleur de sel
Instructions
Caramel
- Optionnel (voir notes): faire tremper les dattes dans de l’eau chaude pendant 15 minutes pour les attendrir. Egoutter soigneusement.
- Hacher grossièrement les dattes dénoyautées et les placer dans un blender avec le lait de coco. Mixer à pleine puissance jusqu’à obtenir un caramel lisse et sans morceaux.
- Puis ajouter le tahini, la vanille et la fleur de sel, et mixer de nouveau pour incorporer les ingrédients et obtenir un caramel parfaitement onctueux. Verser le caramel dans un récipient et réserver au réfrigérateur.
Cookies
- Préchauffer le four à 180°C et huiler des petits moules à muffins.
- Dans un grand saladier, mélanger la poudre de noisette, la farine de riz blanche, la levure chimique et le sel, et remuer.
- Ajouter le sirop d’érable, l’huile de coco fondue et la vanille, et mélanger à l’aide d’une spatule ou des mains, afin de bien incorporer tous les ingrédients. La pâte semble légèrement sèche et friable, mais doit se tenir quand on la presse entre les doigts. Ajouter les éclats de fève de cacao.
- Former 6 boules de pâte de même taille et les déposer dans les moules à muffin.
- A l’aide d’un petit verre ou de vos doigts, appuyer sur chaque boule de pâte afin de faire remonter les bords sur les 3/4 de la hauteur du moule, et former des petites coupelles. Appuyer uniformément pour avoir une épaisseur de pâte homogène sur toute la surface et qu’elle épouse bien la forme du moule.
- Enfourner pour 10 minutes, ou jusqu’à ce que la pâte soit légèrement colorée et sèche au toucher.
- Retirer du four et immédiatement appuyer délicatement sur le fond des cups pour faire retomber la pâte qui pourrait avoir gonflé. Laisser refroidir 5 minutes dans les moules, puis démouler et laisser refroidir complètement sur une grille.
Garniture et assemblage
- Préparer le chocolat en mélangeant l’huile de coco fondue, le sirop d’érable et le cacao en poudre dans un petit bol. Mélanger jusqu’à obtenir une sauce fluide et sans grumeaux.
- Hacher grossièrement les noisettes torréfiées.
- Assembler les cookie cups. Déposer environ 2 cuillères à soupe de caramel dans chaque cookie cup afin de les remplir aux 2/3. Ajouter les noisettes concassées, puis verser le chocolat pour remplir les cups et recouvrir complètement les noisettes. Saupoudrer d’une pincée de fleur de sel.
- Placer les cookie cups au congélateur pendant 3 minutes pour que le chocolat durcisse. Déguster immédiatement, ou conserver au congélateur et retirer 10 minutes avant de servir.
- Les cookie cups se conservent jusqu’à 1 mois au congélateur dans un récipient hermétique.
Notes
- J’ai utiliser des moules à muffin de 6,5 centimètres de diamètre.
- Pour réaliser un caramel onctueux, il est important d’utiliser des dattes bien tendres. Je recommande d’utiliser des dattes de la variété medjool, tendres, juteuse et sucrées. A défaut ou si vos dattes sont sèches, faites les tremper dans de l’eau chaude pendant 15 minutes pour les attendrir avant de les utiliser.
- Pour réaliser le caramel, je recommande d’utiliser du lait de coco entier, avec une teneur en coco à minimum de 85%.


Coucou, y a pas une erreur dans la proportion d’éclats de fèves de cacao?
Ca semble délicieux je teste ça au plus vite, merci pour tes recettes et ta créativité épatante !
Hello Lena,
Non, les quantités d’éclat de fève de cacao sont justes. 1 measuring US tablespoon, soit environ 5-6 grams. Mais si tu aimes ça, tu peux évidement en mettre un peu plus 😉
Merci à toi! J’espère que tu vas te régaler !