

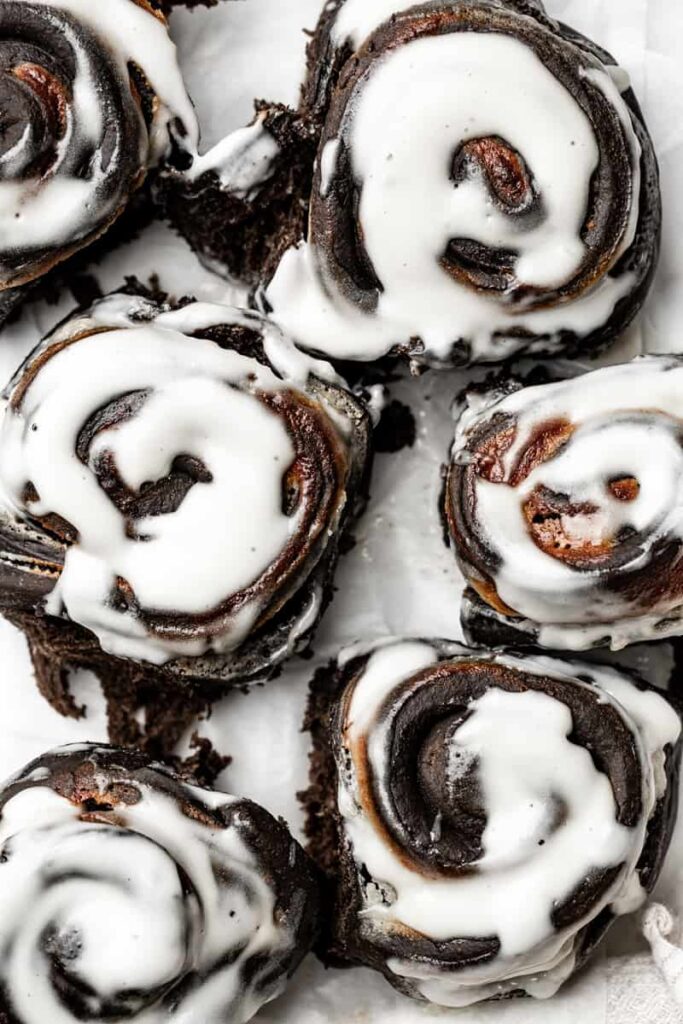
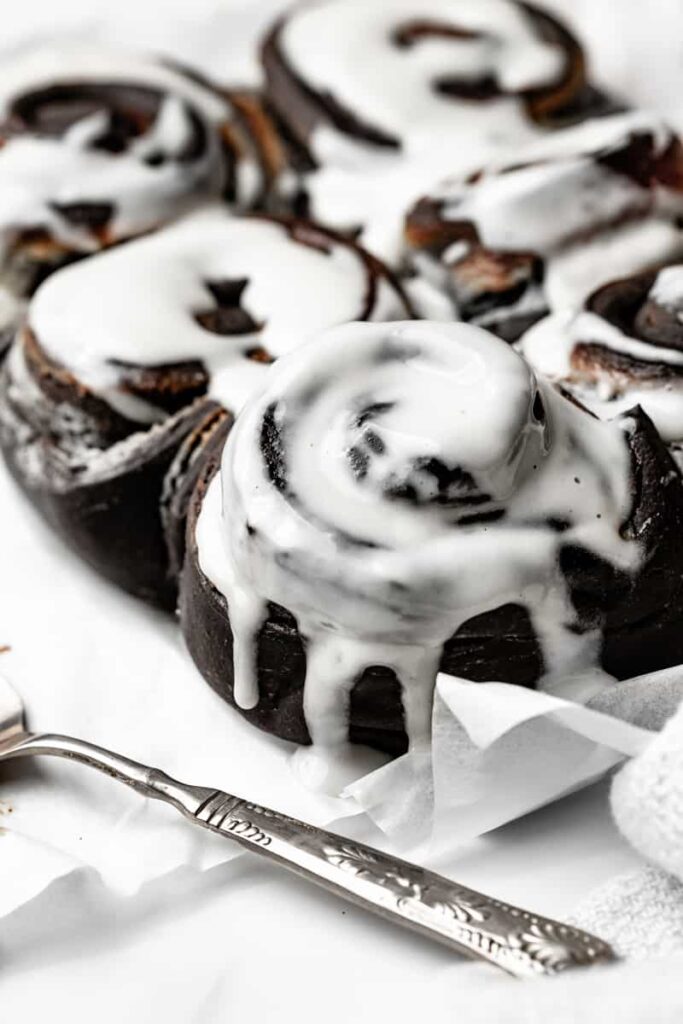
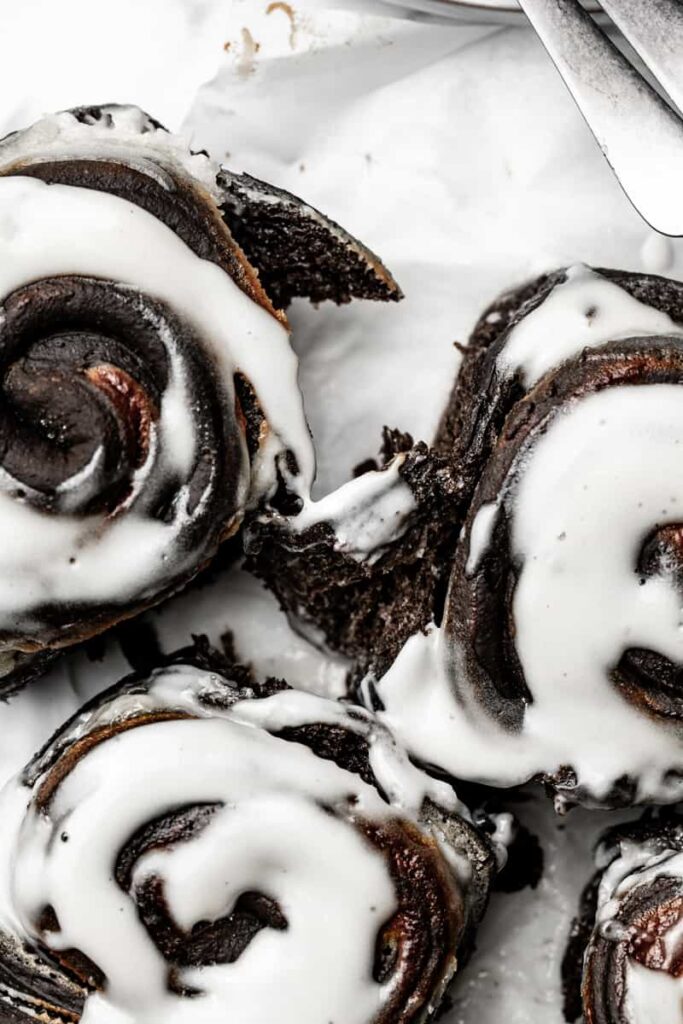
These cookies and cream vegan cinnamon rolls transform the famous black and white creme-filled sandwich cookies into an even more delicious treat! Wafers are replaced by a soft and fluffy cocoa flavored dough, stuffed with a smooth plant based crème made of nuts. They are very easy to make with only simple ingredients and no specific equipment. The perfect holiday baking or halloween treat!
What are cookies and cream cinnamon rolls?
Everybody knows the little black and white stuffed cookies from that famous brand. But have you already tried them in their even more delicious cinnamon rolls version? Cause let’s be honest, everything is better in the form of a soft and fluffy rolls.
No processed cookies or over-sweetened cream in this recipe, but only simple wholesome ingredients that you probably already have in your kitchen cupboard! In these cookies and cream vegan cinnamon rolls, wafers are replaced by a soft yeasted bread bun flavored with cocoa and colored with natural activated charcoal. The cream here is made of nuts, coconut cream and a touch of maple syrup. Nothing weird, only food that is good for your body, your tastebuds and your mind!
This cookies and cream vegan cinnamon rolls recipe basically is an adaptation of my other rolls recipes, like these cinnamon rolls or this decadent pumpkin caramel cinnamon rolls sheet pan. So if you’ve already tried these recipes from the blog, you’re now a pro of the rolls and it will be super easy for you to make this one! Here again, no specific equipment is required, so you can make and enjoy these delicious cinnamon rolls everywhere. Perfect for holidays bakings when you’re not at home!
Make the cocoa dough
First thing first, start by making the dough has it will have to rest for a total 1 hour and 30 minutes! You will have all the time to prepare the cream filling while the dough is resting. The recipe for the dough is basically the same as for my Cinnamon Rolls, except that there is cocoa powder and activated charcoal powder for the black color.
Ingredients and substitutions for the dough
- Almond milk – I like almond milk because it has a light flavor and is easy to find. However you can use any other unsweetened non dairy milk, like soy, coconut or oat.
- Plant based yogurt – Yogurt adds moisture to the rolls for a dreamy soft and fluffy texture. I used soy yogurt but I guess you can use almond or coconut yogurt as well. Just make sure it’s plain and unsweetened.
- Coconut oil – You can actually use any kind of oil in this recipe, but I recommend to use neutral flavor ones.
- All purpose flour – Unfortunately I still haven’t find a good and easy gluten free recipe for soft and fluffy cinnamon rolls. So for this recipe, we stick to this good old all purpose flour.
- Yeast – There are two main types of bakers yeast: dry yeast and fresh yeast. The first one, dry yeast, is living but inactive while fresh yeast is active and living. For more details about yeast check this post. In this recipe you can use fast-acting dry yeast or fresh yeast. Refer to the quantities indicated in the recipe card.
- Cocoa powder – It brings a light and delicious chocolate flavor to the dough as well as a brown color. I recommend to use unsweetened Dutch quality cocoa powder.
- Activated charcoal powder – The only purpose of charcoal powder in this recipe is to get that dark color. You can easily find activated charcoal powder in most health stores. However, if you don’t have charcoal you can simply omit it or replace by another natural black color agent.
Making cinnamon rolls by hand vs. stand mixer
Good news, you don’t even need a stand mixer to make bakery-like pastries! This recipe can be made either with a stand mixer or by hand. Actually, when I have the choice I often prefer to kneed the doughs by hand. It has so much advantages for me: you can make small amount, you can really feel the dough and how it changes while you kneed, you don’t have to clean the stand mixer, and a little elbow bread never hurt anyone!
Okay more seriously, it’s definitely easier and quicker to make the dough using a stand mixer, especially if you wan to make large quantities. But it’s also good to know that these rolls can be made by hand, for the situations when you’re not at home for the holidays or just don’t have a stand mixer.
Whichever method you use, just make sure to knead or mix the dough long enough, until it gets a smooth and elastic texture and doesn’t stick to the bowl or counter. This can take up to 8-10 minutes by hands.
Make the sweet crème filling
Let’s be honest, what makes us crazy about cookies and cream is … the cream! – and that’s probably the reason why Oreo created the double stuff version. Not only it’s delicious by itself, but sandwiched between two cocoa cookies it brings the perfect amount of creaminess, richness and smoothness. It is actually the star of the show. I mean, those cookies would be so boring without the cream.
Ingredients for plant based cream filling
As the idea of these cookies and cream vegan cinnamon rolls is to replicate cookies and cream, we need a thick, rich and smooth cream cheese frosting to layer our cocoa rolls. But this cream guys is nothing like the one you can find in the original thing. Cause this cream is oil free, dairy free and made with only 5 simple wholesome ingredients!
- Cashews – They are THE staple ingredient in any basic vegan cream cheeses and frostings. They help to make super creamy and smooth preparations. Before using, soak the cashews either in boiled water for 20 minutes or overnight in water at room temperature to soften.
- Macadamia nuts – Here I’ve replaced about half of the cashews with macadamia nuts. Macadamias are harder than cashews but they have a high content of fats to add richness to the cream as well as a yummy white chocolate flavor.
- Coconut cream – For a thick and rich cream filling I strongly recommend to use full-fat coconut cream. To do so you can store a can of full-fat coconut milk in fridge overnight. Then open the can and scoop the thick layer of cream that has formed on top.
- Maple syrup – It’s one of my favorite natural sweetener. Maple syrup is lower on the glycemic index than table sugar, meaning it doesn’t spike blood sugar as quickly. I also love its delicate caramel flavor.
- Lemon juice – It brings a zesty tangy touch that you can find in traditional cream cheese. Don’t omit it!
- Salt – Just a pinch to balance the flavors and enhance the sweetness of the cream.

How to shape and bake cinnamon rolls
Now it’s time to fold our cookies and cream vegan cinnamon rolls. You know simple things are sometimes the best, so I kept the folding for these rolls as simple as possible!
- First, roll out the risen dough into an even 28 cm x 28 cm square. Important: if you have changed the quantities of the recipe, adapt the dimensions accordingly!
- Pour half of the filling on the dough and spread evenly on the whole surface using a spatula or the back of a tablespoon, to form a thin and even layer.
- Fold over the dough into thirds, like a wallet: at this step you have a 9 cm x 28 cm rectangle. Then roll out the dough in the widthwise direction into a 18 cm x 28 cm rectangle.
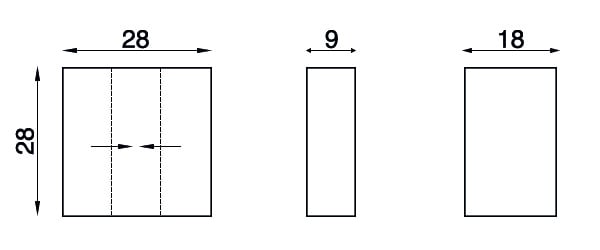
- With a sharpened knife, cut the dough into 6 identical strips, 28 cm long and about 3 cm wide, parallel to the direction of folding.
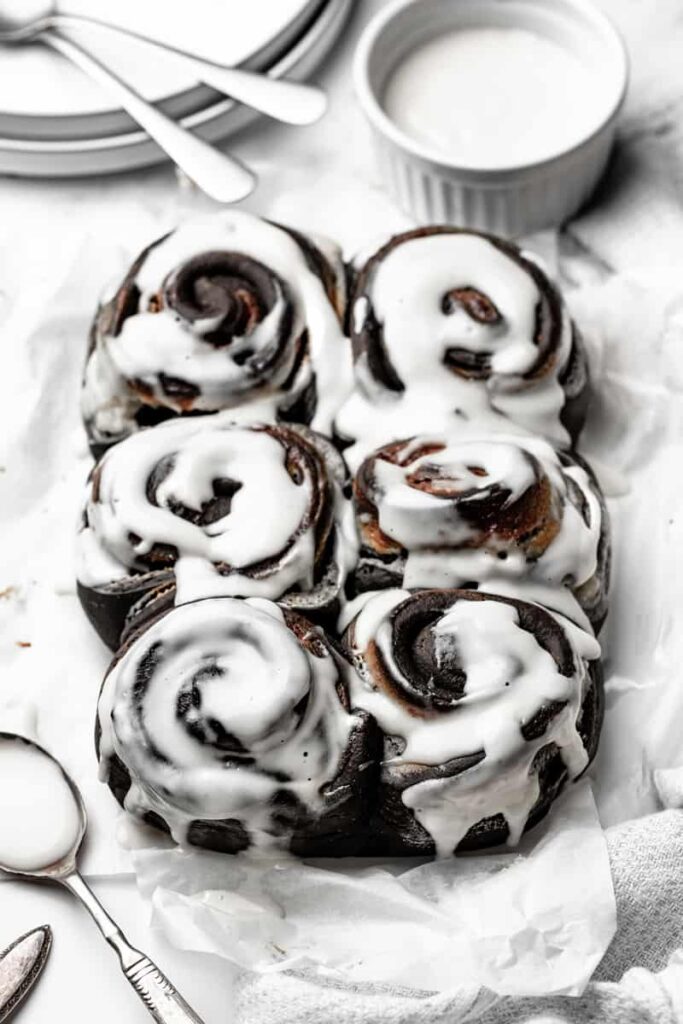
- Finally, roll each strip of dough into a beautiful roll and secure the end. Voilà!
How to store cookies and cream cinnamon rolls
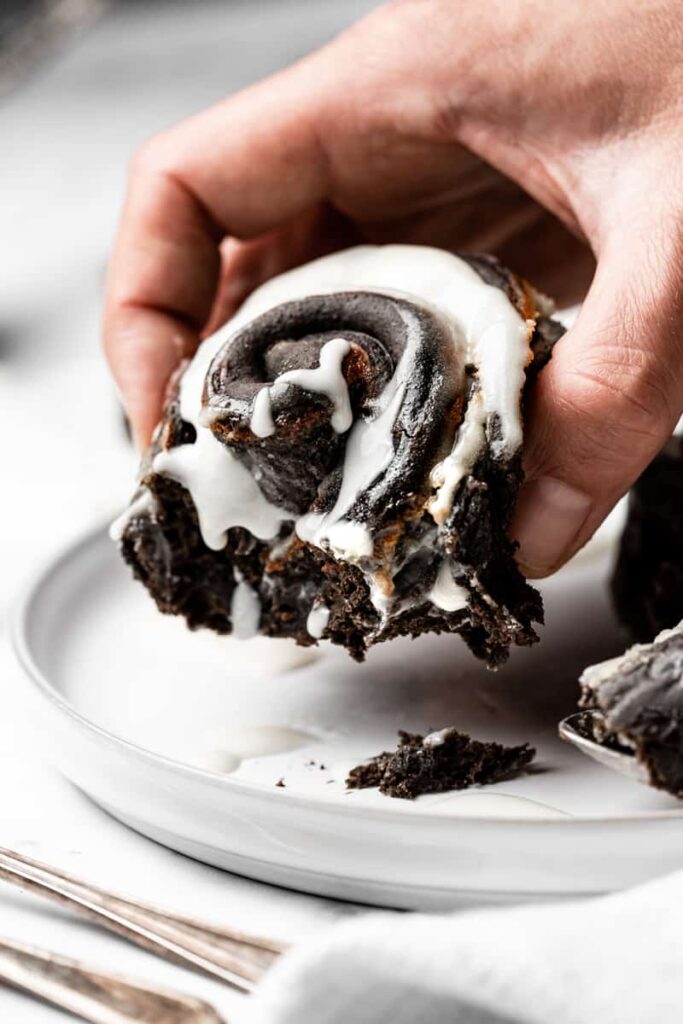
There is nothing more delicious and satisfying than a warm cinnamon rolls freshly baked. Right out the oven, these cookies and cream vegan cinnamon rolls are incredibly soft and fluffy. The filling is perfectly creamy and the freshly baked dough just melts in the mouth. It’s a real bliss. So I would really recommend you to enjoy them right after baking or at least the same day for the best experience.
However, you can absolutely store leftovers or prepare these vegan cinnamon rolls in advance and enjoy them later. They will still be absolutely delicious the next day, I promise. The good thing when you bake cinnamon rolls in a pan vs. individually is that they stay moist and soft for longer.
If you want to keep cookies and cream vegan cinnamon rolls for one or two days, leave them in the pan and simply cover the pan with a clean towel and leave on your countertop at room temperature. If possible, try not to separate the rolls to avoid them to dry.
If you want to keep the rolls for longer, the best option is to freeze them. This time, separate the rolls and place them in a freezer-safe bag. They will keep for up to one month in the freeze. They will remain delicious although they tend to dry out a bit. When you want to enjoy, take out one roll and pop it in oven at 350F / 180°C for a few minutes to defrost and heat.
For more delicious cinnamon rolls recipes, check out my:
- The BEST Vegan Cinnamon Rolls, soft and easy
- Caramel and Pecan Pumpkin Cinnamon Rolls sheet pan
- Cinnamon Rolls Mug cake
I love to see your creations! Don’t forget to tag me @alicepages on your photos on Instagram and give your feedback in the comments below if you make this recipe at home! Your opinion is my best reward.
PrintCookies and Cream Cinnamon Rolls

Soft and fluffy cocoa flavored vegan cinnamon rolls swirled with a smooth plant based crème. They are so easy to make with simple ingredients and no specific equipment. The perfect holiday baking or halloween treat!
- Prep Time: 30 minutes
- Rise Time: 1 hour 30 minutes
- Cook Time: 15 minutes
- Total Time: 2 hours 15 minutes
- Yield: 6 cinnamon rolls
- Category: Breakfast
- Method: Oven
- Cuisine: American
- Diet: Vegan
Ingredients
Dough
- 100 ml almond milk
- 4 g fast-acting dry yeast (or 10 g fresh yeast)
- 190 g all-purpose flour
- 20 g coconut sugar (or cane sugar)
- 20 g cocoa powder
- 2 tsp activated charcoal powder
- 1/4 tsp salt
- 40 g plant based yogurt, unsweetened
- 18 g melted coconut oil (or neutral flavor oil)
- 1 tsp liquid vanilla extract
Filling
- 40 g macadamia nuts
- 50 g cashews
- 100 g coconut cream
- 2 tbsp maple syrup
- 1 tbsp lemon juice
- 1 pinch of salt
Glaze
- 1 tbsp dairy free milk
- 1 tsp maple syrup
Instructions
Dough
- In a small bowl, mix together the almond milk and the yeast and stir until the yeast is completely dissolved in the milk. If you use fresh yeast, make sure that the milk is slightly warm (but not too hot), around 100F / 37°C to activate the yeast. Let activate for 2 minutes.
- In the bowl of a stand mixer or a large mixing bowl, add the flour, sugar, cocoa powder, charcoal powder and salt. Mix to combine.
- Pour in the milk and yeast mixture, together with the yogurt, melted coconut oil and vanilla extract.
- Kneed the dough:
- If using a stand mixer, mix with the hook accessory until the dough is very smooth and elastic, not sticky. This can take up to 5-8 minutes to get the right consistency.
- If you don’t have a stand mixer, start mixing the dough with a spatula until combined. Then transfer the dough to a lightly floured surface and kneed for about 10 minutes until smooth. If after 5 minutes the dough is still too soft and sticky, add a little more flour and continue to kneed.
- Form a loose ball with the dough, place it into a greased mixing bowl and cover with a clean towel. Set in a warm place to rise for about 1 hour, or until doubled in size.
Filling
- While the dough is rising, prepare the filling. Soak the cashews and macadamia nuts in boiled water for 20 minutes to soften (or overnight in water at room temperature).
- Then drain and rinse the nuts, and place them in a high speed blender with coconut cream, maple syrup, lemon juice and salt. Blend everything until perfectly smooth and creamy, with no chunks. It can take up to 2 minutes to get that smooth consistency depending on the power of the blender.
- Transfer the filling to a bowl or an airtight container, cover and place in fridge to firm for about 1 hour, while the dough rises.
Assembly
- Once the dough has doubled in size, turn out onto a floured surface. Roll out the dough into an even 28 cm x 28 cm square (if you have changed the quantities of the recipe, adapt the dimensions accordingly).
- Pour half of the filling on the dough and spread evenly on the whole surface using a spatula or the back of a tablespoon, to form a thin and even layer. Set aside the remaining filling to drizzle on the cinnamon rolls after baking.
- Fold the dough into thirds : at this step you have a 9 cm x 28 cm rectangle. Then roll out the dough in the widthwise direction into a 18 cm x 28 cm rectangle. See notes.
- With a sharpened knife, cut the dough into 6 strips, 28 cm long and about 3 cm wide, parallel to the direction of folding. Roll the strips of dough into a roll and secure the end.
- Place the rolls in a greased baking dish. Cover with a towel and place in a warm place to rise for 30 minutes.
- Meanwhile, preheat the oven to 350 degrees F. Prepare the glaze by mixing together the milk and maple syrup in a small bowl.
- Once the rolls have risen, put the dish into the oven and bake for 15 minutes. Then remove from the oven and brush the rolls with the glaze. Return the dish to the oven and bake for 2 minutes more.
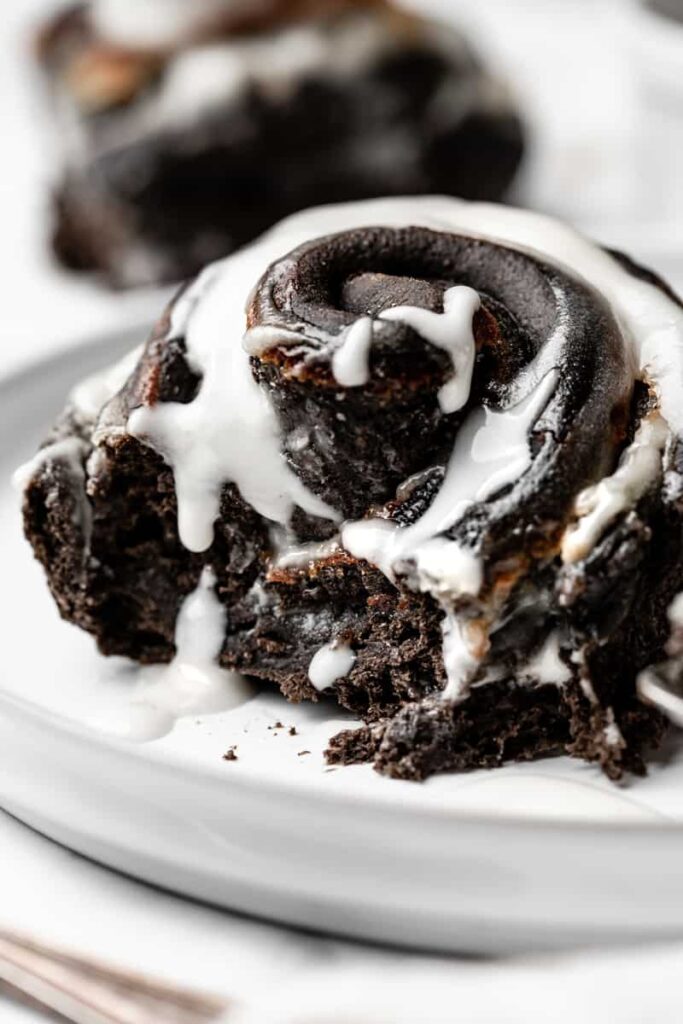
- Remove the dish from the oven and allow to cool for a few minutes. Enjoy the cinnamon rolls warm, preferably the same day, drizzled with the leftover of filling.
Notes
- Dough folding instructions:
- Roll out the dough into an even 28 cm x 28 cm.
- Fold the dough into thirds, into a 9 cm x 28 cm rectangle.
- Roll out the dough in the widthwise direction, into a 18 cm x 28 cm rectangle.
- These cinnamon rolls are best enjoyed the same day, while they are still warm and very soft. Store leftovers in an airtight container at room temperature for to 2 days or in the freezer for up to 1 month.
Recette version française
Roulés à la crème vegan façon Oreos
Ces roulés à la cannelle décadents se composent d’une pâte briochée au cacao ultra tendre et moelleuse, garnie d’une crème végétale onctueuse. Facile à préparer avec des ingrédients simples et peu de matériel, c’est la recette parfaite pour les fêtes!
- Prep Time: 30 minutes
- Temps de repos: 1 heure 30 minutes
- Cook Time: 15 minutes
- Total Time: 2 heures 15 minutes
- Yield: 6 roulés
- Category: Petit-déjeuner
- Method: Four
- Cuisine: Américaine
- Diet: Vegan
Ingredients
Pâte à roulés
- 100 ml de lait végétal nature
- 4 g de levure boulanger sèche instantanée (ou 10 g de levure fraiche)
- 190 g de farine de blé type T55
- 20 g de sucre de coco (ou sucre de canne)
- 20 g de cacao en poudre
- 1 cuillère à s. de charbon actif en poudre
- 1/4 cuillère à c. de sel
- 40 g de yaourt végétal nature
- 40 g d’huile de coco fondue (ou huile neutre)
- 1 cuillère à c. d’extrait de vanille liquide
Crème
- 40 g de noix de macadamia
- 50 g de noix de cajou
- 100 g de crème de coco
- 40 g de sirop d’érable
- 1 cuillère à s. de jus de citron
- 1 pincée de sel
Dorure
- 2 c. à s. de lait végétal
- 1 c. à s. de sirop d’érable
Instructions
Pâte à roulés
- Mélanger le lait végétal et la levure dans un bol et remuer pour délayer et dissoudre la levure. Si vous utilisez de la levure fraiche, assurez-vous que le lait soit tiède, légèrement en dessous de 37°C, pour activer la levure sans la brûler.
- Dans le bol d’un robot pâtissier ou dans un grand saladier, mélanger la farine, le sucre, le cacao en poudre, le charbon actif en poudre et le sel. Mélanger.
- Verser la préparation lait levure dans le mélange sec, ainsi que le yaourt, l’huile de coco fondue et l’extrait de vanille.
- Pétrir la pâte:
- Si vous avez un robot pâtissier, pétrir avec l’accessoire crochet jusqu’à obtenir une pâte bien lisse et élastique, non-collante. Cela peut prendre jusqu’à 5 à 8 minutes pour obtenir la bonne texture.
- Si vous n’avez pas de robot pâtissier, commencer par mélanger la pâte avec une spatule pour incorporer grossièrement tous les ingrédients. Puis lorsqu’elle devient trop épaisse, transférer la pâte sur un plan de travail légèrement fariné et pétrir à la main pendant 10 minutes jusqu’à obtenir une pâte bien lisse. Si au bout de 5 minutes de pétrissage la pâte est toujours trop fluide et collante, ajouter un peu plus de farine.
- Former une boule de pâte, déposer dans un saladier huilé et recouvrir d’un torchon propre. Placer le saladier dans un endroit chaud et laisser gonfler pendant environ 1 heure, ou jusqu’à ce que la pâte ai doublé de volume.
Crème
- Pendant que la pâte lève, préparer la crème. Faire tremper les noix de cajou et les noix de macadamia dans de l’eau très chaude pendant 20 minutes (ou dans de l’eau à température ambiante pendant toute une nuit).
- Rincer et égoutter les noix et les déposer dans le bol d’un blender avec la crème de coco, le sirop d’érable, le jus de citron et le sel. Mixer à pleine puissance jusqu’à obtenir une crème parfaitement lisse et onctueuse, sans morceaux. Cela peut prendre plusieurs minutes en fonction de la puissance du blender.
- Verser la crème dans un bol ou un récipient hermétique et placer au réfrigérateur pendant 1 heure pour qu’elle se raffermisse, le temps que la pâte repose.
Assemblage
- Une fois que le pâte a doublé de volume, la déposer sur un plan de travail fariné. A l’aide d’un rouleau à patisserie, abaisser la pâte en un carré de dimension 28 cm x 28 cm (si vous avez modifié les quantités de la recette, adaptez les dimensions en fonction).
- Déposer environ la moitié de la crème sur la pâte et étaler uniformément sur toute la surface avec une spatule ou le dos d’une cuillère à soupe. Garder le restant de crème pour garnir les roulés après cuisson.
- Replier la pâte en trois: à ce stade elle forme un rectangle de dimensions 9 cm x 28 cm. Puis abaisser la pâte dans le sens de la largeur en un rectangle de dimensions 18 cm x 28 cm. Se référer aux Notes en dessous de la recette pour les détails du pliage.
- A l’aide d’un couteau aiguisé, découper 6 bandes de longueur 28 cm et de largeur 3 cm dans le rectangle de pâte. Rouler les bandes de pâte en escargot et bien coller l’extrémité contre le rolls.
- Déposer les roulés dans un plat allant au four préalablement huilé, en les disposant de façon à ce qu’ils se collent quand la pâte aura gonflé. Couvrir avec un torchon propre et laisser gonfler dans un endroit chaud pendant 30 minutes.
- Pendant ce temps, préchauffer le four à 180°C et préparer la dorure en mélangeant le lait et le sirop d’érable dans un petit bol.
- Une fois que les roulés ont gonflé, enfourner et cuire pendant 15 minutes. Puis retirer le plat du four et badigeonner les roulés avec la dorure à l’aide d’un pinceau. Enfourner pour 2 minutes supplémentaires.
- Retirer le plat du four et laisser refroidir quelques minutes. Déguster les roulés encore tièdes, arrosés avec le restant de crème.
Notes
- Pliage de la pâte:
- Abaisser la pâte en un carré de dimension 28 cm x 28 cm.
- Replier la pâte en trois, en un rectangle de dimensions 9 cm x 28 cm.
- Abaisser la pâte dans le sens de la largeur en un rectangle de dimensions 18 cm x 28 cm.
- Déguster les roulés de préférence le jour même, à la sortie du four, quand ils sont encore tièdes et bien moelleux. Les roulés se conservent pendant 2 jours dans un récipient hermétique à température ambiante ou jusqu’à 1 mois au congélateur.


0 Comments