

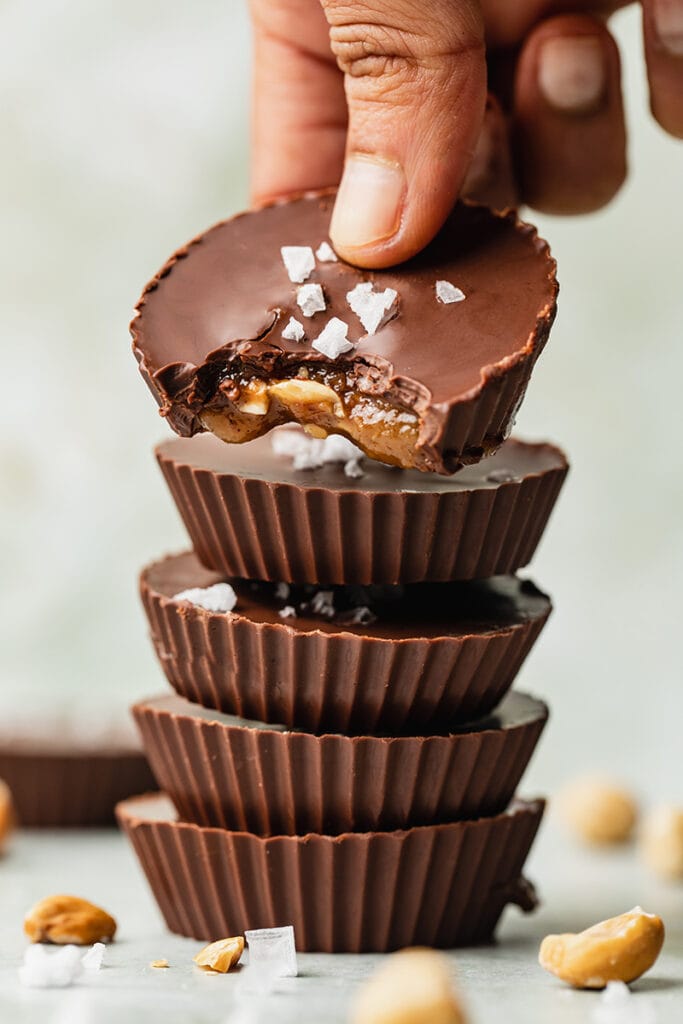
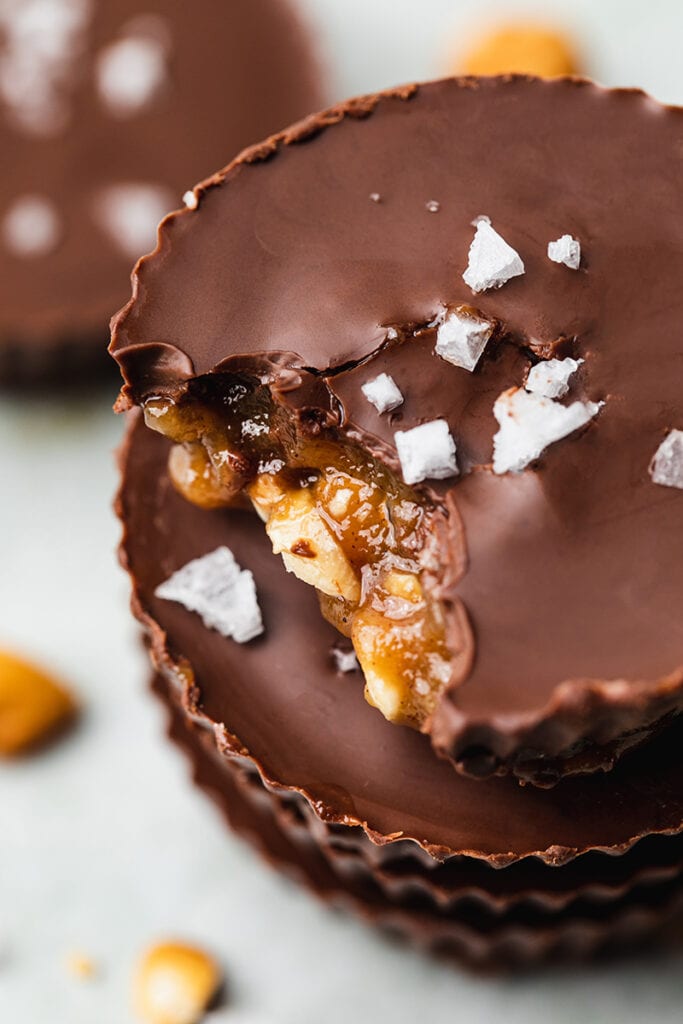
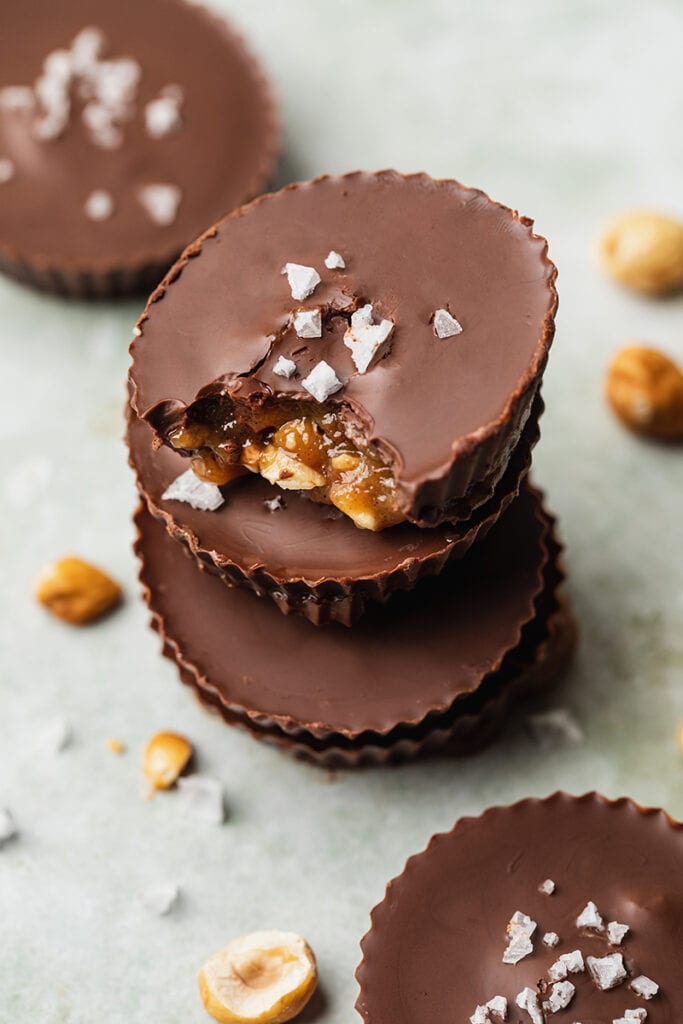
Homemade Chocolate Hazelnut butter Cups are the perfect treat to always have in your freezer for satisfying your sweet tooth. They taste like your favorite hazelnut praliné rocher in the form of smooth chocolate cups. They are easy to make, with only a few simple ingredients you probably already have in your pantry!
Ingredients needed
You only need 7 simple ingredients to make these delicious chocolate hazelnut butter cups! These are everyday products you should always have in your kitchen cupboard as they are versatile and very useful in so many recipes.
- Dark chocolate – This recipe calls for chocolate to make the cups. I personally use high quality, pretty dark chocolate bars as I like the intense taste of dark chocolate in desserts, but you can use any regular, baking chocolate that you want. You can use either chocolate chips or chocolate bar chopped up. Many dark chocolate brands you can find easily are vegan friendly, just check the ingredient list for milk fat, powder or butter oil.
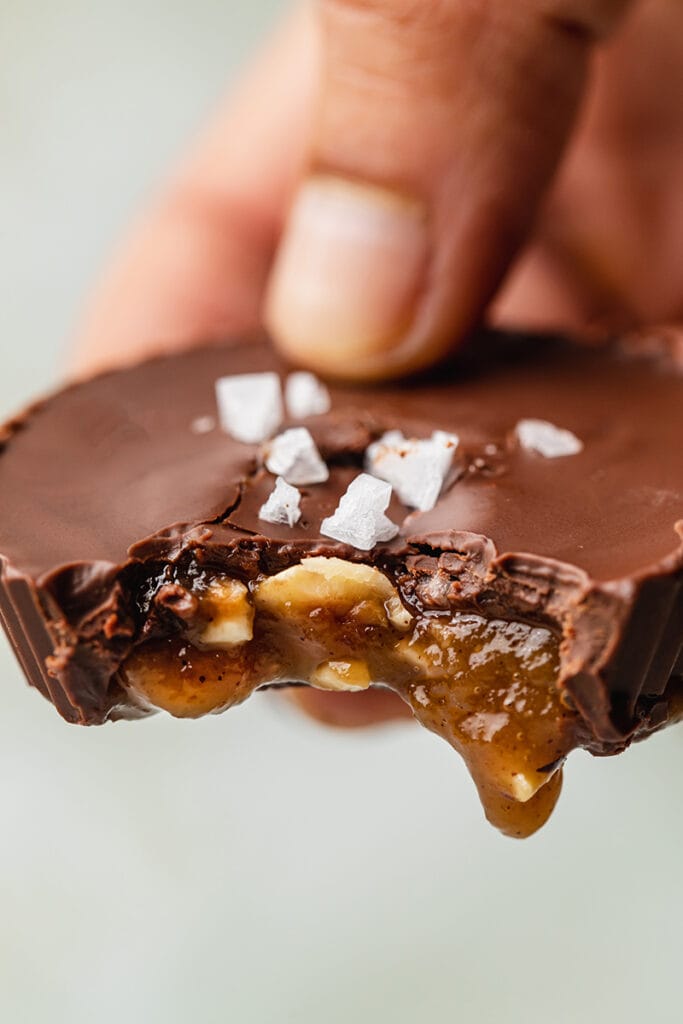
- Hazelnut butter – It’s the key ingredient of the recipe so it’s important to pay a special attention to it! You can find very good quality hazelnut butter, I used this natural hazelnut butter from KoRo. I absolutely love all their nut butters, they have a great texture and taste. For a delicious praliné flavor, I recommend to use roasted hazelnut butter. Check the section below on How to make your own nut butter!
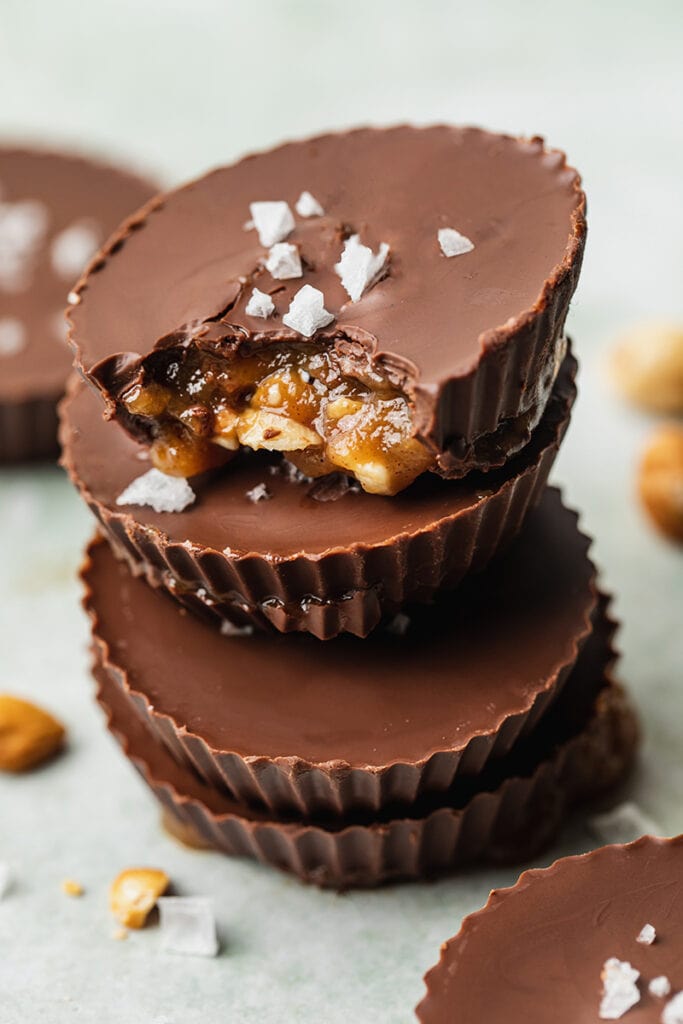
- Hazelnuts – I love to add a handful of chopped roasted hazelnuts to the filling for pleasant crunchiness and an extra hazelnut flavor!
- Maple syrup – It adds sweetness to the hazelnut filing, but it also reacts with the oil in hazelnut butter to thicken the mixture and form some kind of a past. Use high-quality grade A maple syrup.
- Coconut oil – We add a few spoons of coconut oil to the chocolate to make it thinner and easier to spread. It also makes the chocolate smoother and richer, so very pleasant for an easter treat. However, coconut oil makes the cups melt faster at room temperature, so if you want the cups to be shelf stable simply omit this.
- Vanilla extract – Natural vanilla extract adds deepness to the praliné
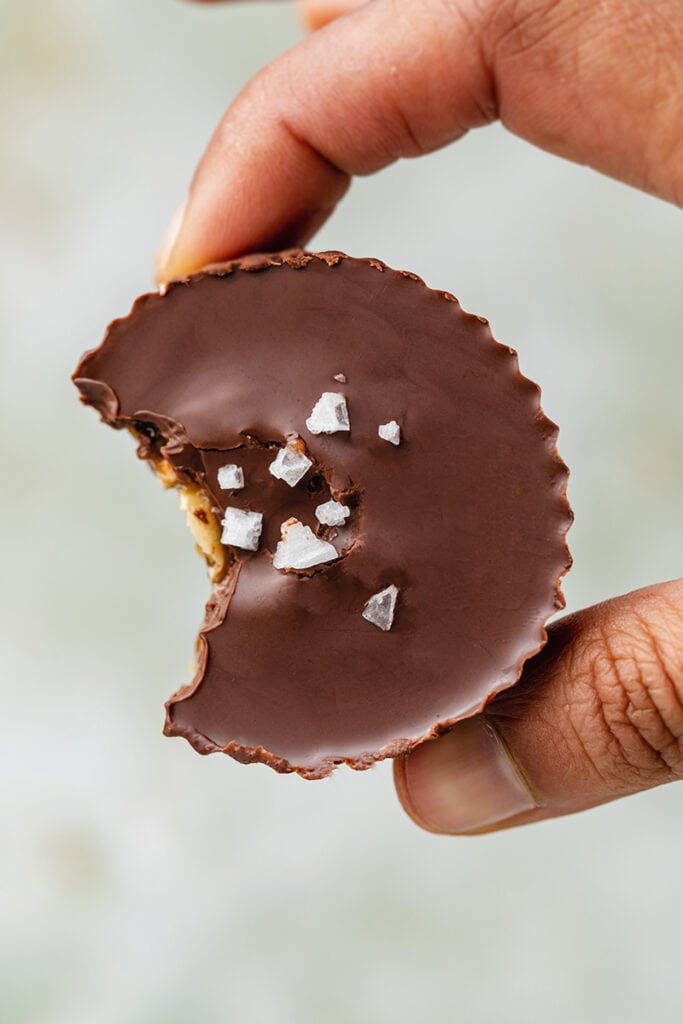
- Sea salt – Don’t skip the sprinkle of coarse sea salt at the end, it’s the little detail that makes all the difference!
How to make hazelnut butter cups
- We start with making the hazelnut butter filling so it has a little time to set in the fridge while we prepare the chocolate. In a small bowl, mix together hazelnut butter, maple syrup, vanilla extract and sea salt. Taste and adjust the quantity of maple syrup if you’d like. Finely chop the roasted hazelnuts (keep small chunks) and add to the preparation, stir to combine. Place in the fridge to firm.
- Melt the chocolate in a double boiler. Fill a small saucepan with just a little bottom of water and bring to a gentle simmer. Roughly chop the dark chocolate and add in a heat-safe bowl with the coconut oil. Place the bowl on top of the simmering water to gently melt. Once the chocolate is fully melted, give it a stir, remove from the heat and allow to cool down one minute.
- Scoop about half a tablespoon melted chocolate and pour it in your silicon muffin cups or a standard size muffin tin lined with paper liners. Add just enough chocolate to completely cover the bottom and form a thin even layer. Using the back of a teaspoon, drag the chocolate upwards to cover the sides of the tins. Place the cups in the freezer for 5 minutes to set. Set the remaining melted chocolate aside for covering the cups.
- Once the bottom chocolate has set, remove two preparations from the fridge. Dollop about 1 to 2 teaspoon of hazelnut butter filling into each cup and slightly flatten and spread it with a small spoon, without touching the edges of the cups. Try not to over-filled the cups!
- Immediately top with the remaining melted chocolate to completely cover the hazelnut butter filling and flatten the surface. Refrigerate or freeze until the chocolate is set, and top with flaky sea salt before enjoying!
How to make your own hazelnut butter
We use store-bought hazelnut butter to keep this recipe as simple as possible. But you must know that hazelnut (and any other variety of nut) butter is ridiculously easy to make at home, and the result is wonderful! Not only it’s very quick and simple, but it’s super satisfying and you can choose the exact amount of roast and mixing to get the perfect flavor and texture you like. All you need is an oven and a food processor or a high speed blender.
To make your own hazelnut butter, start by roasting the hazelnuts. This step is very important to enhance the flavor of the nuts. Place the hazelnut on a baking sheet and roast in the oven at 350F / 180°C for about 10-12 minutes, until they’re golden and smell good. Be carefully not to burn the hazelnuts. Let cool for a few minutes, then place hazelnuts on a clean towel and rub between your hands to remove most of the skins. Place the hazelnut in a food processor, and blend until completely smooth and creamy. This may take a few minutes depending on the power of your machine, so take your time, stopping to scrap down the sides of the bowl when needed. Add a pinch of salt.
FAQ
What can I use instead of hazelnut?
I made this recipe for Easter, and I think hazelnut praliné and chocolate is the perfect flavor. However, you probably all know the famous peanut butter cup, so obviously you can use any other nut butter to make these cups. Try peanut, almond, cashew, pistachio, pecan. If you have nut allergy, you can also use seed butter like tahini, sunflower or hemp seed!
What is the best mold for hazelnut butter cups?
The container you choose will define the size and the shape of your cups. Honestly it’s up to you, if you prefer big cups or smaller, or even mini cups! I personally use muffin silicon tins, as it makes it easier to remove. Other option is to use a standard muffin tin and line with paper liners. But you can also make a different shape and use special chocolate molds to make funky forms. Whatever mold you choose, just make sure to adapt the quantities of chocolate and filling.
How long do they keep?
Store the hazelnut butter cups in an airtight container in the refrigerator or in the freezer. I personally like to keep them in the freezer as it makes the chocolate crunchier. Properly stored, away from moisture, these cups will keep for months! Make sure to always have a batch in your freezer for a sweet snack or dessert. Remove the cups from the freezer 5 minutes before enjoying to allow the filling to soften. Note that the cups will melt rather quickly when at room temperature because of the coconut oil.
For more bites, chocolate candies and truffles, check out my
- After Eight Chocolate Peppermint patties
- No-bake Chocolate Peanut Snickers truffles
- No-bake Hazelnut and Cream Chocolate slices
- Easy Energy Balls 3 ways
- Coconut cream Cookie dough bars
I love to see your creations! Don’t forget to tag me @alicepages on your photos on Instagram and give your feedback in the comments below if you make this recipe at home! Your opinion is my best reward.
Print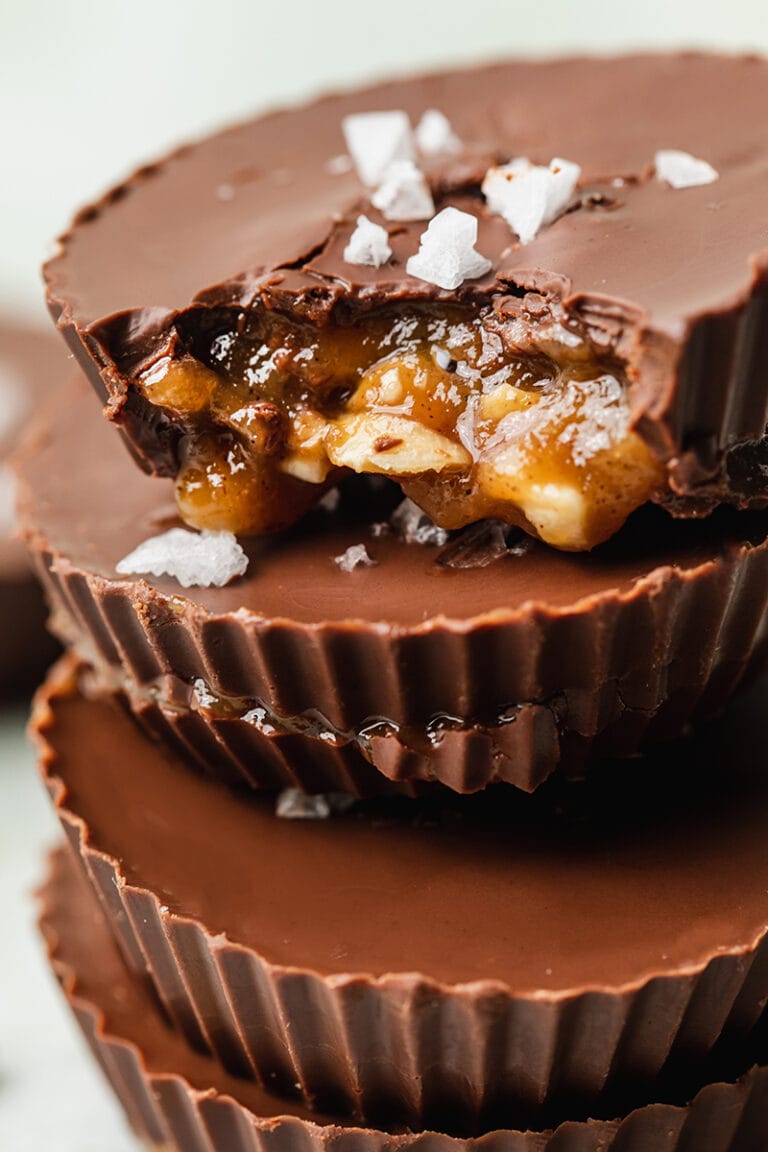
Chocolate hazelnut butter cups
Homemade hazelnut butter cups are the perfect natural sweet treat! They are easy to make, with only 6 ingredients you already have in your pantry.
- Total Time: 20 minutes
- Yield: 6 big cups
Ingredients
Hazelnut butter filling
- 1/3 cup hazelnut butter (80g)
- 3 tbsp maple syrup (40g)
- 1 tsp vanilla extract
- Pinch of sea salt
- 10g roasted hazelnuts, to garnish
Chocolate cups
- 1 cup dark chocolate, chopped (150g)
- 2 tbsp coconut oil (20g)
Instructions
- Begin with making the hazelnut butter filling. In a small bowl, mix together hazelnut butter, maple syrup, vanilla extract and a pinch of sea salt. Taste and adjust the quantity of maple syrup if you’d like. Finely chop the roasted hazelnuts and add to the preparation, stir to combine. Place in the fridge to firm up slightly while you prepare the chocolate cups.
- Prepare the cups. You can either use silicon muffin cups or line a standard size muffin tin with paper liners.
- Fill a small saucepan with just a little bottom of water and bring to a gentle simmer. Roughly chop the dark chocolate and add in a steel heat-safe bowl with the coconut oil. Place the bowl on top of the simmering water to gently melt. Once the chocolate is fully melted, give it a stir, remove from the heat and allow to cool down one minute.
- Scoop about half a tablespoon melted chocolate and pour it in liners. It should be just enough to completely cover the bottom. Using the back of a teaspoon, drag the chocolate upwards to cover the sides. Place the cups in the fridge for 5 minutes to set. Set the remaining melted chocolate aside for covering.
- Once the bottom chocolate has set, remove the hazelnut butter filling from the fridge and dollop about 1 to 2 teaspoon into each cup and slightly flatten with a small spoon, without touching the edges of the cups. Try not to over-filled the cups with filling!
- Immediately top with remaining melted chocolate to completely cover the hazelnut butter filling and flatten the surface. Refrigerate or freeze until the chocolate is set, and top with flaky sea salt.
Notes
- Storage: Store the hazelnut butter cups in an airtight container in the refrigerator or in the freezer if you prefer crunchier. Remove them 5 minutes before enjoying to allow the filling to soften. The cups will melt rather quickly when at room temperature because of the coconut oil.
- This recipe makes 6 large cups. The quantity strongly depends on the size of your moulds. If you use smaller tins, adjust the quantity and use less chocolate and hazelnut butter filling per cup.
- Prep Time: 20 minutes
- Category: Dessert
- Cuisine: American
- Diet: Vegan
Recette version française
Print Cups chocolat praliné noisettes
Ces cups au chocolat fourrées au praliné noisettes sont la friandise parfaite! Elles sont très faciles à réaliser avec des ingrédients simples et naturels.
- Total Time: 20 minutes
- Yield: 6 grosses cups
Ingredients
Fourrage noisettes
- 80g de purée de noisettes, nature ou grillées
- 40g de sirop d’érable
- 1 cuil. à café d’extrait de vanille
- 1 pincée de fleur de sel
- 10g de noisettes grillées
Cups chocolat
- 150g de chocolat noir en morceaux
- 20g d’huile de coco
Instructions
- Commencer par la préparation du fourrage noisettes. Dans un bol, mélanger la purée de noisettes, le sirop d’érable, l’extrait de vanille et une pincée de fleur de sel. Hacher finement les noisettes, en gardant tout de même des petits morceaux, et mélanger à la préparation. Placer au frais pendant la préparation des cups chocolat.
- Préparer les moules pour les cups. Utiliser soit des moules en silicone, ou chemiser un moule à muffin standard avec des caissettes en papier.
- Verser un fond d’eau dans une petite casserole, et porter doucement à ébullition. Hacher le chocolat. Placer le chocolat et l’huile de coco dans un saladier ou un bol résistant à la chaleur. Déposer le saladier au dessus de la casserole, sans que le fond ne soit en contact avec l’eau, et laisser fondre le chocolat tranquillement. Une fois le chocolat complètement fondu, mélanger pour l’homogénéiser. Retirer le saladier de la casserole et laisser refroidir 1 minute.
- Verser environ 1 cuillère à soupe de chocolat fondu dans chaque cup, juste assez pour former une couche fine et uniforme dans le fond des moules. Incliner légèrement les cups pour répartir le chocolat et le faire remonter un peu sur les côtés. Placer les cups au congélateur 5 minutes pour que le chocolat durcisse. Réserver le restant de chocolat fondu.
- Une fois que le chocolat a durci, sortir le fourrage noisettes et les cups. Prélever 1 cuillère de fourrage noisettes et la déposer au centre de chaque cup. Aplatir légèrement, en faisant attention que la fourrage ne touche pas les bords de la cup. Attention à ne pas trop garnir les cups!
- Recouvrir immédiatement avec le restant de chocolat fondu. Placer les cups au réfrigérateur ou au congélateur pour que le chocolat durcisse, et garnir d’une pincée de fleur de sel.
Notes
- Conservation: Conserver les cups dans une boite hermétique au réfrigérateur ou au congélateur pour qu’elles soient encore plus croquantes. Sortir les cups 5 minutes avant dégustation pour qu’elle s’attendrissent légèrement. À noter que le chocolat fond rapidement à température ambiance à cause de l’huile de coco.
- Cette recette permet de réaliser environ 6 grosses cups. La quantité dépends de la taille des moules utilisés, et de l’épaisseur de chocolat et fourrage désirée. Si vous utilisez de plus petits moules, ajustez la quantité de chocolat et de fourrage par cup.
- Pour réaliser cette recette, j’ai utilisé la purée de noisettes de KoRo. Bénéficiez de 5% de réduction permanente sur toute la boutique en ligne KoRo avec le code ALICE5.
- Prep Time: 20 minutes
- Category: Dessert
- Cuisine: Américaine
- Diet: Vegan


0 Comments