

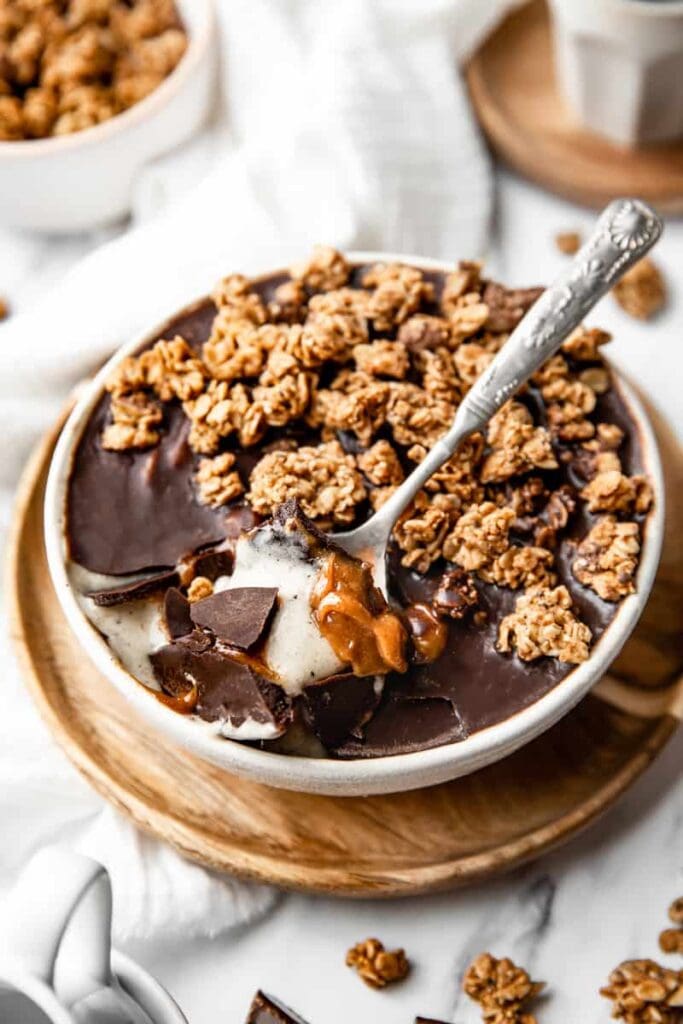
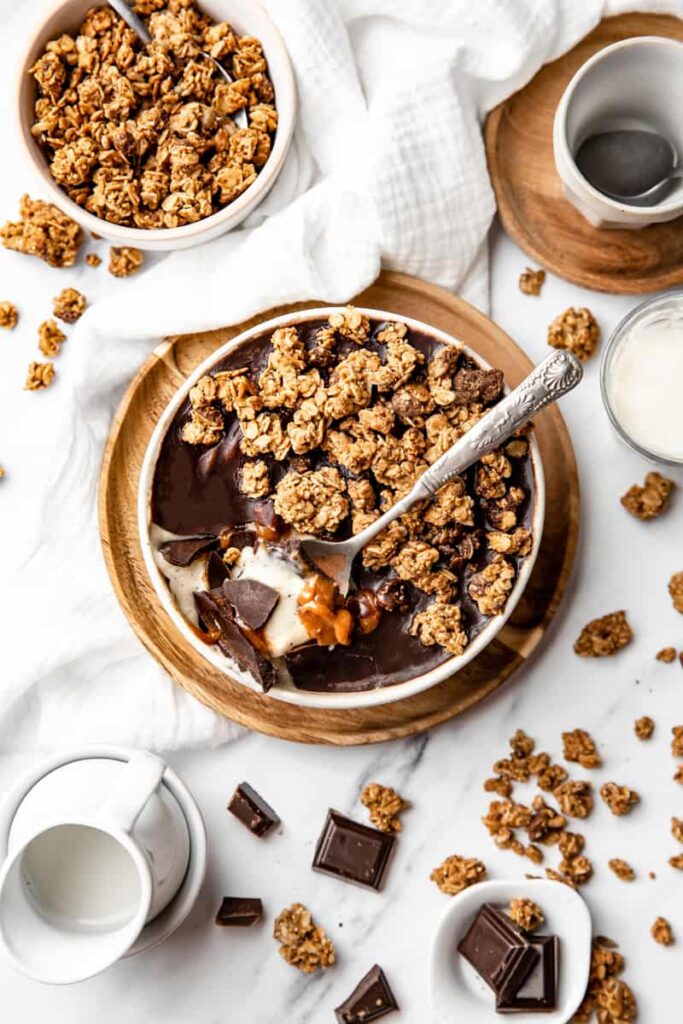
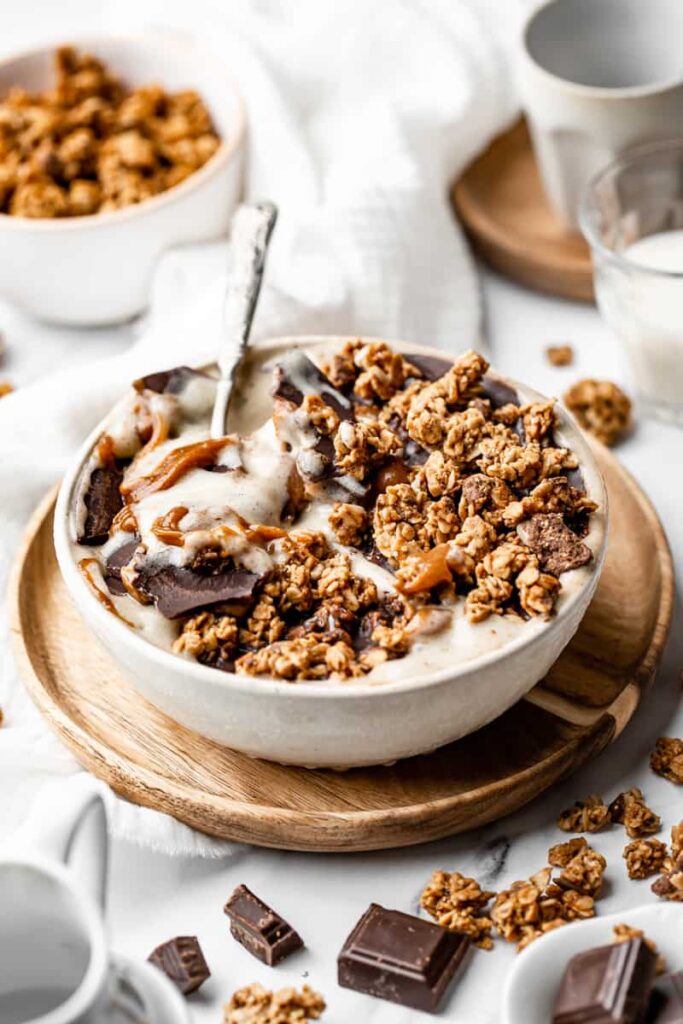
Dessert for breakfast, or breakfast for dessert? You choose with this delicious vanilla banana nice cream with peanut butter caramel, granola and magic chocolate shell! This dreamy rich and creamy soft serve is very easy to make with only banana, and is a healthy plant-based alternative to traditional ice cream. Drizzle with gooey caramel and a crunchy chocolate shell for the perfect treat to indulge anytime.
This recipe is sponsored by Purely Elizabeth and uses their incredible Vanilla Chocolate Chip Granola. Thank you for supporting Early Brawd and the brands that make all this possible!
Nice cream what?
Banana ice cream, also referred to as “nice cream,” is a super simple, plant-based and sugar-free version of ice cream by blitzing pieces of frozen bananas. It results in a rich, creamy and luscious soft serve, that you can use for any occasion.
Nice cream has become very popular among the plant-based community, because it’s very quick and easy to make, doesn’t require sophisticated equipment, and a healthier alternative to traditional ice cream.
How to prepare the bananas for nice cream
Frozen bananas is the base ingredient to make a super creamy nice cream. For dense and sweet nice cream, I recommend to use ripe bananas. The best is when the bananas are a little soft with brown spots on their skin. The riper the bananas, the sweeter the nice cream!
- Peel and slice the bananas into about 1/2-inch slices instead of large chunks. Small slices will be easier to process, especially if your blender is not very powerful
- Arrange the slices of banana in a single layer in a freeze bag or in a freezer safe container. Try not to overlap the slices to prevent them to stick together and form large clumps.
- Place in the freezer for at least 8 hours, or until the bananas are very hard. This is important for a thick and creamy nice cream.
Make the nice cream
Place the frozen bananas into a blender or food processor. If you have a high speed blender and for a dreamy dense nice cream, you even don’t need to add milk. If you’re not using a powerful blender or want a softer texture, add a dash of plant-based milk with the bananas.
Blend until it’s completely smooth and no chunks remain. It can takes a few minutes to get the right consistency. If necessary, add 1 tablespoon at a time of dairy-free milk to encourage blending, but be careful as the mixture can quickly turn runny.
Scrap the vanilla bean with the tip of a knife and add the vanilla seeds to the nice cream. Blend to combine.
Serve immediately for a soft serve texture, or place in the freezer 1 to 2 hours for a firmer ice cream like consistency.
The best equipment to make perfect nice cream
You can use either a blender or food processor to make nice cream, depending on the equipment you have on hand. Both work for making banana ice cream, but they don’t offer the same benefits. Before you start, my only recommendation is to make sure your equipment is powerful enough to mix frozen bananas! And if not, or if you find your blender or food processor overheats during the process, immediately stop it or you may damage it!
Food processor is a low speed but powerful equipment. It’s often pretty robust to make nice cream. As it works on low speed, it generally takes a fez minutes, about 5 minutes, to get a smooth consistency. Also it can be a bit difficult to fully blend bananas and some chunks can remain on the bottom of the bowl.
High speed blender is my personal favorite method to make nice cream. It’s very fast (only 1 to 2 minutes with a powerful blender) and makes a perfectly soft and creamy nice cream! My blender is equipped with a tamper that helps to stir during the whole process. If you don’t have a tamper, stop the blender time to time to stir the content.
Make the peanut butter caramel sauce
How to make a simple vanilla banana nice cream even more delicious? Drizzle a gooey and sweet peanut butter caramel on top! This sauce is ridiculously easy to prepare in one bowl with only 4 simple ingredients, and is perfect when you need a quick and healthy caramel.
To make peanut butter caramel sauce, you need:
- Peanut butter — you want the sauce to be creamy and silky, so preferably use a smooth peanut butte without chunks. Make sure to use natural unsweetened peanut butter, made with only peanuts. If you’re peanut intolerant or don’t like the taste of peanuts, you can substitute with any nut butter of your choice, like almond, cashew, tahini or sunflower seed butter for a nut-free option.
- Maple syrup — use a good quality grade A maple syrup. You can easily find maple syrup in any grocery store.
- Vanilla extract — use liquid vanilla extract in this recipe to add a nice vanilla flavor while keeping the sauce smooth.
- Flaky sea salt — just a pinch is needed to enhance the flavors, and give the sauce that characteristic « salted caramel taste ».
To prepare the caramel sauce, stir peanut butter together with maple syrup, vanilla extract and flaky sea salt into a bowl until smooth and creamy. Set aside while you prepare the magic chocolate shell.
Make the magic chocolate shell
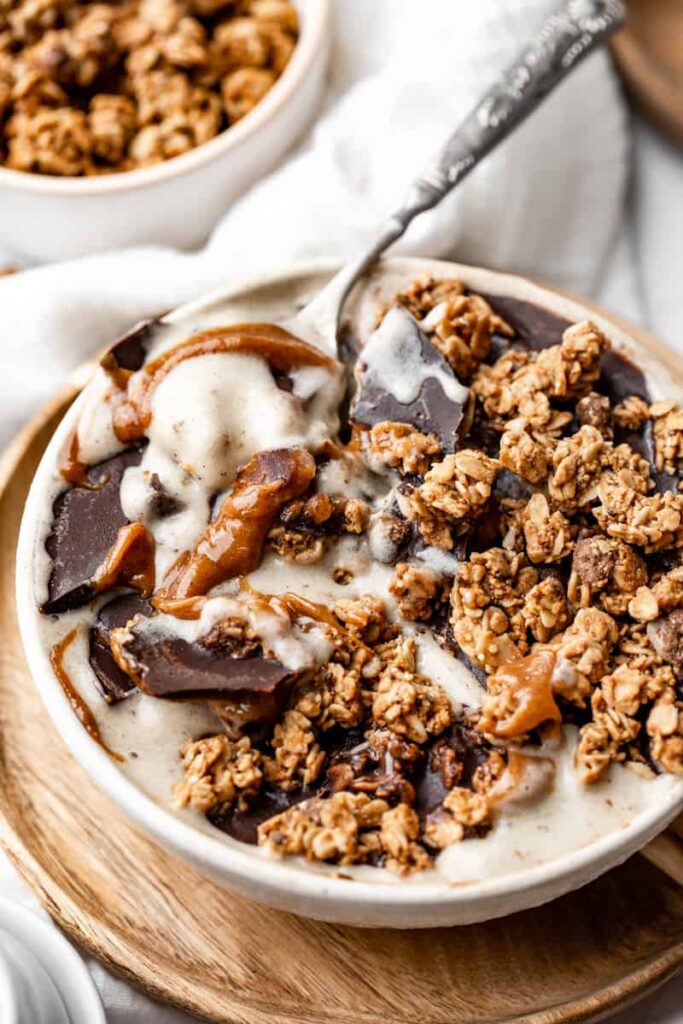
This magic chocolate sauce is the final touch that takes this already delicious dessert to the next level! It looks like any runny chocolate sauce, but once poured on top of the nice cream, it instantly hardens to become a delicious crispy chocolate shell! The exact amount of crunchiness that was missing to perfect balance the smoothness of nice cream.
Making the magic chocolate shell is extremely simple. Start by melting the coconut oil in a bowl, in micro wave or in a double boiler. When the coconut oil is completely liquid, add cocoa powder and maple syrup and stir to combine, until you get a smooth and runny sauce.
When you’re ready to assemble your nice cream, take the nice cream out of the freezer and serve in a bowl. Immediately poured the chocolate sauce on top. The coconut oil contained in the chocolate sauce will become solid in contact with the cold nice cream. Wait a few seconds for the chocolate sauce to harden before to enjoy!
For more frozen desserts and plant based ice creams, check out these recipes:
- No-banana Raspberry Avocado Nice cream
- Healthy Snickers Ice cream
- Fudgey Hazelnut Praline Popsicles
- Strawberry Basil and Coconut Ice cream
- Chickpea Cookie Dough Popsicles
- No churn Cherry Amaretto Ice cream
I love to see your creations! Don’t forget to tag me @alicepages on your photos on Instagram and give your feedback in the comments below if you make this recipe at home! Your opinion is my best reward.
PrintVanilla Nice Cream with Peanut Butter Caramel and Chocolate Shell
This banana nice cream with peanut butter caramel, crunchy granola and a crisp chocolate shell is the perfect healthy treat to indulge anytime. Easy to make with only bananas, vegan and packed with nutrients.
- Total Time: 20 minutes
- Yield: 2 servings
Ingredients
Vanilla nice cream
- 2 ripe bananas, sliced and frozen
- 2 tbsp plant-based milk (like almond, soy, coconut, cashew …)
- 1/2 fresh vanilla bean or 1/4 tsp vanilla powder
Peanut butter caramel sauce
- 1 tbsp smooth peanut butter (or any other nut butter, like almond, cashew, tahini or sunflower seed for a nut-free option)
- 1 tbsp maple syrup
- 1/2 tsp vanilla extract
- 1 pinch of flaky sea salt
Chocolate shell sauce
- 1 tbsp coconut oil, melted
- 1 tbsp cocoa powder, unsweetened
- 1 tbsp maple syrup
Toppings
- 2 handfuls of Purely Elizabeth Vanilla Chocolate chip Granola (or any granola of your choice)
Instructions
- Prepare the nice cream. The day before, slice the bananas into large chunks and place in the freezer overnight or at least 8 hours until they are completely frozen.
- Add frozen bananas and plant-based milk to a high speed blender, and blend until smooth and no chunks remain. Depending on the power of your blender, you might need to add a little more milk to make the process easier.
- Scrap the vanilla bean and add the seeds to the nice cream. Blend to combine. Transfer the nice cream to a container and store in freezer while you prepare the other elements.
- To make the peanut butter caramel sauce, stir peanut butter together with maple syrup, vanilla extract and flaky sea salt into a bowl until smooth and creamy. Set aside.
- To make the chocolate shell, melt the coconut oil in a bowl. Then add cocoa powder and maple syrup and stir to combine, until you get a smooth and runny sauce.
- When ready to serve, remove the nice cream from freezer. Grab a medium serving bowl and arrange a handful of granola on the bottom. Pour the nice cream on top and smooth the surface using the back of a spoon. Drizzle the caramel sauce to make swirls, then pour the chocolate sauce on top and immediately sprinkle more granola. Wait a few seconds for the chocolate sauce to harden before to enjoy.
Notes
- Prep time does not include freezing the bananas.
- Serve the nice cream immediately for a soft-serve ice cream or freeze at least 5 hours for a scoopable ice cream. Store the nice cream in an airtight container in the freezer for up to 1 week.
- Prep Time: 20 minutes
- Category: Desserts
- Method: Freezer
- Diet: Vegan
Recette version française
PrintNice Cream Banane Vanille, Caramel Cacahuète et coque en Chocolat
Cette crème glacée végétale à base de bananes congelées est très simple et rapide à préparer. Garnie d’un caramel au beurre de cacahuète, de granola et d’une coque craquante en chocolat, elle est parfaite pour un dessert ou un petit-déjeuner très gourmand.
- Total Time: 20 minutes
- Yield: 2 bols
Ingredients
Nice cream banane vanille
- 2 bananes mûres préalablement congelées
- 30 ml de lait végétal au choix (amande, soja, coco, avoine …)
- 1/2 gousse de vanille ou 1/4 cuillère à c. de vanille en poudre
Sauce Caramel
- 20 g de beurre de cacahuète nature (ou autre beurre d’oléagineux au choix: amande, noix de cajou, noisette, purée de sésame …)
- 20 g de sirop d’érable
- 1/4 cuillère à c. d’extrait de vanille
- 1 pincée de fleur de sel
Coque en chocolat
- 20 g d’huile de coco liquide
- 15 g de cacao en poudre
- 20 g de sirop d’érable
Garniture
- 2 poignées de granola au choix
Instructions
- La veille, éplucher puis couper les bananes en tranches épaisses. Disposer les tranches de bananes dans un sac congélation ou un récipient, et placer au congélateur pendant au moins 8 heures jusqu’à ce qu’elles soient dures.
- Placer les tranches de bananes congelées dans un blender avec le lait végétal, et mixer jusqu’à obtenir un mélange parfaitement lisse et onctueux, sans morceaux. Cela peut prendre plusieurs minutes avant d’atteindre la bonne texture, en fonction de la puissance du blender. Si besoin, ajouter un peu de lait végétal pour faciliter l’opération.
- Fendre et grater l’intérieur de la gousse de vanille avec la pointe d’un couteau pour en récupérer les grains. Ajouter les grains de vanille à la nice cream et mixer pour incorporer. Transférer la nice cream dans un récipient et placer au congélateur jusqu’au moment du dressage.
- Pour préparer la sauce caramel, mélanger toues les ingrédients dans un bol jusqu’à obtenir une sauce lisse et crémeuse. Réserver.
- Préparer la sauce pour la coque en chocolat. Faire fondre l’huile de coco dans un bol au micro onde ou au bain-marie. Ajouter ensuite le cacao en poudre et le sirop d’érable, et mélanger jusqu’à obtenir une sauce fluide sans grumeaux.
- Au moment de servir, sortir la nice cream du congélateur. Disposer une poignée de granola au fond d’un bol, puis recouvrir de nice cream et lisser la surface avec une cuillère. Verser la sauce caramel avec une cuillère en formant des tourbillons. Verser la sauce chocolat de façon à recouvrir le tout et ajouter immédiatement le granola. Attendre quelques secondes que la sauce chocolat durcisse avant de déguster.
Notes
- Le temps de préparation n’inclus pas le temps de congélation des bananes.
- Servez la nice cream immédiatement pour une crème glacée crémeuse, ou placez-la au congélateur pendant 4 heures pour une texture plus ferme. La nice cream se conserve pendant 1 semaine au congélateur dans un récipient hermétique.
- Prep Time: 20 minutes
- Category: Desserts
- Method: Congélateur
- Diet: Vegan


0 Comments