

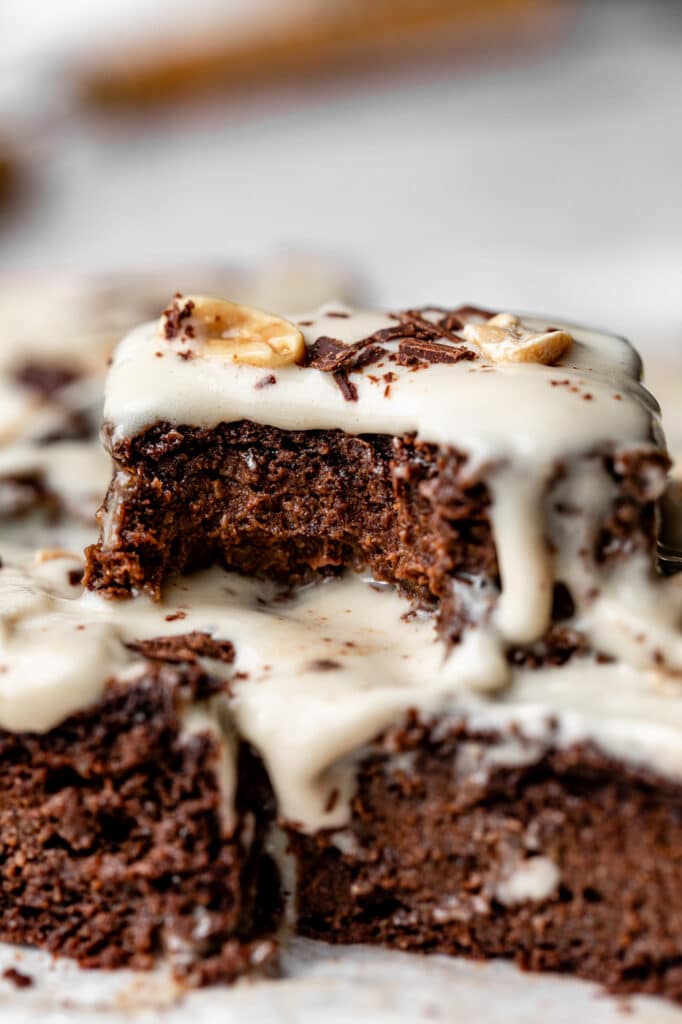
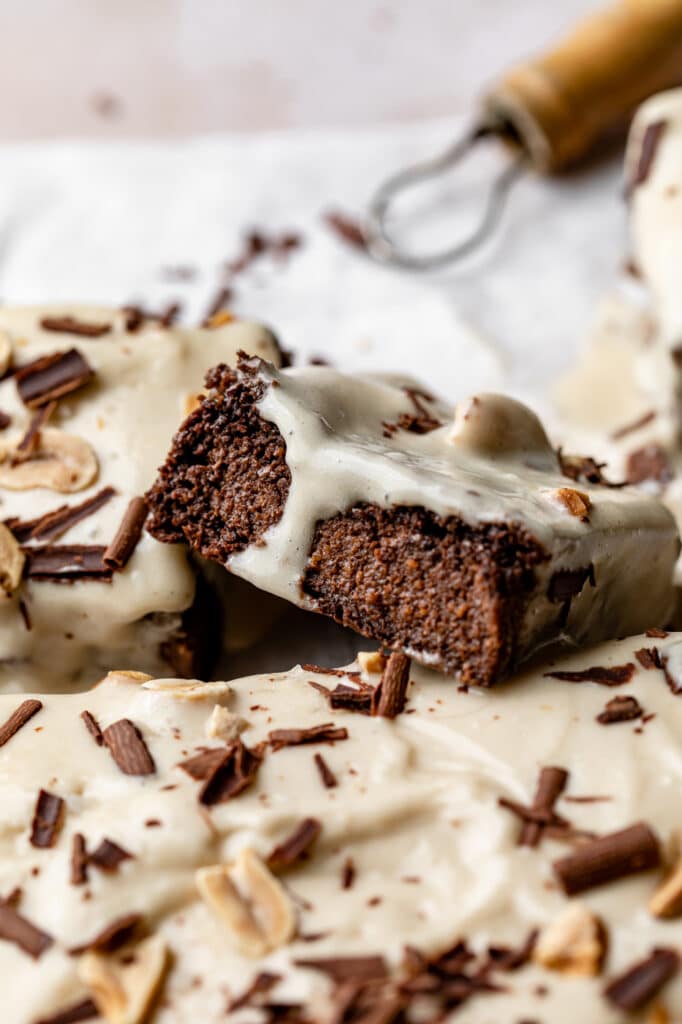
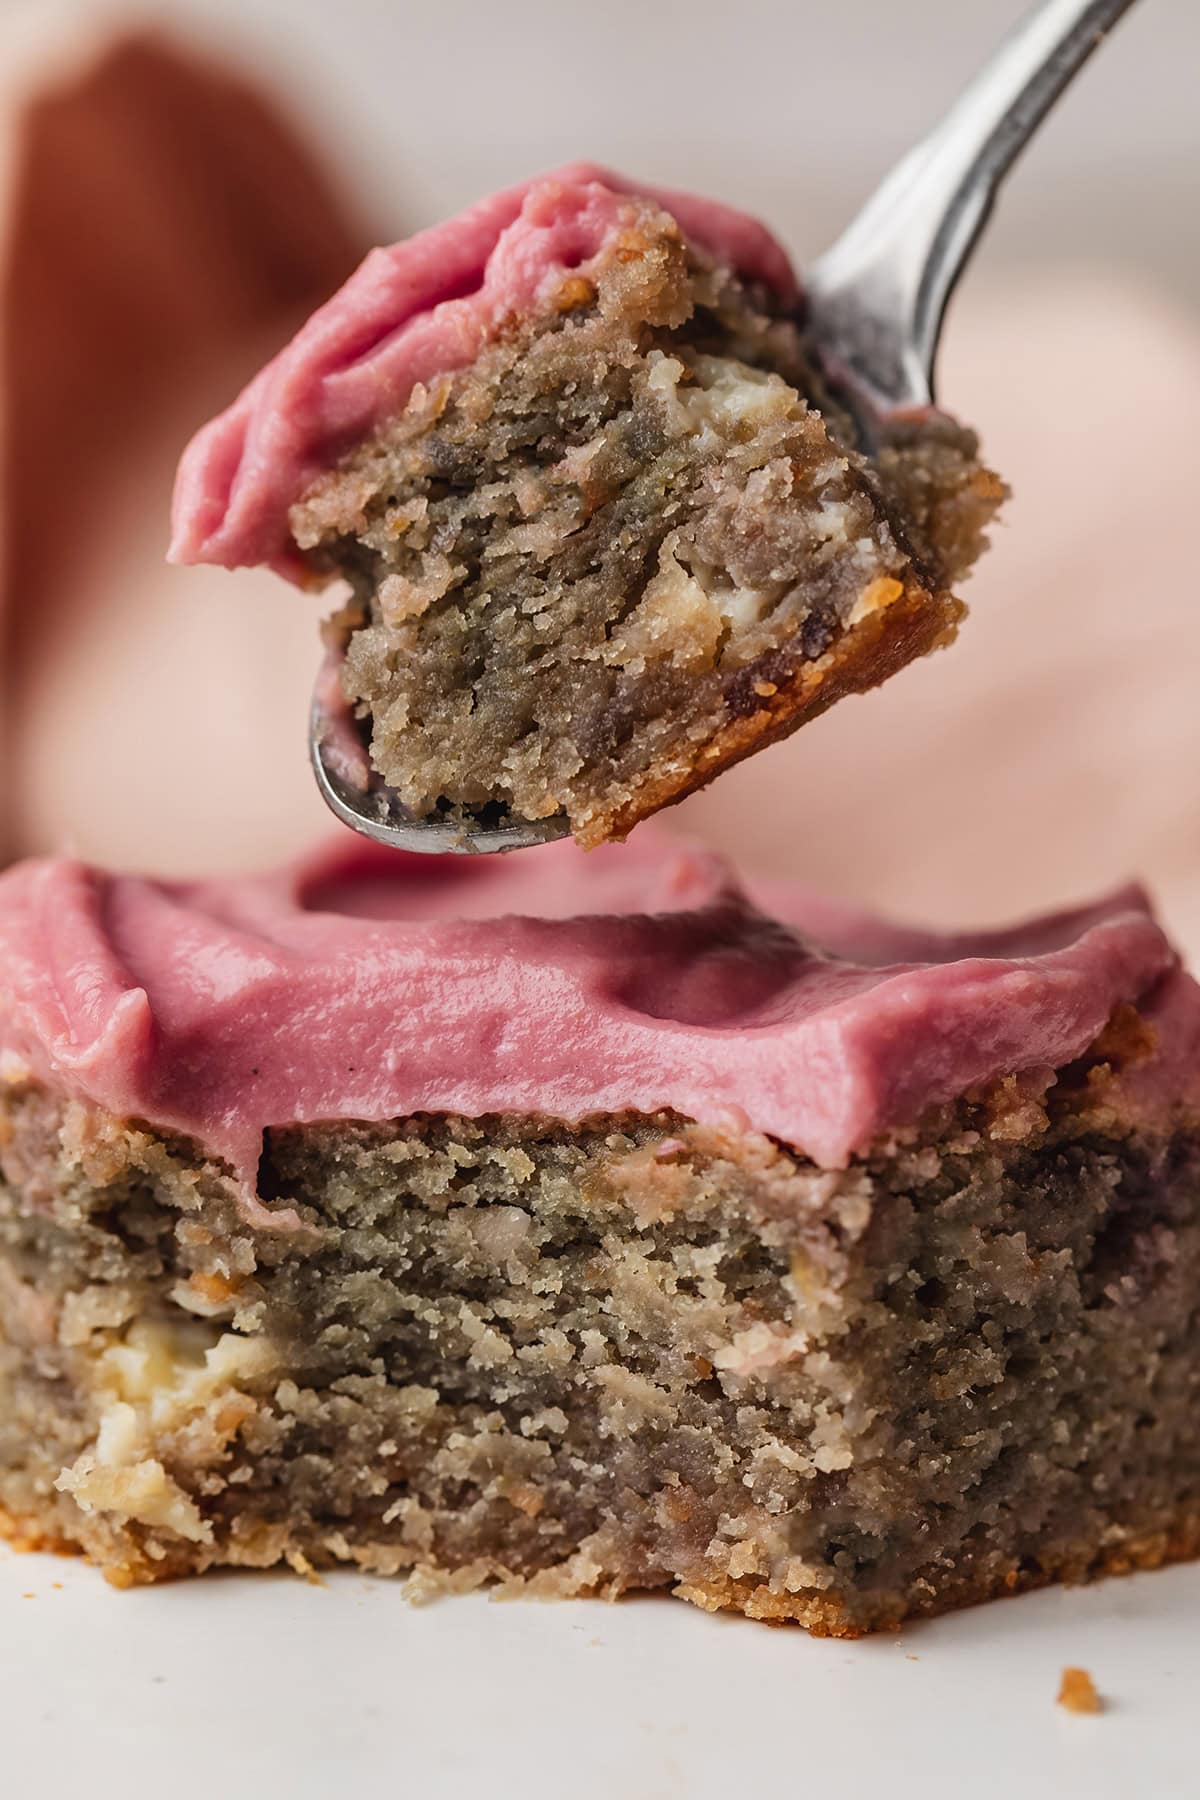
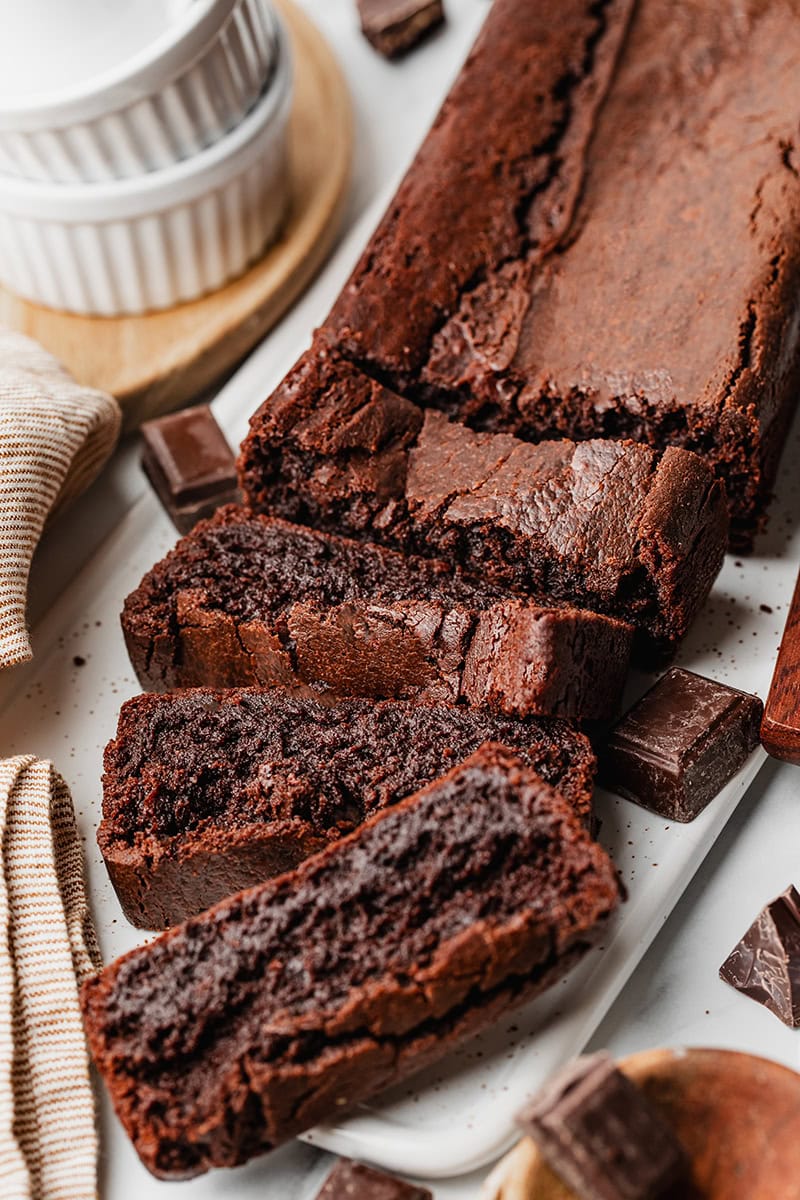
If you like extra fudgy brownies, the ones that melt in your mouth, these mocha quinoa brownies are for you! They have a deep chocolate and coffee flavor, dreamy soft texture, and are topped with a rich peanut butter frosting. Plus, they are loaded with proteins and fibers. So indulgent you will never believe these quinoa brownies are gluten free and entirely flourless!
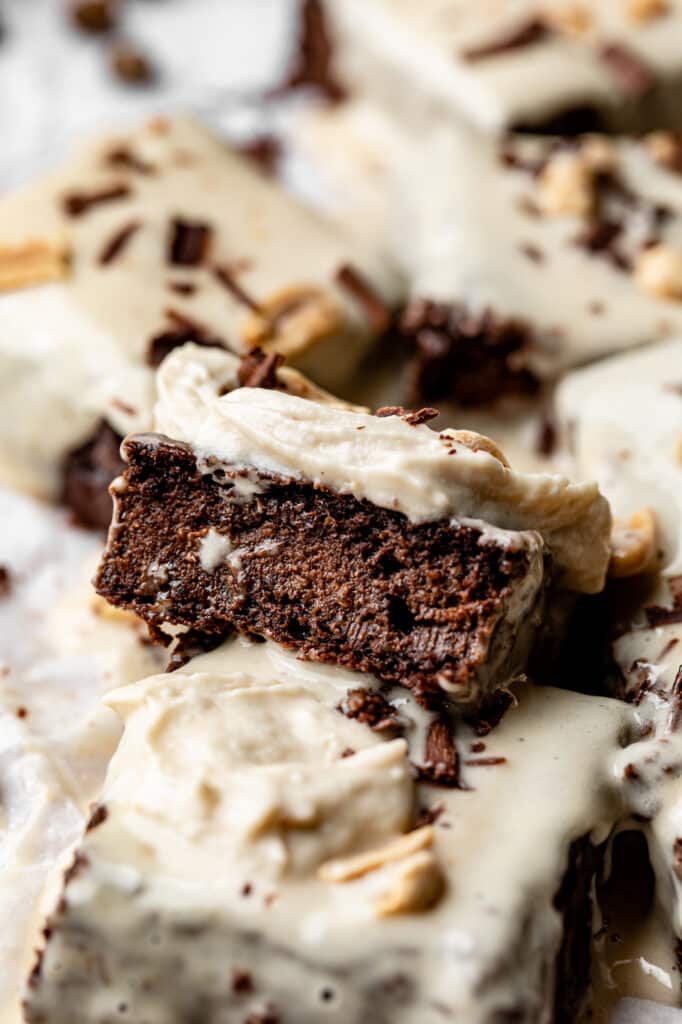
The best moist and fudgy quinoa brownies
What makes this brownies very special?
Well, there are already a lot of vegan, gluten free, grain free, or whatever free brownies recipes on the Internet. But guys, THIS one is completely different from anything you’ve already seen so far! Because these brownies are actually made of … QUINOA! Yes, quinoa, the same as you’re having for lunch. Not quinoa flour or just a tiny spoon of it, cause cooked quinoa does is the major ingredient of this brownies. If you’re a quinoa hater, no worries, I promise you cannot taste the quinoa or feel it’s texture. Once cooked and blended, it completely disappears behind the rich and delicious flavors of chocolate and coffee.
One advantage of using cooked quinoa is that it brings moisture and texture while acting like a binder, for a very fudgy and rich brownies without the addition of flour! So yes, this quinoa brownies is completely free from flour. Quinoa is also a magical ingredient packed with proteins and nutrients.
What is quinoa?
While it became very popular by the world, and especially in the healthy and vegan food sphere, Quinoa is a very ancient South American grain that was cultivated and consumed for centuries. Quinoa was first grown by humans about 7,000 years ago in the Andes. The Incas called it “the mother grain” due to its high nutritional content. Indeed, quinoa is loaded with nutrients, vitamins and minerals and contains more fiber and protein than most other grains. That’s why it is very popular with vegetarians and vegans. It’s also naturally gluten free and safe for persons having celiac disease.
Why is this the BEST quinoa brownies?
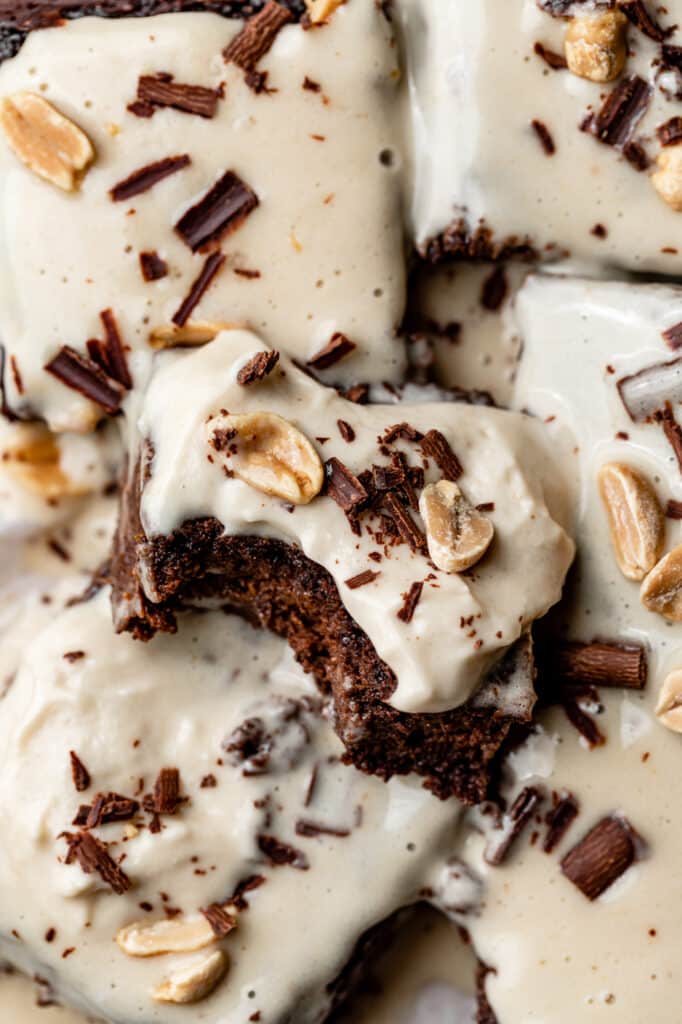
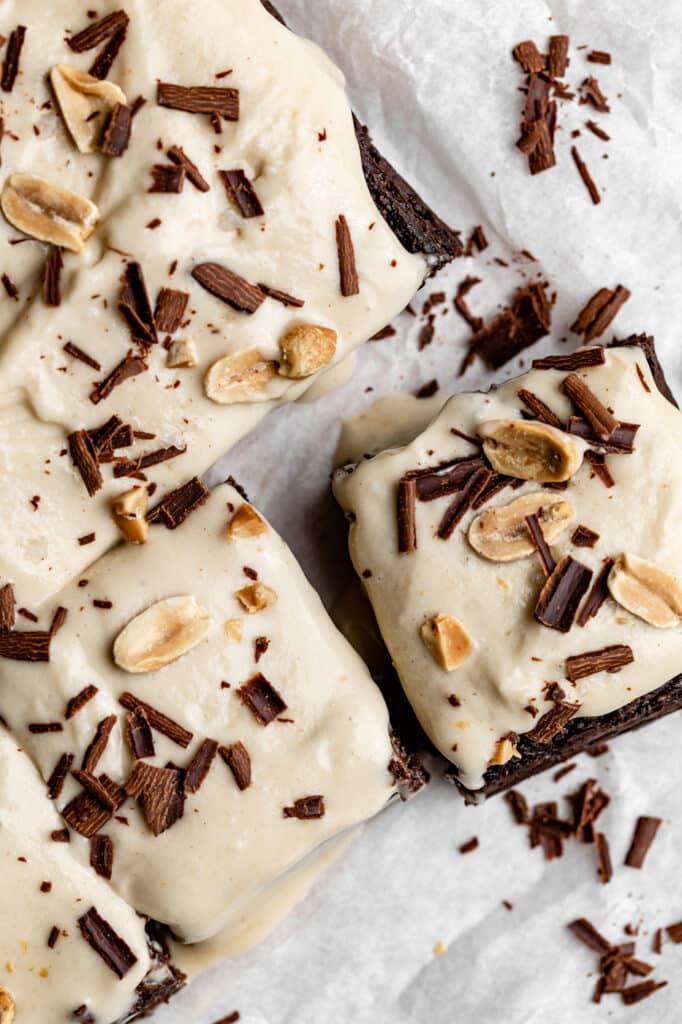
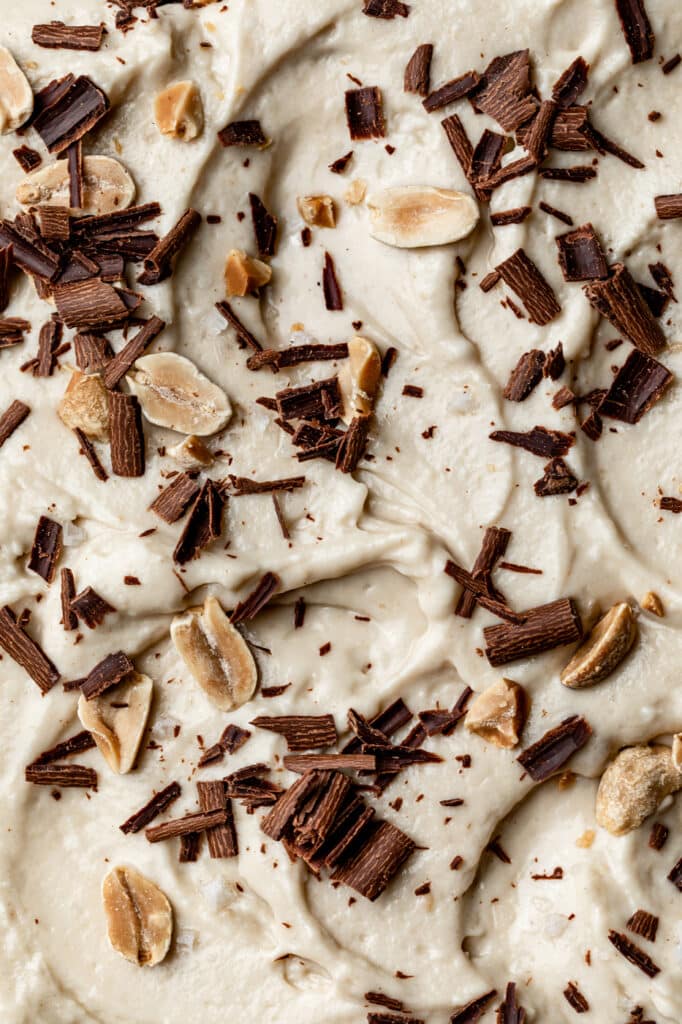
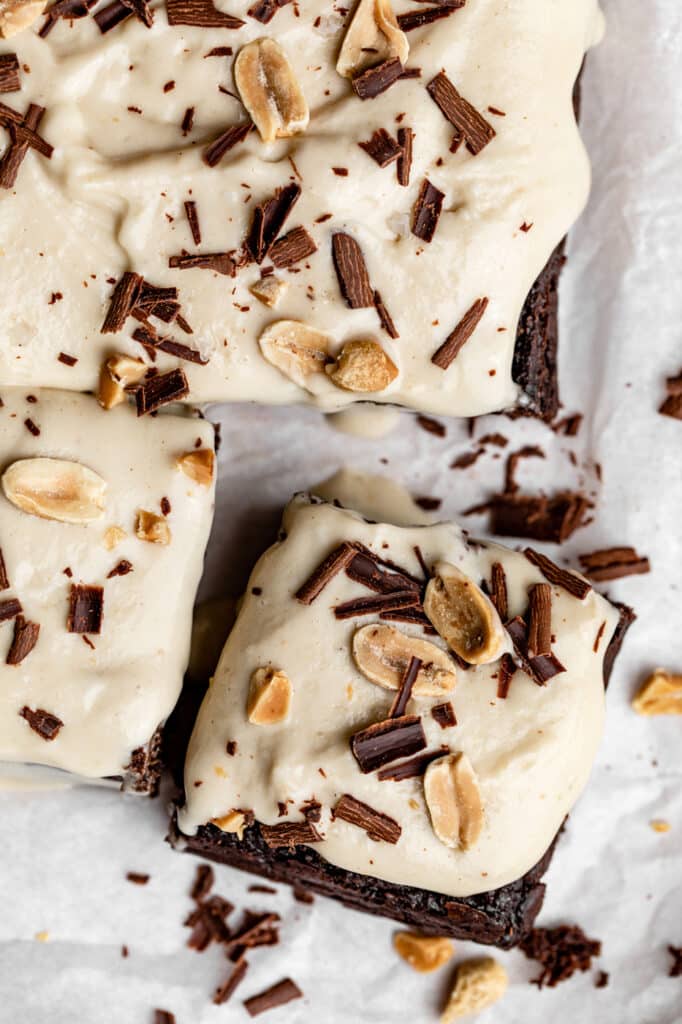
Because it’s made with cooked whole quinoa, these brownies not only are loaded with nutrients, packed with complete proteins and fibers, but it’s also incredibly fudgy! They have a rich and intense cocoa flavor that is enhanced by the addition of espresso and fresh ground coffee. In addition, they are topped with a creamy peanut butter frosting that goes perfectly with the chocolate and coffee flavor. Sprinkled with a handful of roasted peanuts for crunchiness chocolate shaves for extra chocolate, this mocha quinoa brownies is a wonderful cake you can enjoy for snack or dessert.
Flourless Mocha quinoa brownies and Peanut butter frosting ingredients
For the brownies
- Quinoa – Well, you got it, quinoa is the star of this recipe. You have to use white quinoa, and not black or red quinoa, or quinoa flour.
- Almond milk – I mostly use almond milk in cakes recipes because it is light in flavor. But you can also use soy or oat milk.
- Dairy free yogurt – You can use whatever variety of dairy-free yogurt, like soy, almond, oat or even coconut yogurt.
- Espresso – Prepare an espresso with the method of your choice or use black brewed coffee. If you don’t like coffee you can simply replace it with 1 tablespoon (15 ml) of milk.
- Vegetable oil – Using oil instead of butter gives this brownie a lighter texture. I recommend grapeseed oil because it’s made with a natural processing method and has a very light flavor, but you can use peanut, canola or any light flavored vegetable oil.
- Coconut sugar – Coconut sugar is my favorite powdered sugar option. It as a low glycemic index and a delicious caramel flavor. You can also use cane sugar.
- Cocoa powder – Choose a good quality unsweetened cocoa powder for a rich and intense cocoa flavor. Make sure it contains only cocoa, cause some preparations can have sugar or powdered milk.
- Ground coffee – Coffee adds deepness and enhance the overall flavors of the brownies. Preferably use freshly ground coffee but instant coffee works as well. If you replace with more cocoa.
For the frosting
- Coconut milk – For a thick and creamy frosting, it’s important that you use full-fat coconut cream and not milk. Check the content of coconut on the packaging, it should be at least 85%.
- Peanut butter – Use a smooth natural peanut butter to avoid grainy texture of the frosting. You can also make your own peanut butter by mixing roasted peanuts.
- Maple syrup – You can either use maple syrup or agave to sweeten the frosting. Keep in mind that maple has a darker color and might slightly colored the frosting.
Make the peanut butter mousse frosting
Start by making the peanut butter frosting so it has enough time to firm in the fridge while you prepare and bake the brownies. You can use either a stand mixer or a hand mixer to make this frosting. For a thick and creamy frosting, it’s very important that you use coconut cream and not coconut milk.
- Place a can of full-fat coconut milk (at least 85% of coconut) in the fridge overnight.
- Open the can of coconut milk without shaking it and scoop out only the layer of solid cream that has formed on top. Leave the liquid (coconut water) for another use.
- In a large mixing bowl using a hand or stand mixer with the paddle attachment, mix the coconut cream for 1 minute until smooth and fluffy.
- Scrape down the sides of the bowl and add in the peanut butter, maple and salt. Beat again on high speed for 1-2 minutes to incorporate the ingredients and get a firm, light and fluffy mousse.
- Transfer the peanut butter frosting to an airtight container and place in the fridge to chill and firm, for at least 1 hour, ideally more.
Make the quinoa brownies
Now that the frosting is ready and chilling in fridge, it’s time to prepare the star of the recipe, the quinoa brownies. The recipe is pretty simple, but it’s very important that you measure precisely the quantity of all the ingredients to get the right consistency. Else, you could end up with a too dense or too wet brownies. I recommend to use a kitchen scale and use the metric measurements.
- Preheat the oven to 350F (175°C) and grease and line an 8×8 (20x20cm) square baking dish with parchment paper.
- Cook about 80 g of dry quinoa accordingly to the packaging instructions, about 10 minutes in a saucepan with twice its volume of water until its tender and fluffy. Remove the pan from heat. Take off the excess water then cover with a lid and leave for 10 minutes more. The grains will continue to swallow and become very fluffy and tender.
- Measure precisely 250 g of the cooked quinoa and place in a blender or in a food processor, with the almond milk, yogurt, coffee and vanilla. Blend until smooth and creamy. Then add the oil and blend to combine.
- Separately, whisk together the dry ingredients: sugar, cocoa, coffee, baking powder and salt.
- Pour the quinoa mixture to the dry ingredients and mix well with a spoon to combine, until you get a smooth and pretty thick batter.
- Pour the batter into the prepared pan and use a spatula to spread it evenly and smooth the surface.
- Bake for 30 minutes, or until the center of the brownies is dry to touch but may seem slightly underdone. Check with a toothpick if the brownie is baked in the middle.
- Remove from the oven and let cool in the dish for at least 30 minutes to firm up. Then take the brownies out of the dish and leave 15 minutes more to dry.
Tips for perfectly fudgy brownies
- Use a kitchen scale to measure the quinoa – In most cake recipes and especially in this one, it’s very important to measure precisely all the ingredients as they all have an impact on the overall consistency and flavor. Once it cooks, the grains of quinoa absorb some of the water and gain weight. I measured that 80 g of dry quinoa gives about 250 g once cooked. However, this conversion is not complete accurate and can vary depending on the quinoa, how you cook it, how much water remains. So to avoid any problem and make sure you have the right quantity of quinoa, measure it with a kitchen scale once cooked and drained.
- Use a blender for a smooth brownies – You want the quinoa to complete disappear in the brownies and to avoid a grainy texture. For that, you’ll have to blend the cooked quinoa with a few liquid ingredients until creamy. I used my high speed blender that is perfect to make smooth preparations quickly and efficiently. However you don’t need a high speed blender for this task, even a lower powered blender will do the job. You can also use a food processor but the brownies may have a bit more texture, which is fine.
- Choose the right baking pan – As written, this recipe makes a 8-inch square brownies, but you can make it easily in an 8-inch round dish without any modifications. If you’d like to double the quantities, use a slightly larger pan and adjust the baking time as it might be thicker.
- Line the pan with parchment paper – A simple but useful tips, grease and line the bottom and sides of your dish with parchment paper, and allow the paper to hang up and over the sides for easy removal.
- Leave it to cool completely – This quinoa cake doesn’t contain any flour so it has a very moist and fudgy texture. It may seem slightly underdone when you take it off the oven, but it will continue to firm while cooling. I recommend to leave the brownies to cool for 30 minutes in the baking dish, then remove it from the dish and allow to cool and dry for an additional 15 minutes.
FAQs
Is quinoa gluten free?
No, quinoa is a naturally gluten free grain. Some of the quinoas you can find in stores are not certified as gluten free because it may have come into contact with gluten-containing products during its transformation, so it could be contaminated. If you are a celiac, make sure to buy certified gluten free quinoa.
What kind of quinoa should I use in quinoa brownies?
I recommend using white quinoa in this recipe, and not a black or red quinoa. White quinoa is the most common kind of quinoa available in stores, so you’ll often see it just called quinoa. It is softer once cooked and have a lighter flavor than the other varieties.
Can I use quinoa flour instead of cooked quinoa?
No, you can’t substitute cooked quinoa for quinoa flour to male this brownies. Quinoa flour is completely different than whole cooked grain. It’s dry like a regular flour while cooked and blended quinoa is moist and thick.
Can I make it ahead of time?
Absolutely! And I would actually recommend to make the brownies and the frosting the day before so the flavors can infuse in the brownies while the peanut butter frosting can continue to firm and be thick. If you make it ahead, I recommend to store the baked brownies and the frosting separately and make the assembly right before serving.
How can I store this quinoa brownies?
Once frosted, store the quinoa brownies in an airtight container in the refrigerator for up to 2 days. Enjoy the brownies straight from the fridge.
For more brownies and healthy bars recipes, make sure to check out my
- Fudgy Chocolate Cherry and Cream Black Forest Brownies (GF, oil free)
- Pistachio and Apricot Blondies (GF)
- Chocolate Pecan Cookies Bars (GF)
- Healthy No bake Brookie (cookies and brownies) Bar (GF)
- Peanut Butter Brownies (GF)
I love to see your creations! Don’t forget to tag me @alicepages on your photos on Instagram and give your feedback in the comments below if you make this recipe at home! Your opinion is my best reward.
Print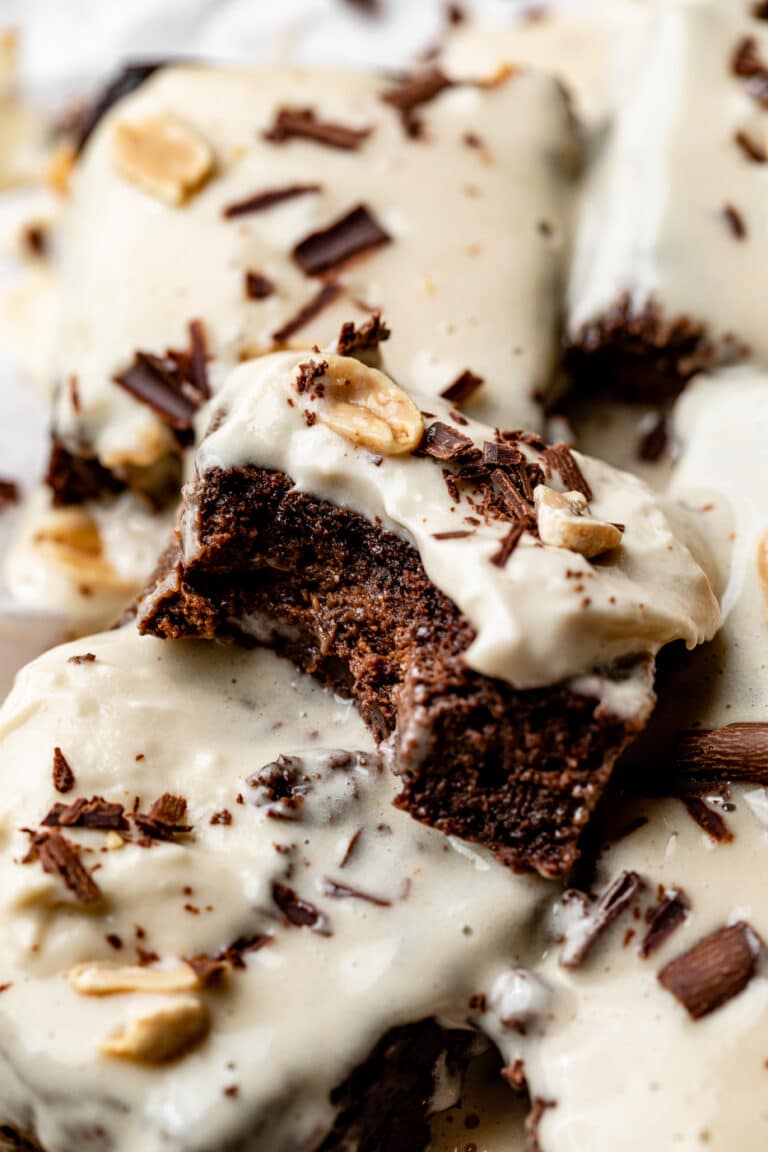
Fudgy flourless quinoa brownies and peanut butter frosting
These mocha quinoa brownies have a delicious deep flavor and ultra fudgy texture. They’re topped with a rich peanut butter frosting. So indulgent you won’t believe they are gluten free and entirely flourless!
- Total Time: 1 hour 50 minutes
- Yield: 9 slices
Ingredients
For the brownie
- 250 g cooked quinoa *see notes for dry quantities
- 50 ml almond milk
- 100 g dairy-free yogurt
- 1 tbsp (15 ml) espresso coffee
- 1 tsp vanilla extract
- 80 g vegetable oil, neutral flavor *see notes for options
- 100 g coconut sugar (or cane sugar)
- 50 g cocoa powder, unsweetened
- 2 tbsp (10 g) fresh ground coffee (optional)
- 1 tsp (5 g) baking powder
- 1 pinch of salt
For the peanut butter frosting
- 1 14-oz (400 ml) full-fat coconut milk, chilled in the fridge overnight
- 120 g smooth peanut butter
- 2 tbsp (50 g) maple syrup or agave
- 1 pinch of salt
Toppings
- Roasted peanuts
- Shaved dark chocolate or chocolate chips *see notes
- A pinch of sea salt flakes
Instructions
Peanut butter frosting
- Open the can of coconut milk without shaking it and scoop out only the layer of solid cream that has formed on top. Leave the liquid for another use.
- In a large mixing bowl using a hand or stand mixer with the paddle attachment, mix the coconut cream for 1 minute until smooth and fluffy.
- Scrape down the bowl and add in the peanut butter, maple and salt. Beat on high speed for 1-2 minutes to incorporate and until you get a firm, light and fluffy mousse.
- Transfer to a container and place in the fridge to chill and firm up, for at least 1 hour, ideally more.
Brownies
- Preheat the oven to 350F (175°C) and grease and line an 8×8 (20x20cm) square baking dish with parchment paper.
- Cook the quinoa accordingly to the packaging instructions, about 10 minutes in a saucepan with twice its volume of water until its tender and fluffy. Remove the pan from heat. Take off the excess water then cover with a lid and leave for 10 minutes more.
- Measure precisely 250g of cooked quinoa and place in a blender with the almond milk, yogurt, coffee and vanilla. Blend until smooth and creamy. Then add the oil and blend to combine.
- In a large bowl, whisk together the sugar, cocoa powder, ground coffee, baking powder and salt.
- Pour the wet preparation to the dry ingredients and mix well to combine, until you get a smooth and pretty thick batter.
- Pour the batter into the prepared pan and use a spatula to spread it evenly and smooth the surface.
- Bake for 30 minutes, or until the center of the brownies is dry to touch but may seem slightly underdone. Check with a toothpick if the brownie is baked in the middle. It must come out nearly clean. If the brownie is still too wet, cook for another 5 minutes and check again.
- Remove from the oven and let cool for at least 30 minutes to firm up.
- Once the brownies has completely cooled, put the peanut butter frosting on top and spread it with a spatula. Sprinkle with roasted peanuts, chocolate shaves and a pinch of sea salt flakes. Cut in slices and enjoy!
Notes
- 250g cooked quinoa equals to about 80g dry quinoa. In any case, make sure to precisely weight the quinoa you’ve cooked before to add.
- I recommend grapeseed oil because it’s made with a natural processing method and has a very light flavor, but you can use peanut, canola or any light flavored vegetable oil.
- Use a vegetable peeler to shave a dark chocolate bar.
- For a thick and creamy frosting, it’s important that you use coconut cream and not milk. For that, place a can of full-fat coconut milk in the fridge overnight. Then open the can without shaking and scoop out only the thick layer of cream that has formed on top.
- Store the brownies in an airtight container in the fridge for up to 2 days. Enjoy the brownie straight from the fridge. You can prepare the brownies and the frosting ahead and store them separately in the fridge.
- Prep Time: 20 minutes
- Chill time: 1 hour
- Cook Time: 30 minutes
- Category: Dessert
- Method: Oven
- Cuisine: American
- Diet: Gluten Free
Recette version française
Print Brownies fondant au quinoa et au beurre de cacahuètes
Des brownies aussi décadents que surprenants, au bon goût de chocolat et à la texture ultra fondante, le tout surmonté d’une mousse au beurre de cacahuètes. Ils ne contiennent pas de farine et sont naturellement sans gluten.
- Total Time: 1 heure 50 minutes
- Yield: 6 parts
Ingredients
Pour le brownie
- 250 g de quinoa cuit *voir notes pour quantités crues
- 50 ml de lait d’amandes
- 100 g de yaourt végétal nature
- 15 ml de café noir
- 1 cuil. à café de vanille liquide
- 80 g d’huile végétale neutre *voir notes
- 100 g de sucre de coco
- 50 g de cacao en poudre non sucré
- 10 g de café en poudre fraichement moulu (optionnel)
- 5 g de levure chimique
- 1 pincée de sel
Pour la mousse au beurre de cacahuètes
- 1 conserve de 400 ml de lait de coco, placée au frais toute une nuit
- 120 g de beurre de cacahuètes
- 50 g de sirop d’érable ou d’agave
- 1 pincée de sel
Pour la garniture
- 1 poignée de cacahuètes grillées non salées
- Des copeaux ou pépites de chocolat *voir notes
- 1 pincée de fleur de sel
Instructions
Glaçage beurre de cacahuètes
- Ouvrir la conserve de lait de coco préalablement placée au réfrigérateur en prenant soin de ne pas la secouer. Prélever uniquement la couche de crème épaisse formée au dessus et réserver le liquide pour une autre utilisation.
- Battre la crème de coco au robot avec l’accessoire fouet ou au batteur à main, pendant environ 1 minute, jusqu’à obtenir une crème onctueuse.
- Ajouter le beurre de cacahuètes, le sirop d’érable et le sel et continuer à battre pendant 1 à 2 minutes pour les incorporer et obtenir une mousse légère et assez ferme.
- Transférer la mousse dans un récipient et placer au réfrigérateur pendant au moins 1 heure, idéalement plus, pour qu’elle se raffermisse.
Brownies
- Préchauffer le four à 175°C et chemiser un plat d’environ 20×20 cm avec du papier cuisson.
- Si ce n’est pas déjà fait, cuire le quinoa dans deux fois son volume d’eau bouillante, pendant 10 minutes ou jusqu’à ce que toute l’eau soit absorbée. Couvrir et laisser reposer 10 minutes, puis laisser complètement refroidir.
- Placer le quinoa cuit, le lait d’amandes, le yaourt, le café et la vanille dans un blender et mixer pour obtenir une crème lisse et onctueuse. Ajouter l’huile et mixer pour l’incorporer.
- Dans un grand saladier, mélanger le sucre, le cacao, le café en poudre, la levure et le sel.
- Ajouter la crème de quinoa et mélanger pour obtenir une pâte homogène, lisse et épaisse.
- Verser la pâte dans le moule, répartir uniformément avec une spatule et lisser la surface. Enfourner pendant 30 minutes, puis vérifier la cuisson avec un cure dent: le brownie est cuit si il ressort quasiment propre. Si la pâte est encore humide, prolonger la cuisson de 5 minutes et vérifier à nouveau.
- Retirer du four et laisser le brownie refroidir pendant au moins 30 minutes pour qu’il se raffermisse. Une fois complètent refroidi, étaler la mousse au beurre de cacahuète sur le brownie et garnir cacahuètes grillées concassées, de copeaux de chocolat et d’une pincée de fleur de sel. Couper en parts et déguster!
Notes
- 250g de quinoa cuit correspondent environ à 80g de quinoa sec. Dans tous les cas, mesurez précisément la quantité de quinoa une fois cuit avec une balance.
- Je recommande l’huile de pépins de raisin, très légère en goût, mais vous pouvez également utiliser de l’huile d’arachide, de tournesol ou n’importe quelle huile végétale au goût léger.
- Utilisez un économe pour réaliser des copeaux de chocolat à partir d’une tablette!
- Le brownie se conserve pendant 2 jours dans un récipient hermétique au réfrigérateur. Vous pouvez préparer le brownies et le glaçage en avance et les conserver séparément au réfrigérateur.
- Prep Time: 20 minutes
- Temps de repos: 1 heure
- Cook Time: 30 minutes
- Category: Dessert
- Method: Four
- Cuisine: Américaine
- Diet: Gluten Free


0 Comments