

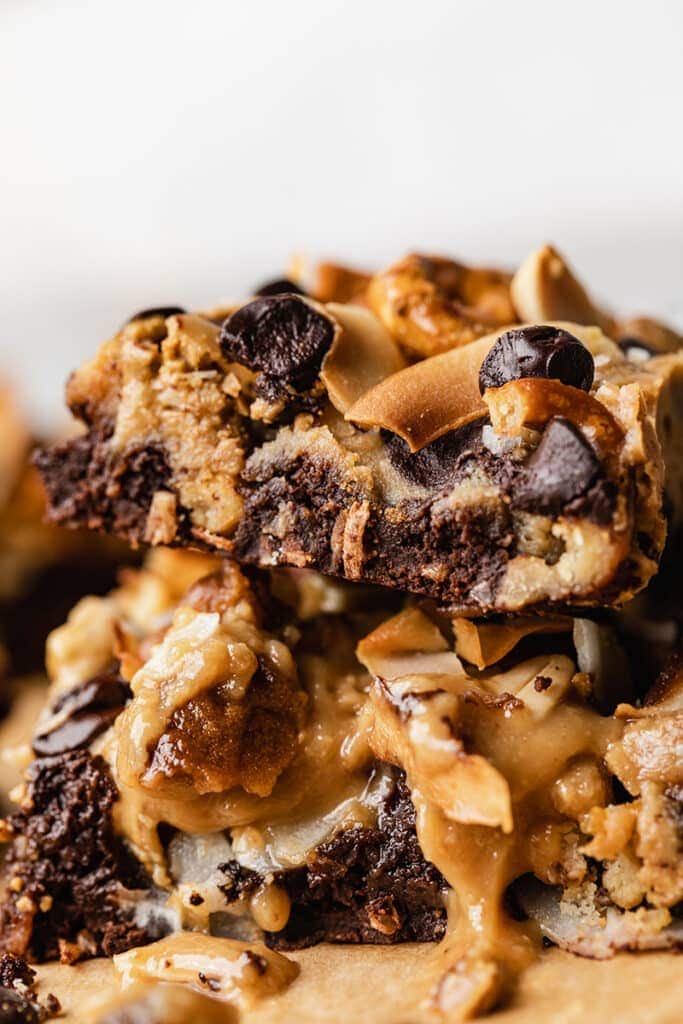
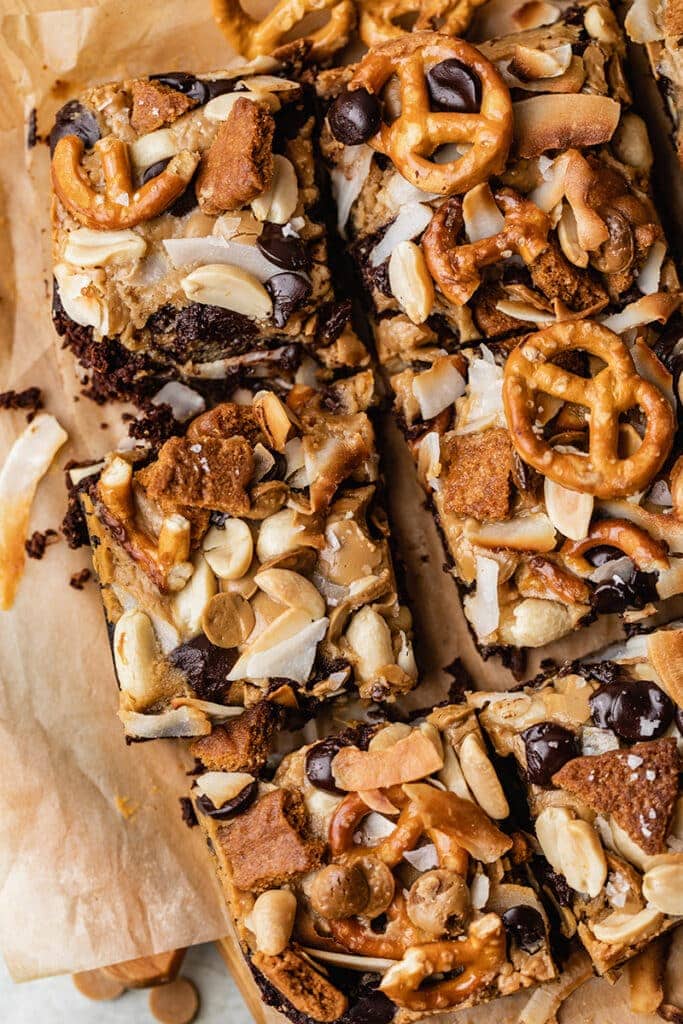
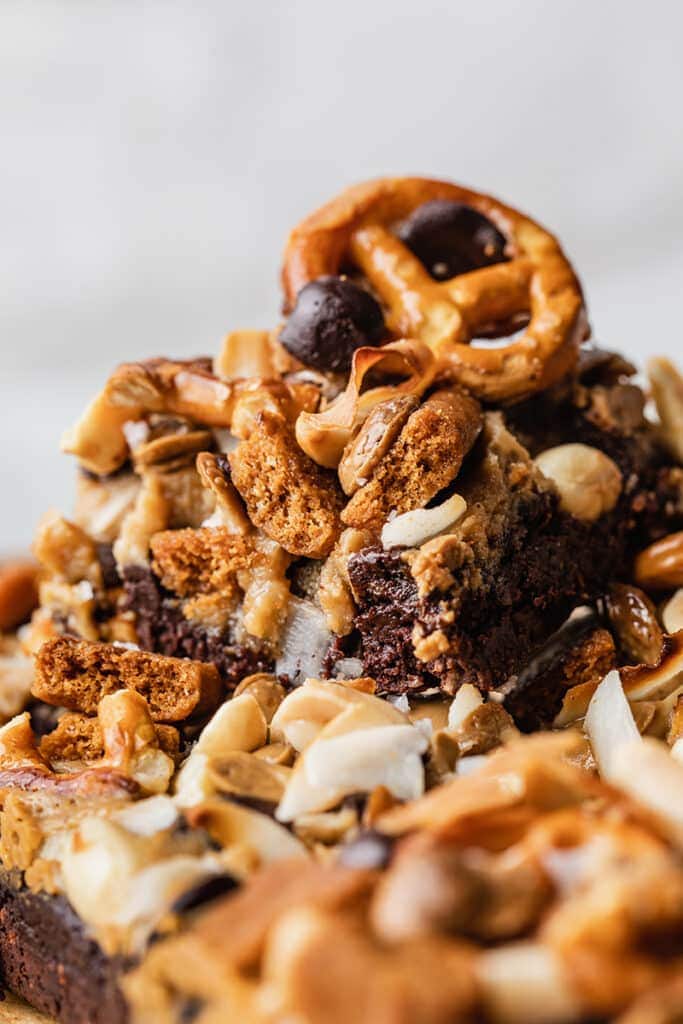
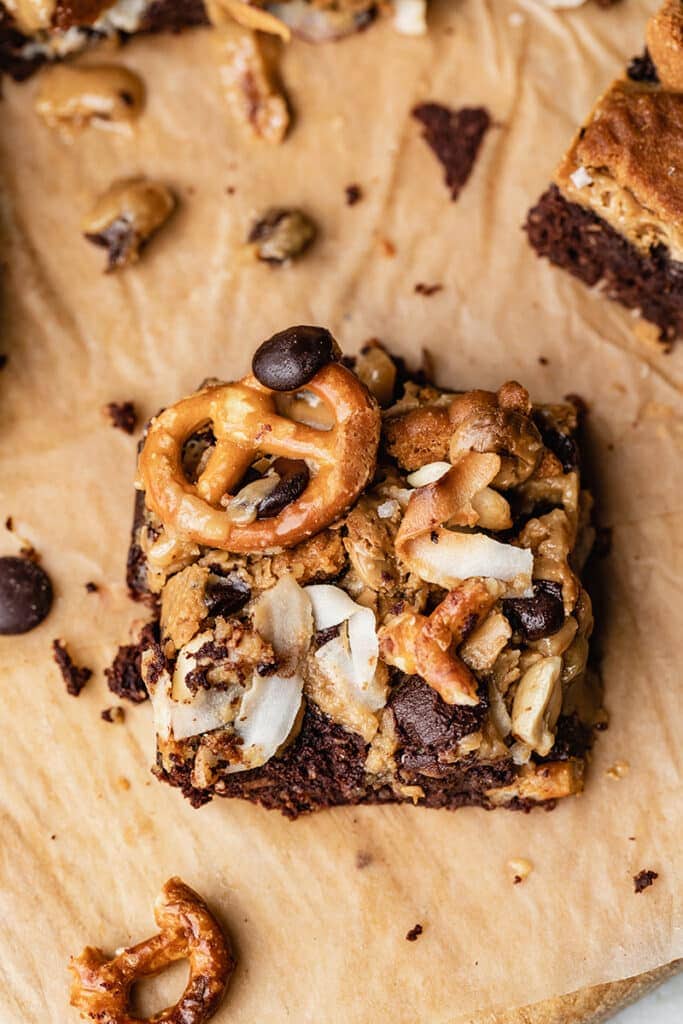
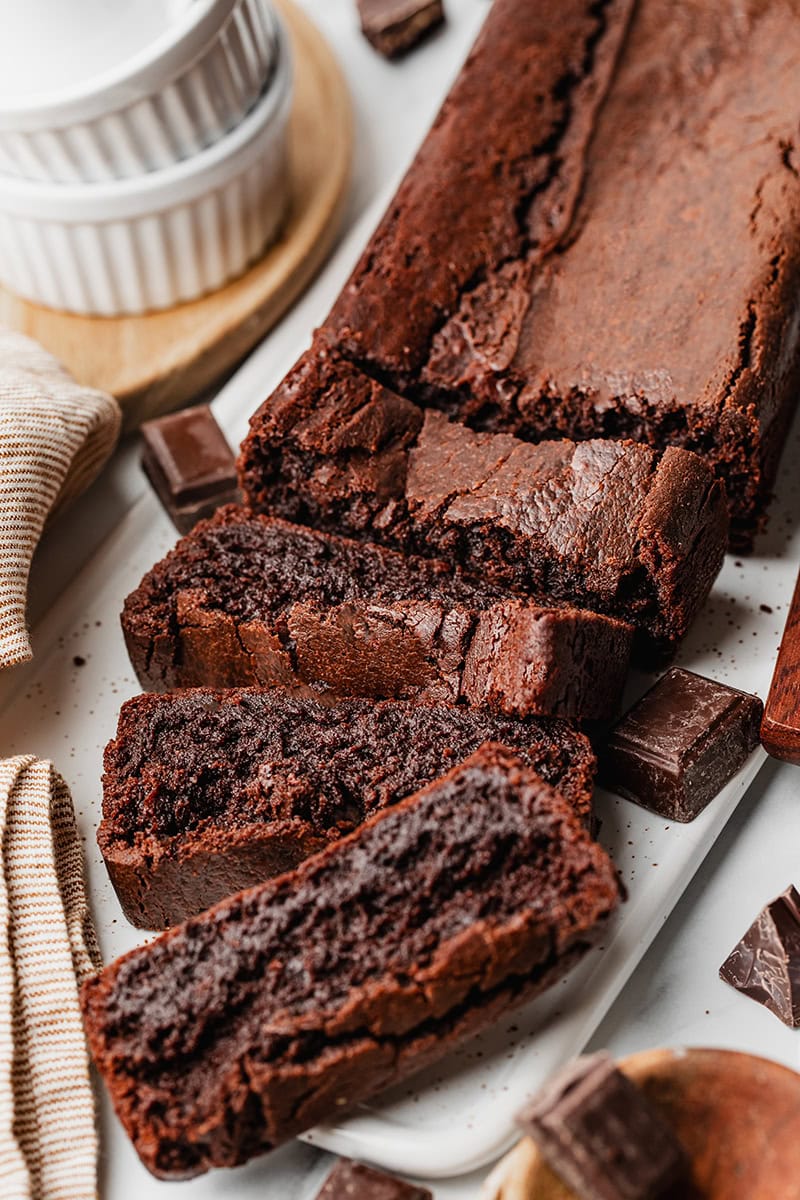
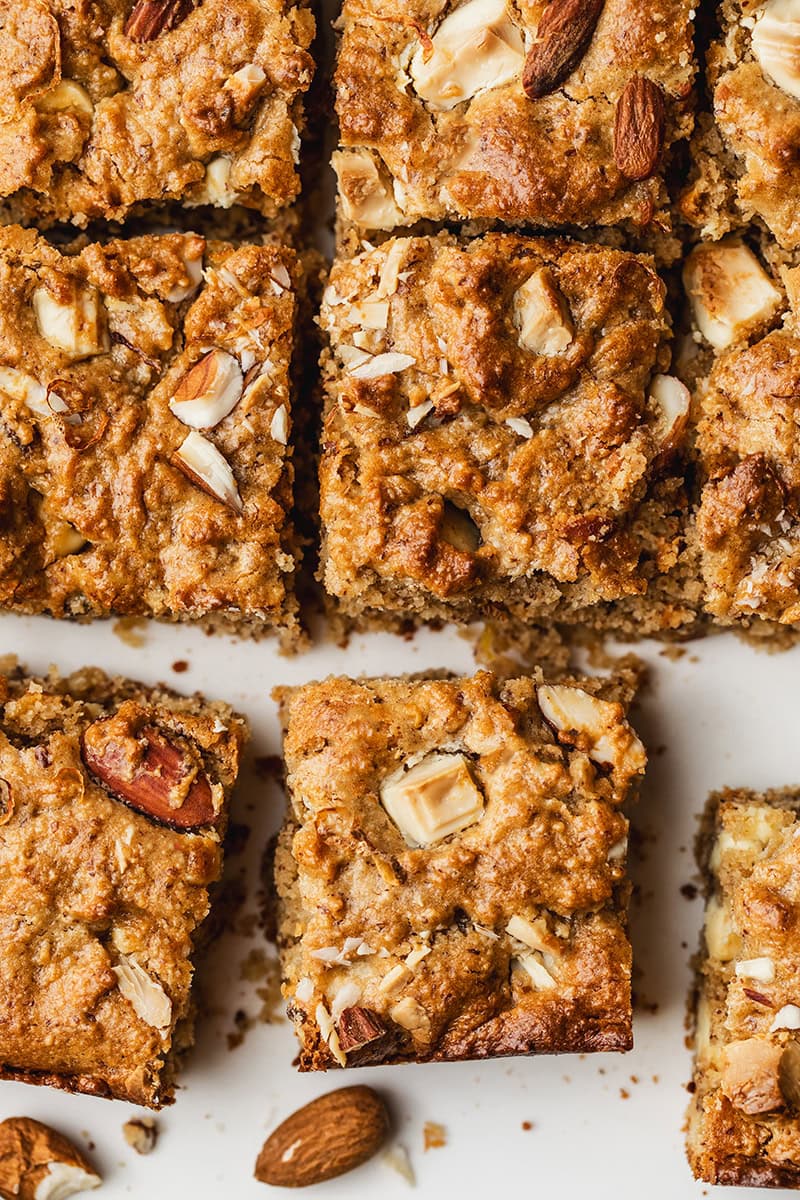
All your favorite things combined in an extremely decadent but healthy treat! These seven layer brownies bars are the best answer to your craziest sweet cravings. Soft and fudgy brownies are topped with gooey peanut butter caramel, and loaded with handful of sweet and salty goods. A perfect guilt free treat for Halloween.
Why are they called seven layer bars?
Seven layer bars, also called Magic Bars, are an easy, very rich sweet dessert bar made up of seven layers of flavors. It typically consist of a cookie crust usually made of graham cracker crumbs and butter, and topped with chocolate chips, butterscotch chips, shredded coconut, walnuts and sweetened condensed milk. So if you’re counting right, exactly seven simple ingredients!
A healthier version of candy bars
The challenge was to create a healthier yet still satisfying version of this very rich and sweet treat. And I must say that the mission is completely accomplished as these seven layer brownies bars are even more delicious as we basically added extra layers of fudgy brownies AND peanut butter caramel!
Then you gonna ask: why adding brownies and peanut butter make them healthier? Because the brownies happens to be oil free, refined sugar free, and gluten free and the caramel is made up of only four natural ingredients. I loved the idea of a simple recipe, with a large variety of sweet and savory toppings. But instead of over-processed candies you can find on top of some halloween bars, here we’re using more natural ingredients.
The best toppings for seven layer brownies bars
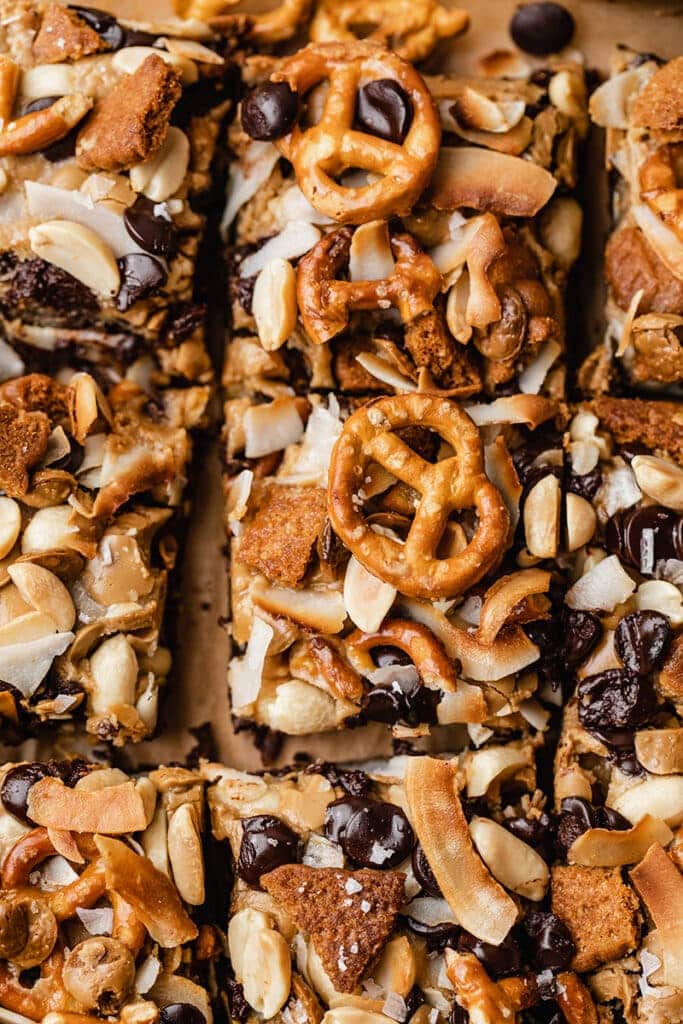
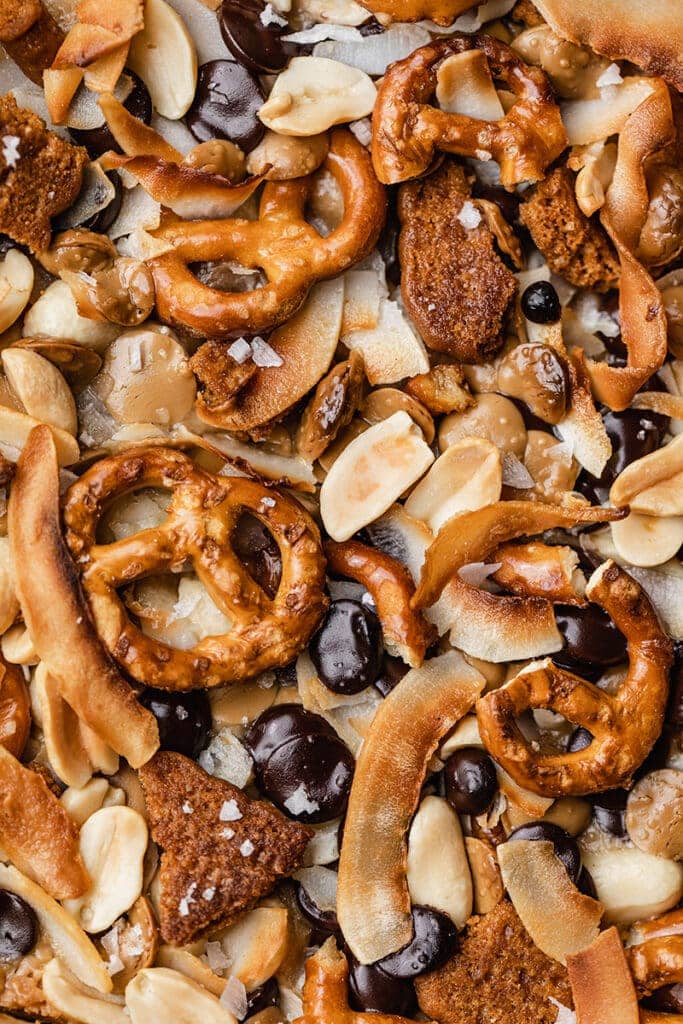
I would answer that the best toppings are the ones you love the most! For my part, I always add a little salty touch on all my desserts to counterbalance the sweetness. I also love to have a lot of different textures: soft, crunchy, melty, gooey, crispy.
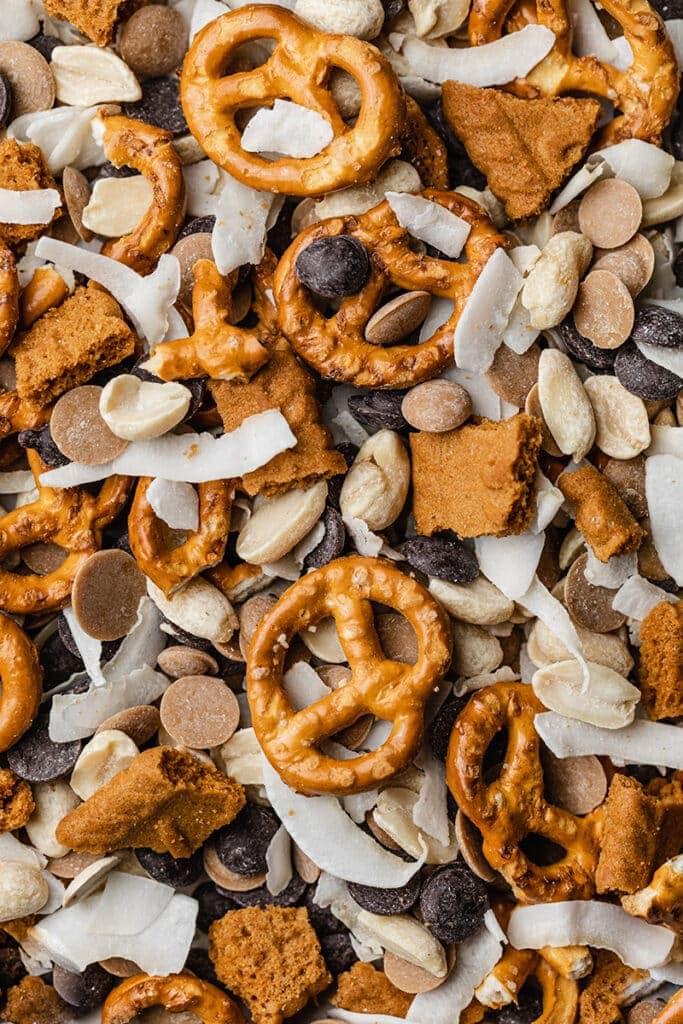
Actually any kind of nuts, chocolate, cookies and biscuits will work in this recipe. Here are some suggestions to garnish your seven layer brownies bars, but you can really go with whatever you want or can find in your kitchen cupboards. Just try to stay away from too processed products or any sugar-based candies like gummies, smarties or marshmallow.
- Nuts and seeds: almonds, hazelnuts, walnuts, cashew, pecan, sunflower, pumpkin seeds, …
- Chocolate chips or chunks, dark, milk, white, …
- Coconut chips
- Pretzel, salty popcorns, puffed rice, granola, …
- Chocolate candies, like peanut butter cups
- Cookies chunks, Oreos, biscoff, …
FAQ
What’s the best baking pan for seven layer brownies bars?
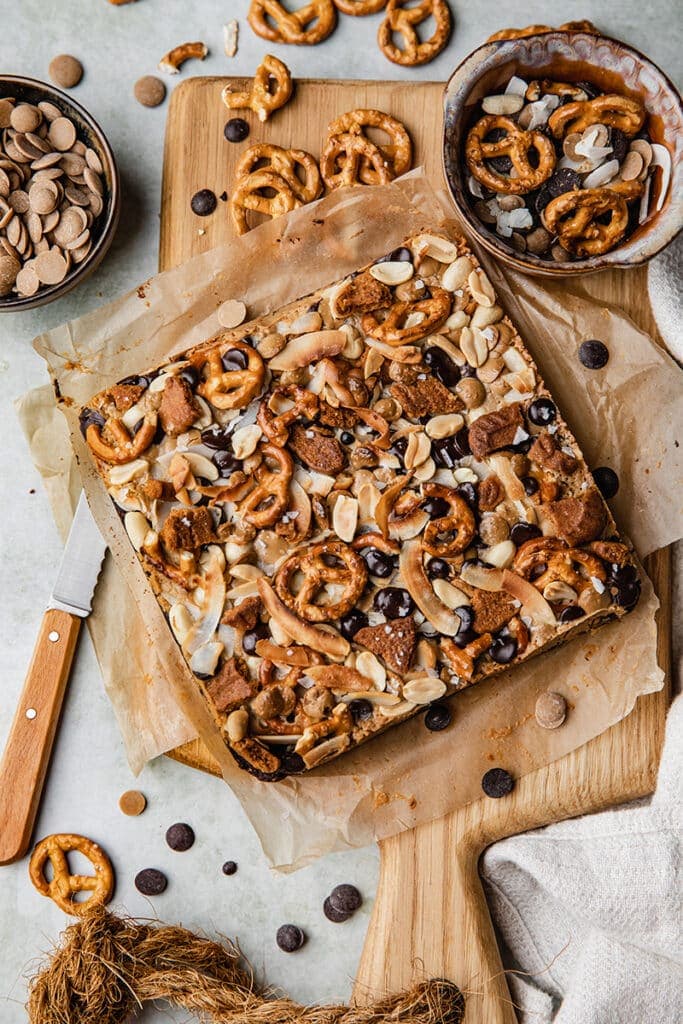
I made these seven layer brownies bars in a 9-inch square spring form pan. I like to use spring form pans for bars and brownies because it makes it easier to remove from the mold. A basic square or rectangle baking pan with straight edges works perfectly as well. The most important thing is to properly grease and line the bottom and the edge of the pan with baking paper. I recommend to leave the baking paper come out more then the edges to help you remove the bars from the pan.

Tips to bake seven layer brownies bars
The magic thing with this recipe is that it’s very simple to make! You assemble the 3 layers: brownies, caramel and toppings, and everything is baked in the same time under 20 minutes. But to prevent the toppings to brown and burn too quick, I strongly recommend to keep an eye on the brownies after around 8 minutes and immediately cover the pan with a piece of aluminum foil. Then you can finish cooking without worrying about the toppings.
How to store seven layer brownies bars
Once completely cooled, store the sliced bars in a clean and dry airtight container and place in the fridge for up to 3 days. You can eat the bars straight out ouf the fridge if you like them firm. But if you prefer your brownies soft and fudgy, place a slice in a plate and reheat for about 30 seconds in a microwave or a few minutes in traditional even.
What to do with caramel sauce leftovers?
The quantities indicated in this recipe make enough caramel to add on top of the brownies to help the toppings to stick, and to drizzle on the brownies after baking. If like me you love caramel, I recommend to double the quantity and keep the leftover for later. Simply store the caramel in a clean airtight glass jar and place in the fridge. This caramel sauce is so simple and delicious, and you can use it in endless ways:
- Drizzle on top of your pancakes and waffles
- As a frosting on top of cakes, brownies, muffins …
- Add on top of your breakfast bowl, porridge or smoothies
- On top of ice cream
What can I use instead of …
- Coconut sugar – you can replace coconut sugar by brown cane sugar in the same quantity in the brownies.
- Maple syrup – any liquid sweetener like agave will work as well.
- Apple sauce – I didn’t try it, but mashed banana or plant based yogurt should work as well.
- Peanut butter – you can replace peanut butter with any nut or seed butter of your choice, like almond, cashew, sunflower seed or tahini.
For more healthy Halloween treat recipes, check out my:
- Buckwheat Rice Krispie Treats (GF)
- Fudgy flourless Quinoa Brownies with Peanut Butter frosting (GF)
- Black Forest Brownies (GF)
- Homemade Twix Bars (GF)
- Raw Chocolate Peanut Snickers Truffles (GF)
- Hazelnut and Cream Chocolate Slices (GF)
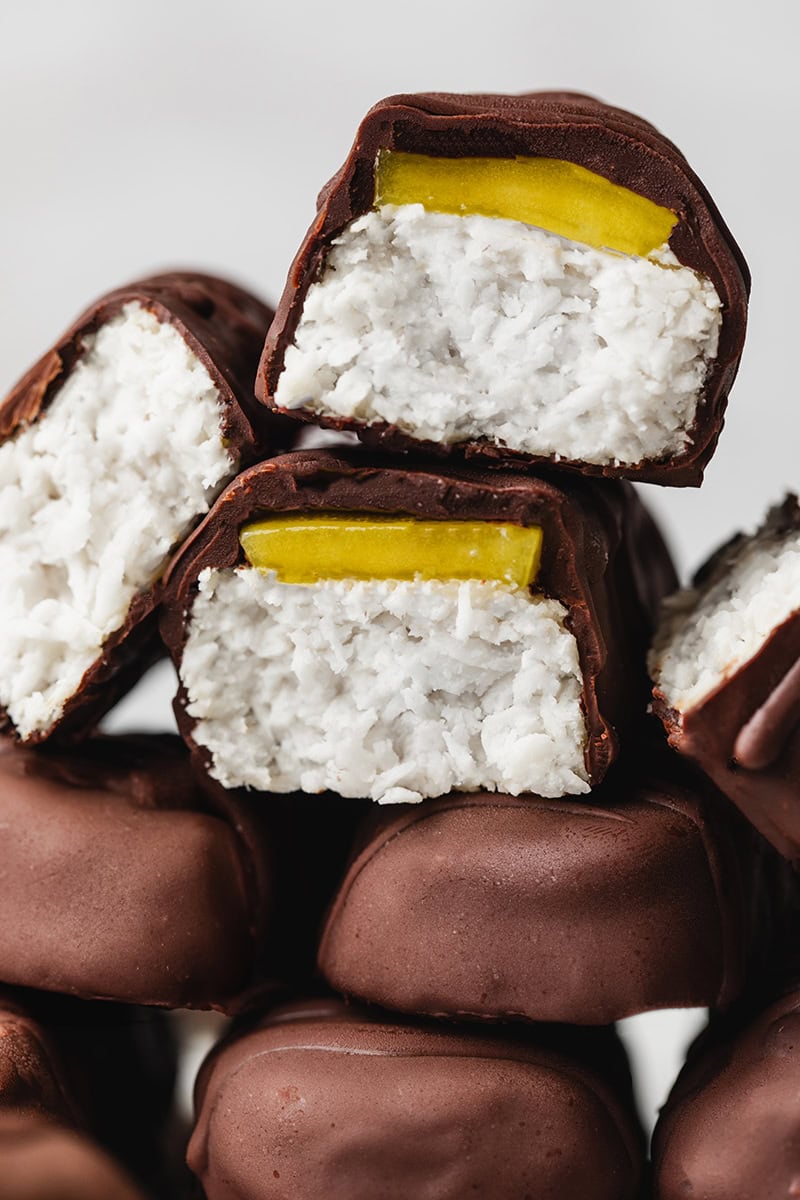
- Coconut Matcha Macaroons (GF)
- No bake Brookie Bars (GF)
I love to see your creations! Don’t forget to tag me @alicepages on your photos on Instagram and give your feedback in the comments below if you make this recipe at home! Your opinion is my best reward.
Print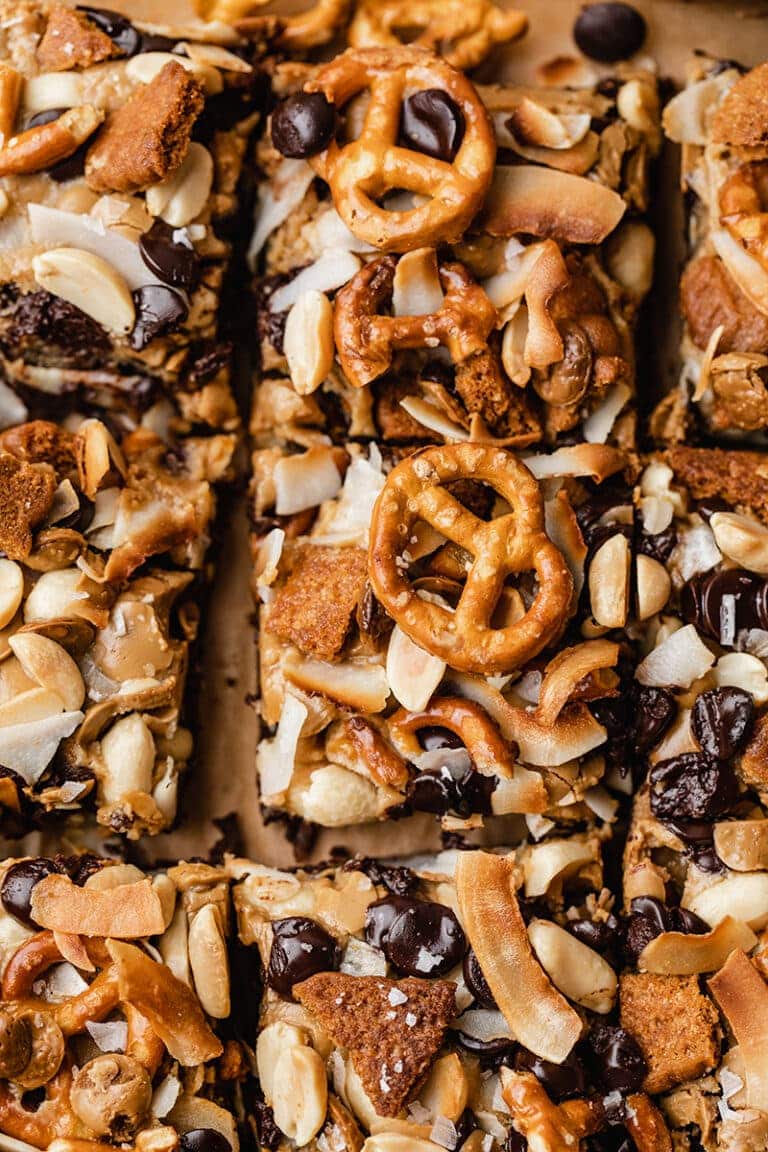
Seven layer brownies bars
These seven layers brownies bars are the perfect guilt free treat for Halloween or all your craziest sweet cravings. Soft and fudgy brownies are topped with gooey peanut butter caramel, and loaded with handful of sweet and salty goods.
- Total Time: 45 minutes
- Yield: 9 squares
Ingredients
Brownies
- 1/2 cup oat flour (40g)*
- 3/4 cup cocoa powder (60g)
- 1/4 cup shredded coconut (20g)
- 3/4 tsp baking powder (6g)
- 1/4 tsp salt
- 1/4 cup coconut sugar (35g)
- 1/4 cup maple syrup (65g)
- 1/4 cup apple sauce (60g)
- 1 tbsp water (15ml)
- 1 tsp vanilla extract
Caramel
- 1/2 cup smooth peanut butter (120g)
- 1/4 cup maple syrup (65g)
- 2 tbsp coconut oil (30g)
- 1 tsp vanilla extract
- 1 pinch of salt
Toppings
- 1/4 cup chocolate chips (40g)
- 1/4 cup caramel chips (40g)
- 1/4 cup coconut chips (15g)
- 1/4 cup peanuts (30g)
- 1/3 cup pretzels (25g)
- 3 biscoff biscuits
- 1 pinch of flaky salt
Instructions
Brownies
- Preheat the oven to 350F/180°C. Grease and line a 9-inch square pan with baking paper.
- In a large mixing bowl, add the oat flour, cocoa powder, shredded coconut, baking powder and salt.
- In a separate medium bowl, combine the coconut sugar, maple syrup, apple sauce, water and vanilla. Whisk until smooth and creamy.
- Pour the wet preparation into the bowl of dry ingredients. Stir thoroughly until combined and you get a thick but even dough. At the end the dough must be dense and sticky. If you feel it’s too dry, add one more teaspoon of water and stir.
- Add the brownies dough into the lined pan and press with your fingers to spread the dough in an even layer. Lightly wet your hands to avoid the dough to stick to your fingers.
Caramel
- Add all the ingredients in a small saucepan. Cook over medium heat, stirring constantly, until it comes to a boil. Then reduce to low heat and continue to cook and stir for 2 minutes, until the mixture thickens.
- Remove the saucepan from the heat and allow to cool down for a few minutes.
- Drizzle about the 2/3 of the caramel sauce on top of the layer of brownies, and spread roughly with the back of a spoon. Keep the remaining caramel for later.
Assembly
- Roughly crush the pretzels and biscoff biscuits, and put all the toppings (except the salt) in a mixing bowl.
- Sprinkle the toppings evenly on top of the bars, and lightly press with your hand to push them into the caramel.
- Bake for 10 minutes. Then cover the pan with a piece of aluminium foil to prevent the toppings to burn, and bake for 10 minutes more.
- Remove from the oven and sprinkle flaky salt on top. Allow to cool down in the pan for 20 minutes.
- Carefully remove the bars from the pan (they could still be fragile) and finish cooling on wire rack.
- Drizzle with the remaining caramel sauce and cut into squares.
Notes
- Store the bars in airtight container in the fridge for up to 3 days. If you desire, reheat the bars a few seconds in a microwave before to enjoy.
- Make oat flour by blending rolled oats until you get a very fine powder.
- Prep Time: 20 minutes
- Cook Time: 25 minutes
- Category: Dessert
- Method: Oven
- Cuisine: American
- Diet: Gluten Free
Recette version française
Print Brownie décadent 7 parfums
Ces barres brownie ultra gourmandes sauront satisfaire vos envies sucrées les plus folles, tout en étant étonnement légères! Elles se composent d’un brownie fondant, d’un caramel au beurre de cacahuète, et sont garnies de vos ingrédients préférés.
- Total Time: 55 minutes
- Yield: 9 barres
Ingredients
Brownie
- 40g de farine de flocons d’avoine*
- 60g de cacao en poudre
- 20 g de noix de coc râpée
- 6g de levure chimique
- 1/4 cuillère à c. de sel
- 35g de sucre de coco (ou canne)
- 65g de sirop d’érable
- 60g de compote de pommes
- 15ml d’eau
- 1 cuillère à c. de vanille liquide
Caramel
- 120 g de beurre de cacahuète nature
- 65g de sirop d’érable
- 30g d’huile de coco
- 1 cuillère à c. de vanille liquide
- 1 pincée de sel
Garniture
- 40g de pépites de chocolat
- 40g de pépites de caramel
- 15g de chips de coco
- 30g de cacahuètes
- 25g de bretzel
- 3 biscuits spéculos
- 1 pincée de fleur de sel
Instructions
Brownie
- Préchauffer le four à 180°C. Huiler et chemiser un plat à four de dimensions environ 23×23 cm avec du papier sulfurisé.
- Dans un grand saladier, mélanger la farine de flocons d‘avoine, le cacao en poudre, la noix de coco râpée, la levure et le sel.
- Dans un autre saladier, fouetter le sucre, le sirop d’érable, la compote, l’eau et la vanille pour obtenir un mélange lisse et crémeux.
- Verser la préparation dans le saladier d’ingrédients secs. Mélanger avec une spatule pour obtenir une pâte épaisse mais bien homogène. La pâte doit être dense et légèrement collante. Si elle semble trop sèche ajouter un tout petit peu plus d’eau et mélanger de nouveau.
- Verser la pâte à brownies dans le plat chemisé et bien la répartir en une couche uniforme en appuyant avec les doigts. S’humidifier légèrement les mains pour éviter que la pâte ne colle aux doigts.
Caramel
- Placer tous les ingrédients dans une petite casserole. Chauffer à feu moyen tout en mélangeant, jusqu’à ce que la préparation commence à bouillonner. Réduire alors à feu doux et prolonger la cuisson de 2 minutes tout en continuant à mélanger.
- Quand la sauce s’est épaissie, retirer la casserole du four et laisser refroidir quelques minutes.
- Verser environ les 2/3 du caramel sur le brownies et étaler grossièrement avec le dos de la cuillère. Réserver le restant de caramel pour après la cuisson.
Assemblage
- Emietter grossièrement les bretzels et les biscuits spéculos dans un saladier et ajouter le reste des éléments de la garniture, sauf le sel.
- Disposer la garniture au dessus du caramel pour le recouvrir complètement et appuyer très légèrement avec la main pour les coller.
- Enfourner pour 20 minutes au total en recouvrant le plat de papier aluminium à mi-cuisson pour éviter que la garniture ne cuise trop.
- Retirer du four et saupoudrer de fleur de sel. Laisser le plat refroidir pendant 20 minutes.
- Démouler délicatement les barres (attention elles peuvent être encore fragiles), avant de déposer sur une grille et de laisser refroidir complètement.
- Napper de sauce caramel avant de découper en carrés et de déguster!
Notes
- Les barres se conservent durant 3 jours dans une boite hermétique au frais. Avant de consommer, réchauffer quelques secondes au micro-ondes.
- Réaliser la farine de flocons d’avoine en mixant des flocons d’avoine au blender pour obtenir une fine poudre.
- Prep Time: 20 minutes
- Cook Time: 35 minutes
- Category: Dessert
- Method: Four
- Cuisine: Américaine
- Diet: Gluten Free


0 Comments